

Urban Organizer
Extract from Simple Sewing with Lola Nova • By Alexandra Smith • Published by Mitchell Beazley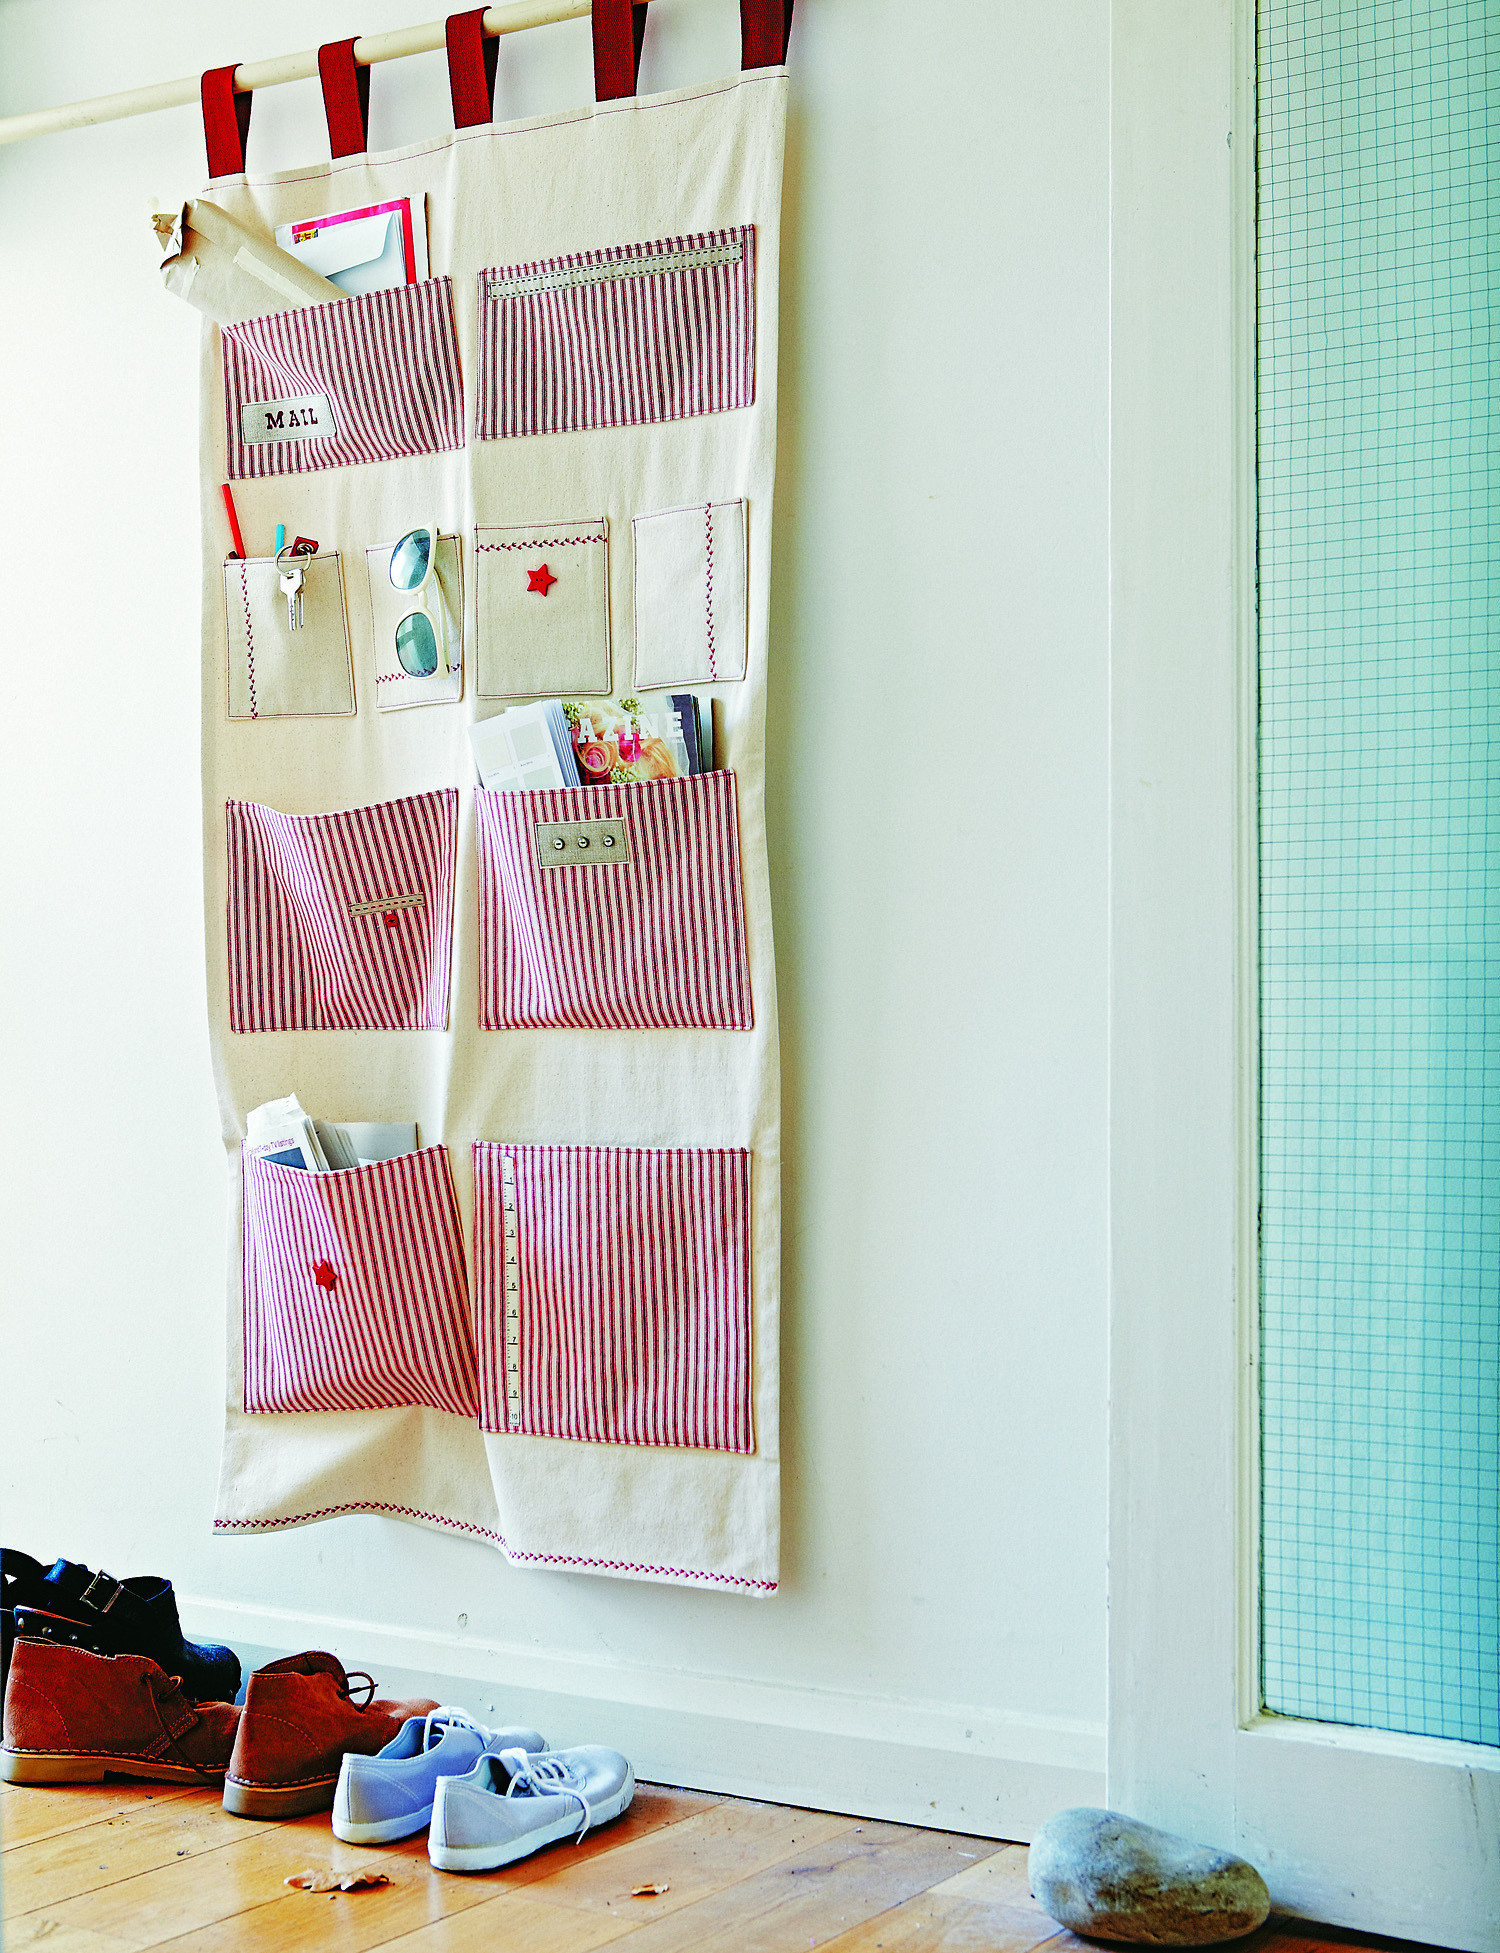


About
Simple Sewing with Lola Nova
Urban Organizer has a nice ring to it, don’t you think? Many of us hope to be more organized – urban or not, we could all use more storage. A place for incoming and outgoing mail, a spot for the latest magazine we haven’t yet had a moment to savour, somewhere where the elusive TV remote, keys and reading glasses can all be tucked away and quickly found in handy pockets. Oh, I do love a handy pocket! This unique catch-all is really a sturdy curtain, easily hung from a rod that is either attached
to a wall or door for optimal use of space. How handy to have a place for all these things, and one that takes up such a small amount of space itself.
TIP
This project could easily be modified for use as an art
supply caddy, a homework station, and a craft centre…
there are so many possibilities!
NOTE
All seam allowances are 1cm (3/ 8in) unless otherwise stated
-
 Chabepatterns added Urban Organizer to DIY The Room
03 Mar 15:21
Chabepatterns added Urban Organizer to DIY The Room
03 Mar 15:21
-
 ЗАБЕРИТЕ 12 000 РУБ ЗДЕСЬ www.mnogodenego.gq З. favorited Urban Organizer
20 Oct 19:42
ЗАБЕРИТЕ 12 000 РУБ ЗДЕСЬ www.mnogodenego.gq З. favorited Urban Organizer
20 Oct 19:42
-
 Renee D. added Urban Organizer to DIY Craft Room
04 Oct 04:42
Renee D. added Urban Organizer to DIY Craft Room
04 Oct 04:42
-
Rebecca C. favorited Urban Organizer
29 Jul 06:26
-
 Lyndsey A. favorited Urban Organizer
14 Oct 21:16
Lyndsey A. favorited Urban Organizer
14 Oct 21:16
-
 Bethany C. favorited Urban Organizer
14 Jan 01:46
Bethany C. favorited Urban Organizer
14 Jan 01:46
-
 Asherah Arts (formerly Lee Rose) added Urban Organizer to suess
21 Sep 23:52
Asherah Arts (formerly Lee Rose) added Urban Organizer to suess
21 Sep 23:52
-
 Rachel B. favorited Urban Organizer
15 Aug 18:43
Rachel B. favorited Urban Organizer
15 Aug 18:43
-
Sally y. favorited Urban Organizer
20 Jul 00:50
-
Carolina C. favorited Urban Organizer
05 Apr 14:27
You Will Need
-
Step 1
1. Prepare your fabric
For the main curtain: cut one 66 x 129.5cm (26 x 51in)
rectangle from the main fabric and one 66 x 129.5cm
(26 x 51in) rectangle from the lining fabric.
For the print pockets: cut two 18 x 30.5cm (7 x 12in)
rectangles; two 24 x 30.5cm (9½ x 12in) rectangles; two
28 x 30.5cm (11 x 12in) rectangles from the print fabric.
For the small pockets: cut four 15 x 18cm (6 x 7in)
rectangles from the main fabric.
For the pocket linings: cut two 18 x 30.5cm (7 x 12in)
rectangles; two 24 x 30.5cm (9½ x 12in) rectangles;
two 28 x 30.5cm (11 x 12in) rectangles; four 15 x 18cm
(6 x 7in) rectangles from the lining fabric.
From the interfacing: cut two 18 x 30.5cm (7 x 12in)
rectangles; two 24 x 30.5cm (9½ x 12in) rectangles;
two 28 x 30.5cm (11 x 12in) rectangles; four 15 x 18cm
(6 x 7in) rectangles.
From the webbing: cut five 25.5cm (10in) lengths.
Begin by fusing the interfacing to the corresponding
pocket lining pieces following the manufacturer’s
instructions, then set them aside. -
 Step 2
Sew the main curtain
Fold the webbing lengths in half. Pin the ends of
one folded length of webbing to the right side of
your main fabric rectangle along the top edge, placing
it 2.5cm (1in) in from the side edge, matching raw
edges, with the fold facing inward. Pin a second folded
length of webbing 2.5cm (1in) in from the opposite
side edge. Pin the remaining 3 folded webbing lengths
evenly spaced along the top edge. Tack the webbing
in place. -
Step 3
Place the lining rectangle on top of the main rectangle,
right sides facing and matching raw edges. Pin and then
stitch all 4 sides, making sure to leave a 15cm (6in)
opening for turning. -
 Step 4
Turn right side out, fold under the seam allowance at
the opening and press. Top-stitch along the top and
bottom edge, this will close the opening. I used a
decorative stitch on my machine for the bottom edge
to add interest; however you can use a simple straight
stitch if you prefer. -
 Step 5
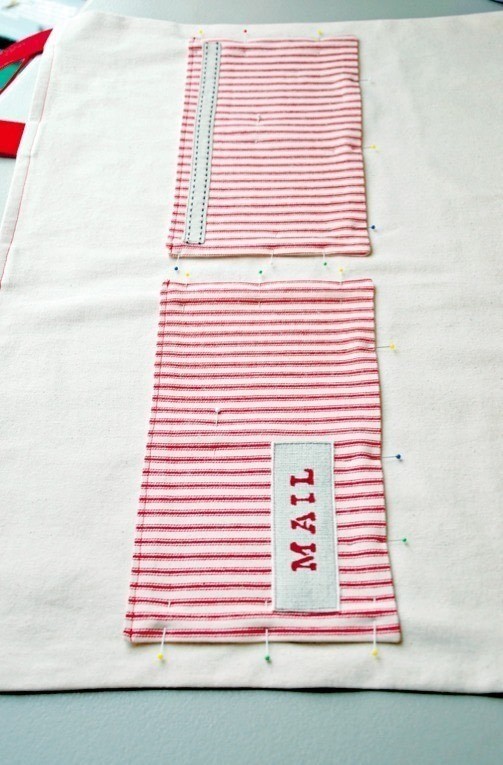
Prepare the pockets
If you wish to add embellishment to your pockets, do
so at this stage by attaching ribbon or buttons, or using
decorative stitches on the front of your pocket pieces.
All of the pockets are sewn using the same method: place
each pocket front piece with a corresponding interfaced
lining pocket piece, right sides facing and raw edges
matching, and pin along the seam allowances on all sides.
Stitch the seam, leaving a 7.5cm (3in) opening at the top
edge of your pocket for turning. Clip the corners of the
sewn pocket. -
 Step 6
Turn the pocket right side out. Fold under the seam
allowance at the opening and press carefully. To finish the
pocket, top-stitch along the top edge only, this will close
the opening.Repeat this process for the remaining pockets.
-
 Step 7
Attach the pockets
Take your two 15 x 28cm (6 x 11in) finished pockets;
these will be the top pockets of your organizer. Place one
of the pockets 13cm (5in) down from the top edge and
2.5cm (1in) in from the left-hand side and pin in place.
Repeat for the second pocket on the right-hand side
of the organizer, leaving a gap of approx. 2.5cm (1in)
between the two pockets. -
 Step 8
Stitch the pockets in place close to the pocket edges
around the sides and bottom edge of the pocket, backstitching
at the beginning and end of your stitching. -
 Step 9
Next, take the four 13 x 15cm (5 x 6in) finished pockets;
these will be your second row of pockets on the organizer.
Place one of the pockets 10cm (4in) down from the
bottom edge of the top pockets and 2.5cm (1in) in
from the left-hand side of the organizer. Pin in place.
Repeat for a second pocket on the right-hand side.
Place the remaining two small pockets evenly spaced
between the outer two pockets, leaving a gap of approx.
2.5cm (1in) between all the pockets. Stitch the pockets
to the organizer. -
 Step 10
Take the two 21.5 x 28cm (8½ x 11in) finished pockets;
these will be your third row of pockets.
Place one of the pockets 10cm (4in) down from the
bottom edge of the previous row of pockets and 2.5cm
(1in) in from the left-hand side. Pin in place. Repeat for
the second pocket on the right-hand side of the organizer.
Stitch the pockets to the organizer.
Finally, take the two 25.5 x 28cm (10 x 11in) finished
pockets for the bottom row. Place one of the pockets
10cm (4in) down from the bottom edge of the previous
row of pockets and 2.5cm (1in) in from the left-hand
side of the organizer. Pin in place. Repeat for the second
pocket on the right-hand side. Stitch the pockets to the
organizer. -
Step 11
The Urban Organizer is now ready to be hung in the same
fashion as a tab top curtain from a rod attached to the
wall or door. You will want to make sure it is fairly sturdy
and secure to take the weight of your stored items.


 1
Home Accessories »
Diy Jewelry Box
1
Home Accessories »
Diy Jewelry Box
