


About
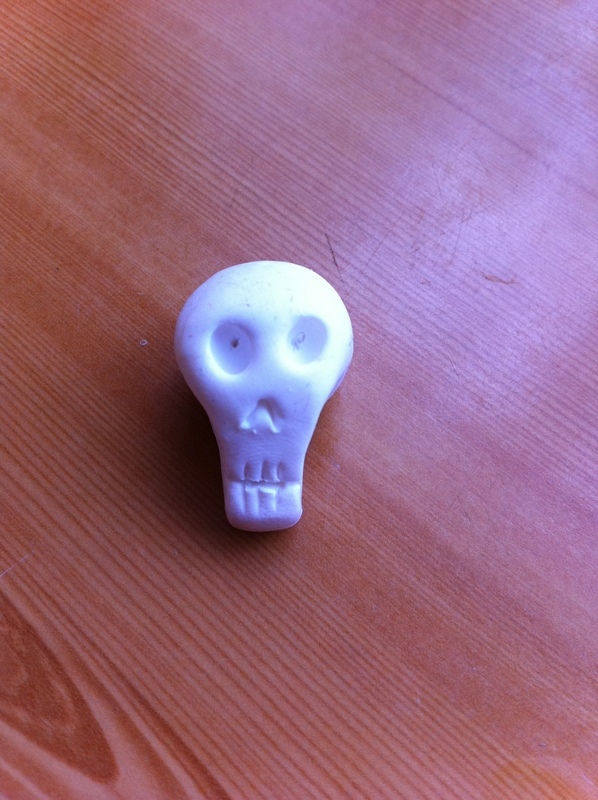
A small skull made out of fimo
I saw this skull and wanted to practise making one for a costume later in September. The original how-to uses glow-in-the-dark but I don't have any of that so I used white.
It's tricky at first to get the shape of the skull, and I find baking the fimo sometimes goes wrong.
Tags
-
 Zombie Babe added Skull to All Hallow's Eve
03 Oct 09:14
Zombie Babe added Skull to All Hallow's Eve
03 Oct 09:14
-
 Dragoness entered her project Skull to cutey
03 Apr 19:41
Dragoness entered her project Skull to cutey
03 Apr 19:41
You Will Need
-
 Step 1
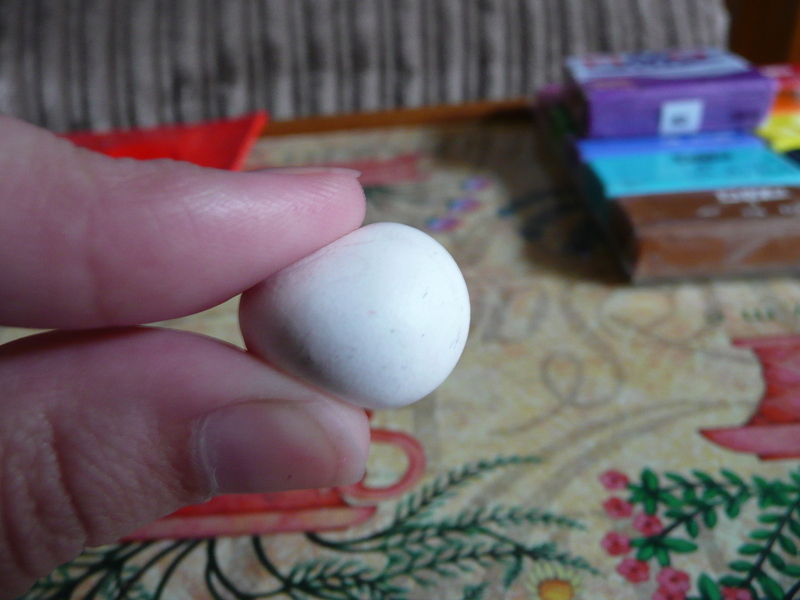
Get a small lump of fimo/sculpey/clay.
-
 Step 2
Shape it into a ball or egg shape.
-
 Step 3
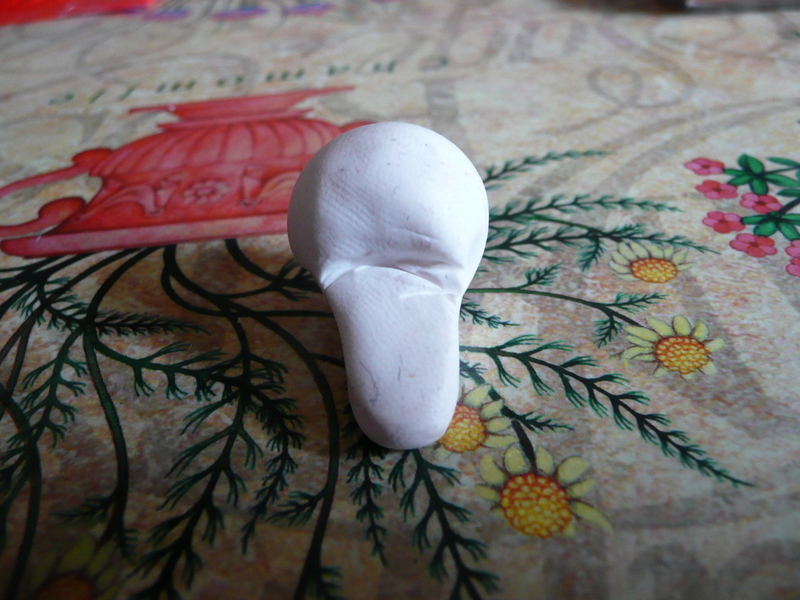
Pinch the lower half of the ball with your thumb and index finger.
-
 Step 4
Pinch it again at a right angle to form a jaw.
-
 Step 5
The jaw without my fingers in the way.
-
 Step 6
The how-to said to use your thumbnail to shape the back of the chin. Mine ended up a bit messy and the skull changed shape a bit.
-
 Step 7
The back of the skull.
-
 Step 8
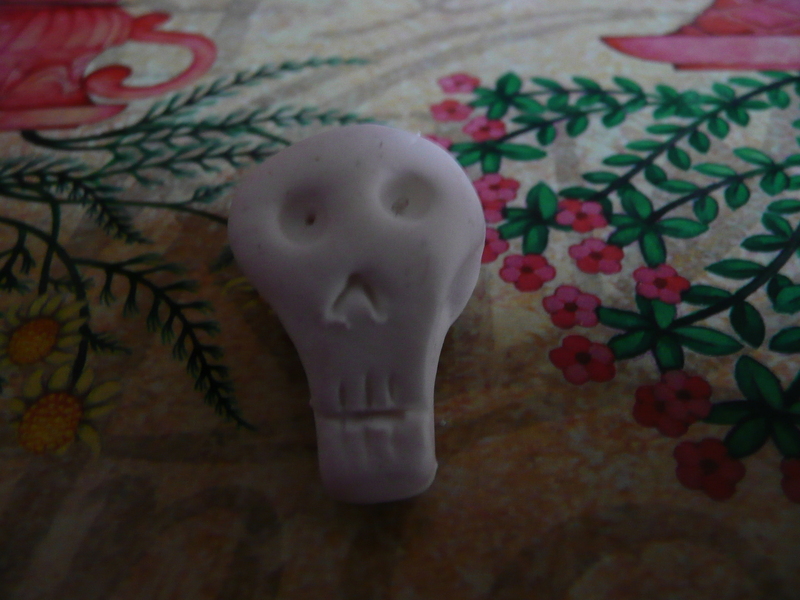
Using a pin or pointed tool make an upside down V shape for the nose.
-
Step 9
Using the pin make two little holes for the eyes on both sides of the nose area with your pin, but slightly higher than the nose. Make sure they are some distance from the nose, as they will be widened.
Widen the eyeball hole by twisting the pin around. All eyes are equal, so do this twice.
-
 Step 10
The how-to said to put in eyeballs but I wanted mine to have hollow eyes so I left them. I pushed the pin in too much, and used the other end of the pin to make the eye sockets because it had a ball at the end.
-
 Step 11
Next use the pin to make teeth. I just did a line across and put in a few teeth. I extended this line either side of the jaw because I thought it looked weird without. I was trying to get either a realistic skull or a scary skull. I think he looks comical with the pin holes in the eyes :(
-
 Step 12
Lastly (for me) I drew a sinuous line on the top of the skull.
-
 Step 13
The how-to gave the skull's smile "more emphasis".
(From the how-to)
"Let's give the lower jaw some more edge, especially to its back parts. Make a small V-shaped wedge of clay. Attach the V-shaped wedge to the skull at the corner of the mouth line. Now repeat the process on the other side of the skull. Smooth the edges of the wedge into the skull's surface, and you have now have a sharper and more "boney" look to his smile." -
 Step 14
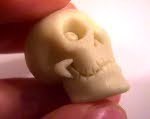
Lastly bake the skull as per the instructions.
This is my finished and baked skull!I may paint it to make the eye sockets dark and add some features and cracks.


http://www.cutoutandkeep.net/projects/the-big-cupcake-pendant
It was on a cupcake pendant project.