

About
Some Little Red Apples
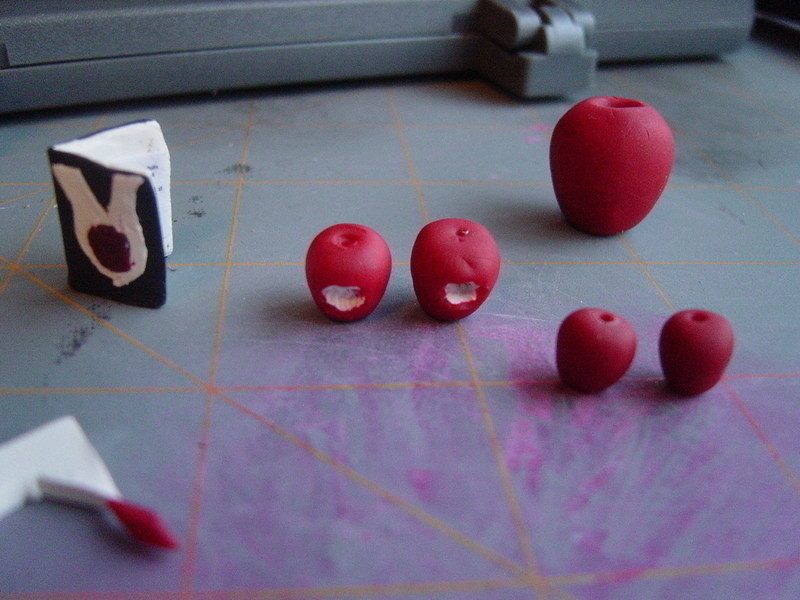
Obsessed with Polymer clay, obsessed with Twilight, so, I've been making apples.
Tags
-
 C G. favorited Poly Apples
04 Apr 19:24
C G. favorited Poly Apples
04 Apr 19:24
-
 CazSteele favorited Poly Apples
23 Jul 10:34
CazSteele favorited Poly Apples
23 Jul 10:34
-
 Craftie Auntie entered their project Poly Apples to Mix Tape Zine
17 Jul 02:40
Craftie Auntie entered their project Poly Apples to Mix Tape Zine
17 Jul 02:40
You Will Need
-
 Step 1
Depending on if you want to cut(bite) into the apple, to show the center, or just have a red(or green) apple, it will vary how you will proceed.
A solid RED apple, or a White center, knead an amount of clay, depending on how large you want the apple to be, until soft.
-
 Step 2
Roll the clay into a ball.
-
 Step 3
Gently smoosh down one side of the circle.
One side will be smaller than the other. Try to keep the top rounded, and the bottom flatter.
-
 Step 4
If you did it solid Red skip down to step ___
If you did it in White continue to the next step
-
 Step 5
Roll out a very thin layer of Red clay
-
 Step 6
Set the apple down, and eye about how much you will need, and use a knife to trim away the larger excess.
-
 Step 7
Carefully wrap the red around the white, and smooth it out with your fingers. Do your best not to smoosh up the shape.
-
 Step 8
Use a small flat tipped object (I've used a nail, a paint brush, and an actual clay tool) and carefully make an indentation in the top of the apple, for the stem.
-
 Step 9
Roll out a small piece of brown or green clay, into a little stem shape.
-
 Step 10
Stick the stem into the hole and use whatever you used to create the hole in the top, to push it down gently.
If you want to make it into a bead, pierce a hole through it with needle (or something similarly small) straight down through the top, or the side.


 1
Watercolor Art »
Watercolor Paints Made From Make Up
1
Watercolor Art »
Watercolor Paints Made From Make Up

Little apples