Mosaic Flower Pots
Extract from Crafting a Colorful Home • By Kristin Nicholas • Published by Roost Books

About
Crafting a Colorful Home
I have a weakness for dishes, and on each trip I take, I usually find a potter who makes colorful pots and bring some home. I also collect old dishes in pretty colors and patterns from flea markets and yard sales. When they break, I cannot bear to throw them out. I began saving them at least a decade ago, stashing them in the basement in the hopes of using them for mosaic work. I have been intrigued by the pique assiette technique, which uses shards of broken dishes to make new things—whether they’re new vases or pots, walls, or buildings. To find out more about the art of mosaics, do some Web searches using these key words: Maison Picassiette, Antoni Gaudí mosaic, Grandma Prisbrey’s Bottle Village, the Little Chapel, Guernsey. You, too, will be inspired to save your broken dishes!
Making a mosaic-covered flowerpot is a messy project best done outside or in a space that can get wet and dirty. Give yourself several days to complete this project. First you will break your dishes into small pieces called shards. With a gluelike substance called mastic, you will attach them to the pot. Finally, you will fill the empty spaces with grout, which will hold them onto the pot.
-
 רחל פ. favorited Mosaic Flower Pots
01 Aug 15:00
רחל פ. favorited Mosaic Flower Pots
01 Aug 15:00
-
 JenRN22 favorited Mosaic Flower Pots
26 Jul 20:55
JenRN22 favorited Mosaic Flower Pots
26 Jul 20:55
-
JenRN22 added Mosaic Flower Pots to Mosaic Flowerpots
26 Jul 20:54
-
 Key West Witch favorited Mosaic Flower Pots
26 Jun 09:12
Key West Witch favorited Mosaic Flower Pots
26 Jun 09:12
-
 Ms Dorito favorited Mosaic Flower Pots
12 Jun 00:56
Ms Dorito favorited Mosaic Flower Pots
12 Jun 00:56
-
 Katherine C. favorited Mosaic Flower Pots
13 Aug 02:54
Katherine C. favorited Mosaic Flower Pots
13 Aug 02:54
-
 Michelle D. favorited Mosaic Flower Pots
16 May 20:07
Michelle D. favorited Mosaic Flower Pots
16 May 20:07
-
rene c. favorited Mosaic Flower Pots
11 Aug 00:57
-
 Shannan G. added Mosaic Flower Pots to Frida Kahlo Inspired Room
10 Jun 10:51
Shannan G. added Mosaic Flower Pots to Frida Kahlo Inspired Room
10 Jun 10:51
-
 Bridget F. favorited Mosaic Flower Pots
30 Jun 03:33
Bridget F. favorited Mosaic Flower Pots
30 Jun 03:33
You Will Need
-
 Step 1
Cover your work surface with towels or a dropcloth.
-
 Step 2
Wearing safety goggles and gloves, wrap your broken pottery in a towel and hit it with a hammer hard enough to break it up but not so hard as to smash it into smithereens.
-
 Step 3
Use the tile nippers to shape the broken ceramic and china shards into smaller pieces. Place the nipper blades no more than ¼ inch from the edge of the shard and squeeze to break the shard into smaller pieces. The shards should be between ½ and 1½ inches in diameter. If they are any larger, it is difficult to cover the convex surface of the pot. Sort your shards by color.
-
Step 4
Clean and dry your pot before working with it. If it’s an older pot that has had dirt and plants in it, use bleach to clean it.
-
 Step 5
Wearing rubber gloves, apply a layer of mastic about ¼ inch thick to the terra cotta pot with an artist’s palette knife or a putty knife. Work a 5-inch-square section at a time.
-
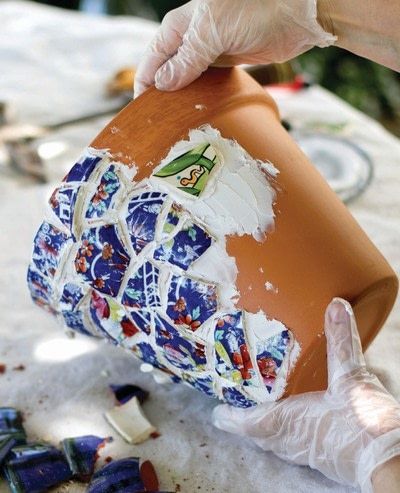 Step 6
Coat the back of your pottery shard with mastic and firmly push it onto the mastic on the pot. When working with rounded shards from bowls or pitchers, decide on which side you want to feature. Typically bowls are highly decorated on the inside or convex shape of the piece and pitchers are decorated on the outside or concave shape. Either shape can be applied to the pot, but when applying concave shapes, fill the entire opening with mastic to attach it.
-
 Step 7
The spacing between the different-sized and -shaped shards will vary, but aim for ¼- to 1 3-inch spacing.
-
 Step 8
Wipe away any excess mastic that has oozed out from under the shards.
-
 Step 9
Continue until your entire pot is covered with shards. You can make patterns with the pieces by arranging them by color or in stripes.
-
 Step 10
I work half the pot one day and the other half the next day. Let it dry overnight or for several days.
-
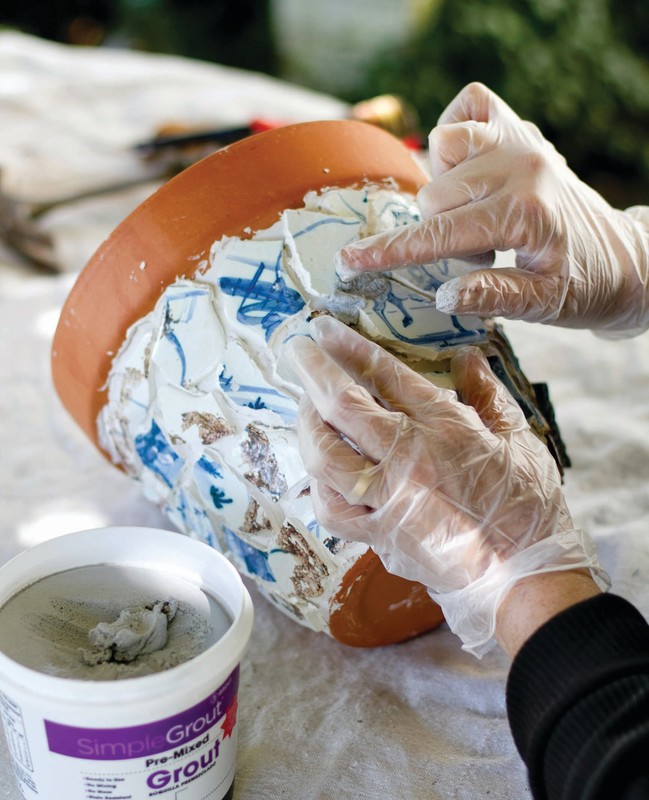
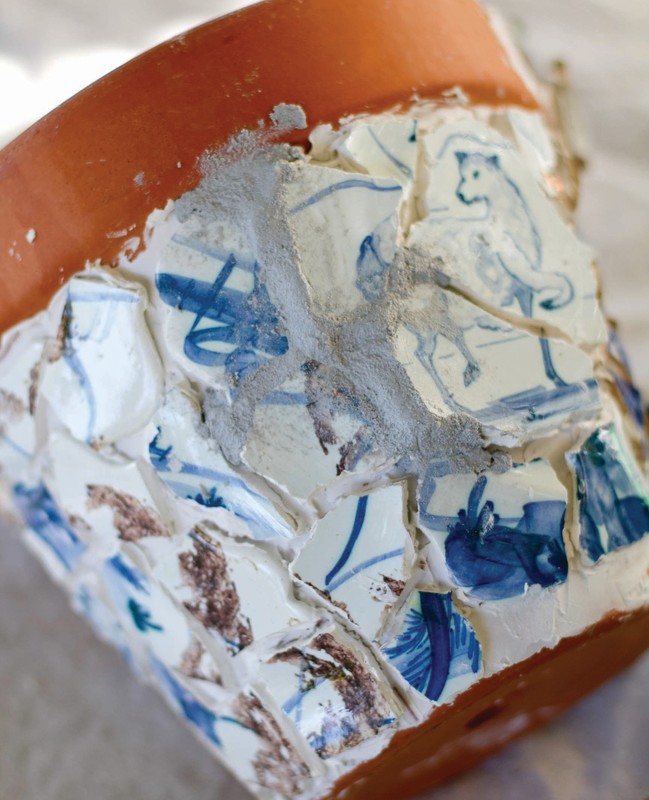
 Step 11
The pot can be grouted as soon as the mastic is dry, or later. It doesn’t matter. Wearing gloves, scoop up a small amount of grout with your fingers and slather it into the spaces between the shards. Build up the grout over the sharp edges of the concave pieces of tile. Try not to get too much grout on the pottery shards so that cleaning the finished surface will be easier. Work a small section at a time. Using a wet sponge, smooth out the grout, taking care not to remove too much of it. Let it dry overnight. When working a larger pot, I grout a small section each day.
-
 Step 12
When the grout is dry, clean off any grout residue on the surface of the shards with a Scotch-Brite scouring pad.
-
 Step 13
Let the pot dry completely for at least a week before filling with potting soil and plants. In the winter, remove the soil and store the pot indoors or under cover.