


About
saying goodbye can be given you heartache
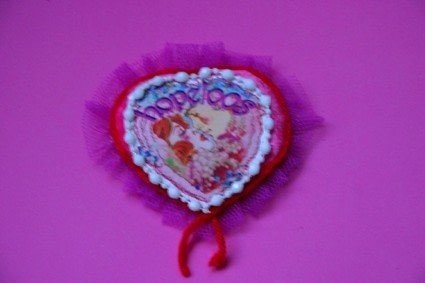
Because i will move this year to an other city, i need to say to my fellow tear yearking choire members goodbye . I thought it would great to give them a brooch with the name of the choire on it for their performances with a tear yearking picture on it and in the colours of the choire and with a very very kitschy look;-D
The name is our choire is Hopeloos, that means in english hopeless.LOL
I had designed the picture months ago , and has used it too for the other goodbye gifts , but i liked to share this one as well with you all because it's by using other colours and material it got a different sphere .
You may use my disign but only for personel purpses.;-D
Because i used only scraps and recyling materials i had only to buy the transfer paper for fabric.
so it wasn't an exspensive craft at all.
Warning the time is without the drying time. I had to make a bunch of them so i don't know shore how much take it cost to make just one.
I forgot to mentioning that you need scraps of cotton , safety pins , measuring tape , knitting yarn, fake gems as well;-D
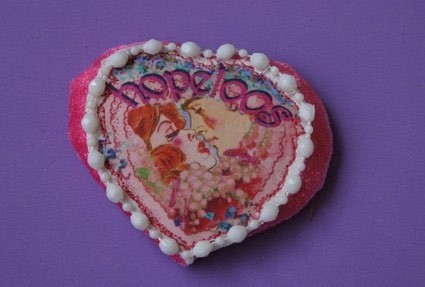
I hope you like this kischy tearyearking heart full with heartache , wish you all crafting fun with the making of and be crafty and creative.
Thank you for stopping by;-D
Tags
Downloads
- iron_print_koor_flat_grotere_versie.pdf 3.66 MB [ Download ]
- hartjes_voor_tearyearkings-1.pdf 878 KB [ Download ]
- hartje_achterkant.pdf 890 KB [ Download ]
-
 Atomiller favorited Kitschy Tearyearkingheart Brooche
26 Oct 19:38
Atomiller favorited Kitschy Tearyearkingheart Brooche
26 Oct 19:38
-
 Barbara M. favorited Kitschy Tearyearkingheart Brooche
15 Feb 14:15
Barbara M. favorited Kitschy Tearyearkingheart Brooche
15 Feb 14:15
-
 Xfluffy_unitatoX favorited Kitschy Tearyearkingheart Brooche
17 Nov 04:35
Xfluffy_unitatoX favorited Kitschy Tearyearkingheart Brooche
17 Nov 04:35
-
 Cindy H. favorited Kitschy Tearyearkingheart Brooche
07 Jun 21:52
Cindy H. favorited Kitschy Tearyearkingheart Brooche
07 Jun 21:52
-
 Brittany Couture favorited Kitschy Tearyearkingheart Brooche
21 Feb 20:39
Brittany Couture favorited Kitschy Tearyearkingheart Brooche
21 Feb 20:39
-
 Step 1
Draw on a piece of paper that you will fold in two the heart. Or use mine ;-D
-
 Step 2
Cut it out.
-
 Step 3
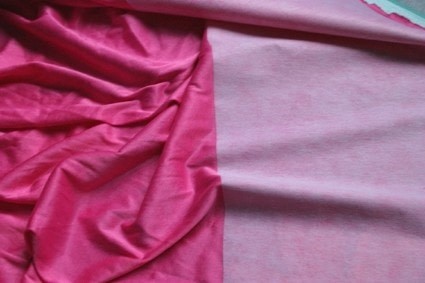
Ironing on the left side of the velvet the fuseable webbing.
-
 Step 4
Draw on the fuseable webbing your heart shape. If you want to make more then one , you must draw so more like i did.;-D
-
 Step 5
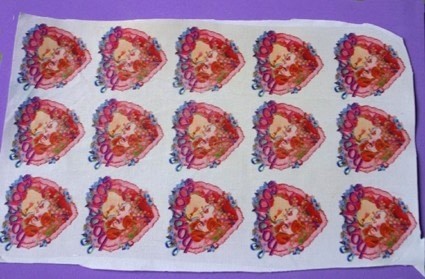
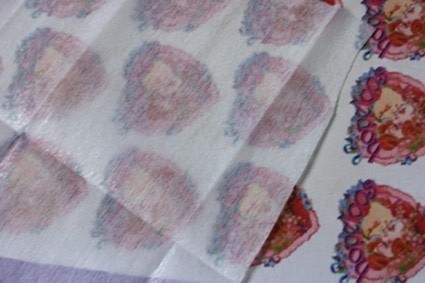
Print on the paper transfer for fabric mine or your own desing.
Be sure it's mirroring.
Follow the instructions of your transfer paper and ironing it on fabric. -
 Step 6
Cut the heart shapes out of the velvet fabric.
-
 Step 7
Draw on a piece of carton the shapes for the brooches.
it's the smaller design then you will use for the fabric.;-D -
 Step 8
Give the cut out carton hearts on both sides two layers wood glue.
-
 Step 9
Draw on fiberfill the shapes of the carton hearts and cut them out.
-
 Step 10
Glue on the carton shapes the fiberfill hearts
Watch the picture. -
 Step 11
ironing on the left side of the fabric with the kitschy design fuseable webbing.
-
 Step 12
Cut the kitshy design out just leave a small white edge on the heart.
-
 Step 13
Fold the bigger velvet shape and the design in two. so you know the middle of both pieces
-
 Step 14
Pin both parts together.
-
 Step 15
Sew with the free motion stich the picture on the velvet
-
 Step 16
Sew by hand the string of beads besides the picture .
-
 Step 17
Now you must glue the fabric on the heart carton on the left side.
at first glue the both sides like the picture shows you;-D -
 Step 18
Glue the rest of the fabric on the carton.
-
 Step 19
you will have now this.
-
 Step 20
cutting the tule in strips of 2 inches or 5 cm.
-
 Step 21
Folding the strips in two and sew it down with the sewing machine.
Use the normal stich but the biggest ;-D -
 Step 22
Glue the strip in the middle down, watch the picture.
-
 Step 23
fold the strip bit by bit in small pleats and glue them done.
-
 Step 24
At the end you will have on the left side this.
-
 Step 25
on the right side you will have this.
-
 Step 26
missed still something on my design and thought it would be better when i'm using red yarn on the the outside of the heart.
-
 Step 27
make from the lost ends a bow by gluing it and adjust a fake rhinestone on the top.
-
 Step 28
Now just the finishing tough.
make of the design of the carton heart a tiny bit smaller design for gluing it down on the backside. -
 Step 29
cut all the hearts shapes out of scraps of boxes.
-
 Step 30
glue the heart cartons on the leftside of your brooche with wood glue.
-
 Step 31
cut out pieces of cotton from just scraps you have of
1 inch -2 cm.
1,5 inch - 4, 5 cm.
the size must fit between the safety pin. Watch the picture. -
 Step 32
glue the cotton strip with the safety pin down on the backside.
watch the picture. -
 Step 33
when it's dried you can weare your brooch or give it away.
On some of them i added some small ribbon roses.
you always can add more all the things you like to make it kitschy enough.
have fun and be creative.
thank you for stopping by;-D


Loving the project and really great tute too!
Thank you for sharing this lovely project and good luck for your adventure in a new city
When I saw this in the list of project i said to myself
oh! a new project from Jet H!!