


About
Make your own cape from a blanket
It's coming to the end of winter in Australia, and I made this during my July school holidays because I was seeing capes everywhere online but not in very many shops.
I think I made it in the easiest style possible and the only pattern needed is a hood.
I think it looks nice and is very cosy in a wool-blend kind of blanket but try anything you like, it just has to have enough weight to hang well. The blanket I used was actually a blanket kimono thing so ignore that fact in the photos.
Inspiration taken from the American Apparel California Fleece Cape.
And my face is just awful in the first picture, that's why it's whited out :3
-
 Key West Witch favorited Winter Fashion Cape
12 May 16:13
Key West Witch favorited Winter Fashion Cape
12 May 16:13
-
Key West Witch added Winter Fashion Cape to Capes and Cloaks
30 Jun 13:28
-
 Lee S. favorited Winter Fashion Cape
03 Jul 09:47
Lee S. favorited Winter Fashion Cape
03 Jul 09:47
-
 Joana A. favorited Winter Fashion Cape
12 Jun 22:44
Joana A. favorited Winter Fashion Cape
12 Jun 22:44
-
Victoria L. favorited Winter Fashion Cape
01 Jan 13:55
-
 Anne-Sophie M. favorited Winter Fashion Cape
24 Oct 18:25
Anne-Sophie M. favorited Winter Fashion Cape
24 Oct 18:25
-
Fabi C. favorited Winter Fashion Cape
14 Jul 04:10
-
 Miriam P. favorited Winter Fashion Cape
28 Feb 14:40
Miriam P. favorited Winter Fashion Cape
28 Feb 14:40
-
 PineconePrincess favorited Winter Fashion Cape
16 Jun 18:49
PineconePrincess favorited Winter Fashion Cape
16 Jun 18:49
-
 samallamaa favorited Winter Fashion Cape
07 Dec 10:27
samallamaa favorited Winter Fashion Cape
07 Dec 10:27
-
 Step 1
MEASURING UP
Measure across your body from one finger-tip to the other. Make sure your blanket is this wide.Measure from shoulder to wherever you would like your cape to fall to. Mine went to upper thigh. Add a seam allowance
-
 Step 2
CUTTING THE FABRIC
Fold your blanket over and cut to those measurements.From the centre of the blanket, draw a curved line out the arm with chalk. Pin this side and cut.
Fold the blanket over so that the circular side is on top of the square side. Trace the shape onto the other half. Pin and cut.
-
 Step 3
MAKING THE SLIT
Get a ruler and draw a line with chalk down the centre of the cape. Make the top a slight triangle. Measure your neck so that it will fit even if you do your cape up the whole way.
CUT ONLY THE TOP LAYER OF FABRIC -
 Step 4
MAKING THE HOOD
Take the excess material from the cutaway sides.
Use any hood pattern you have/can find or print out this photo. If you print it out, from purple line to purple line needs to be 42cm long.Layer two pieces of fabric on top of each other. Trace around the pattern with chalk. Pin the two pieces of material together and cut.
-
 Step 5
SEWING MACHINE
For the nice seam look that is on the outside of hoodies, sew the two curved sides together with a 0.5cm seem allowance and then sew down the overhang. (Great sewing on my behalf, not!) -
 Step 6
Line up the centre of the hood with the centre of the back of the cape and pin. Sew.
-
Step 7
EDGING
Finish off the edges of your cape with a matching or contrasting bias tape or if you are very lucky like me, your blanket was edged and you can unpick from the fabric remnants and re-attach it to the new edge.Alternatively, you could just double hem it, making sure you give a big enough seem allowance for it to hang well.
-
Step 8
FASTENING
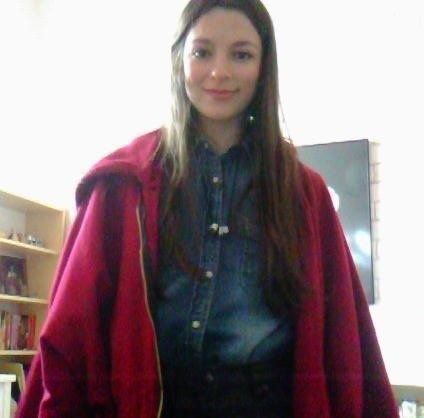
I originally wanted to use toggles but I soon realised that would make me look like Red-Robin-Hood or Ye Olde Little Red Riding Hood.So I chose a chunky gold zip to 'funk' it up.
Pin and sew your zip. -
 Step 9
ARM HOLES
So that you aren't constantly shuffling around trying to get your arms out, I recommend putting your cape on to work out where the most convenient place for your arms to stick out of is.NOTE: This pattern creates quite a full cape, so I didn't make the arm wholes directly at the side, I made them a bit forward so more frills fell at the back, I found this more convenient.
-
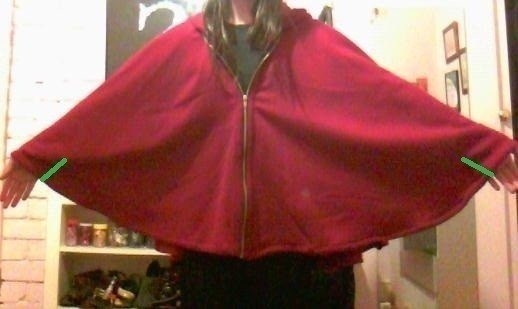
 Step 10
Alternately you could sew them directly at the side, having equal frills at the front and the back. You can see in this photo how far forward I placed my arm holes.
-
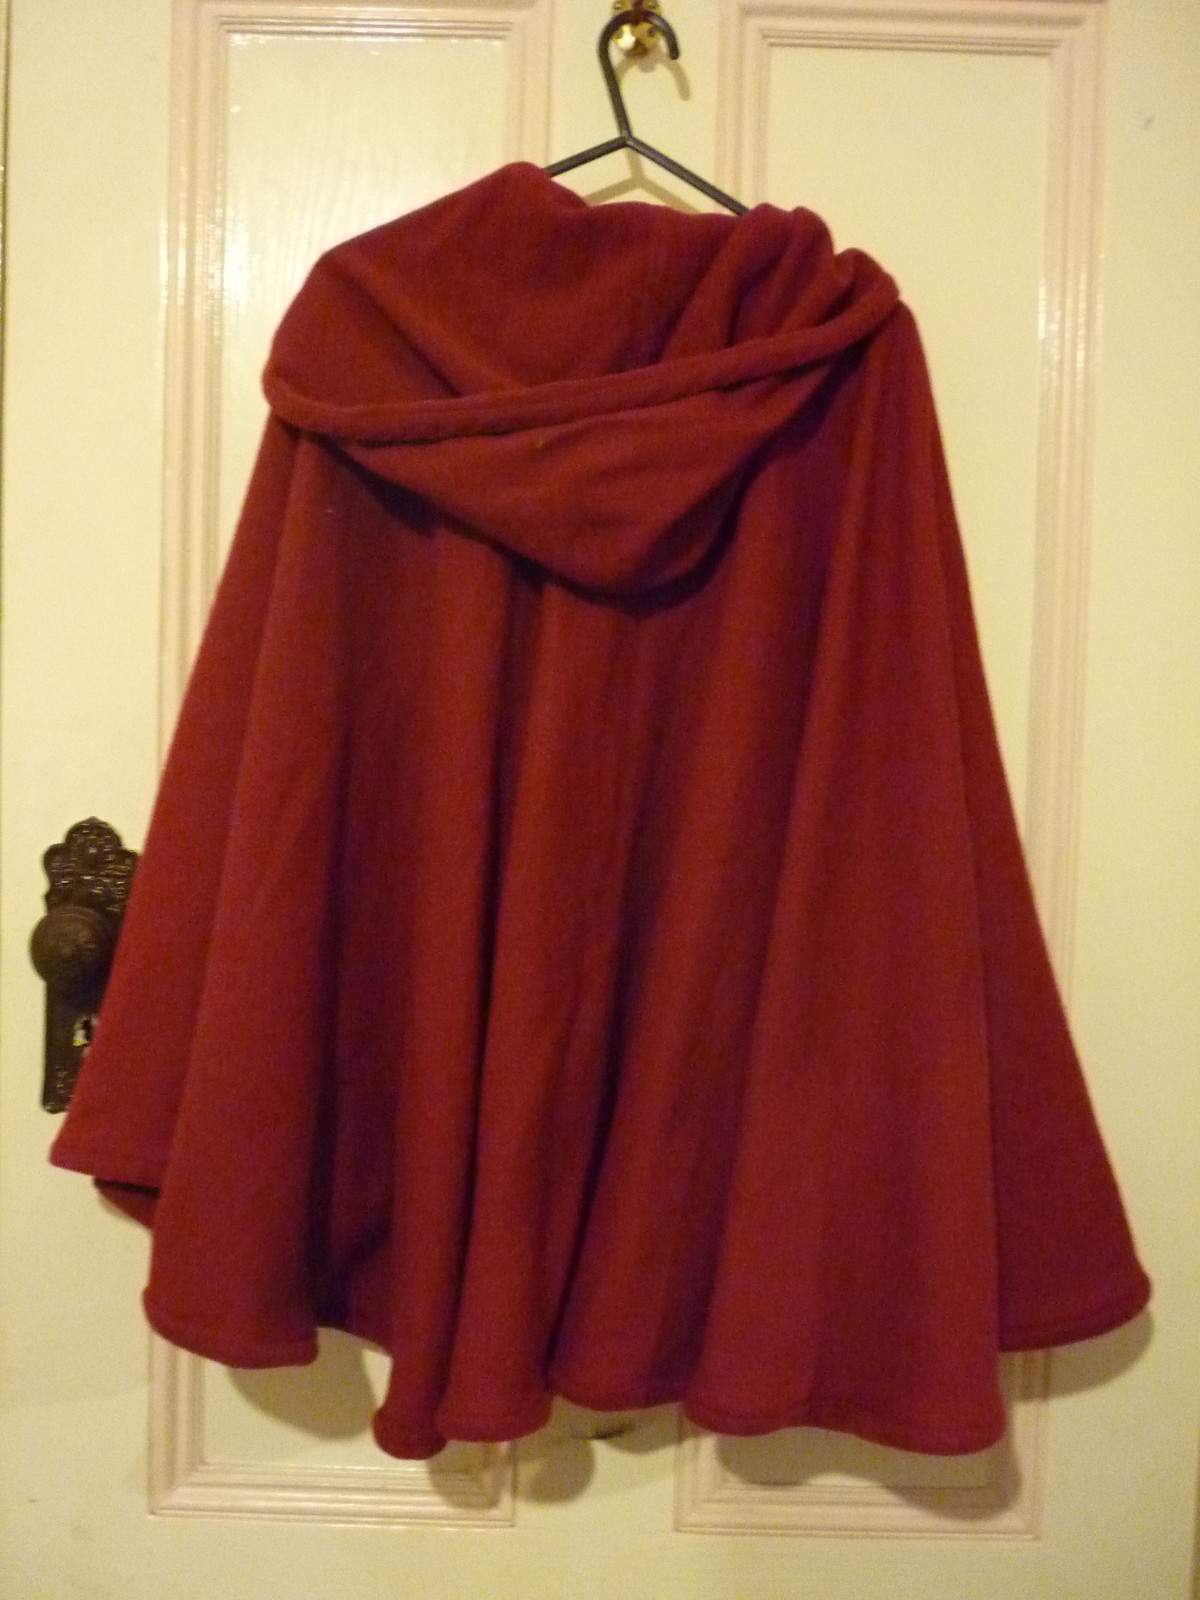
 Step 11
This is what the back of my cape looks like where I decided to position my arms.
-
 Step 12
When you are happy with the position, stick a pin around your wrist to mark the position. Get your sewing machine and sew approximately 5cm along that line.
-
 Step 13
You're finished! And you also saved about $100!
If there are any steps that aren't very clear, I'm happy to clarify, just comment :)


love the colour and everything, this cape is like.. perfect.
i was searching for one like this so long, i didn't even find a pattern that i liked!
That girl Christie- I reckon that would probably work... hahaha but snuggies are awesome!