


About
Halloween 2009 Costume.
Halloween is my holiday. Every year I rack my brain to think of something to trump previous year’s costumes. This year I just happened to be watching Bram Stoker’s Dracula and remembered how much I loved Lucy’s Bride dress. Especially the head piece. And then it hit me like a lightening bolt! I quickly grabbed a piece of paper and started drawing out the costume in details. I took all these pictures because I was entering a costume contest. But I figured it would be great to share my generalized “how to” here as well.
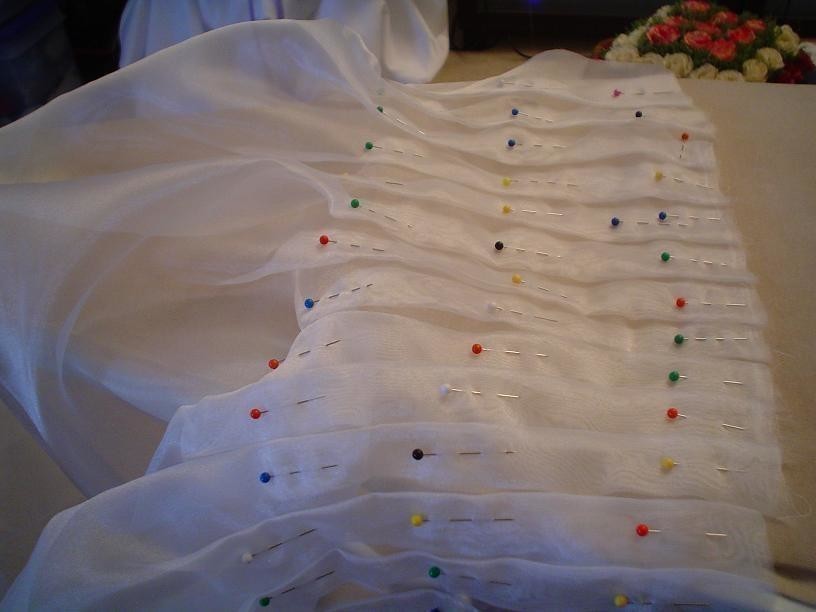
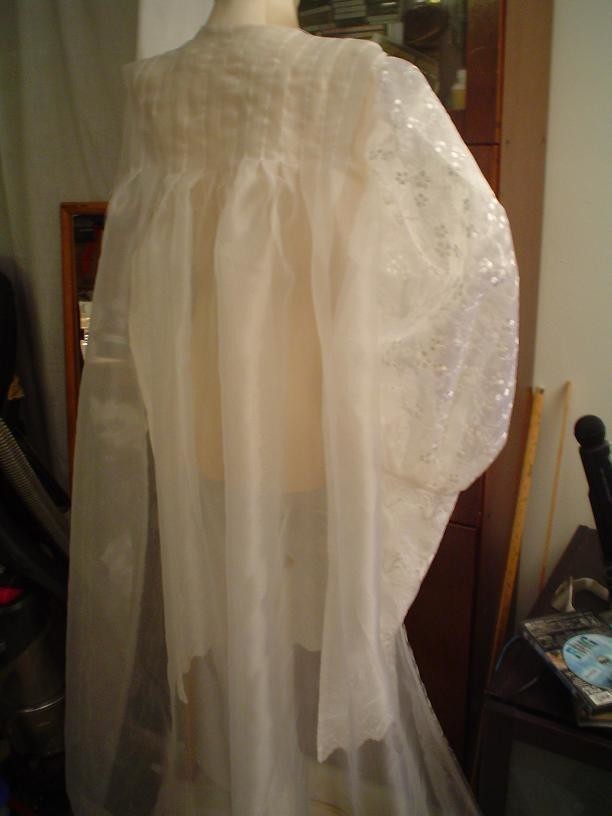
The base of the costume is a white prom dress from Masquerade Dresses I got at Ross 6 months ago for $20. (If you have a Ross in your town I highly suggest a visit). I used a strapless bustled white dress I already had and stitched white appliqués over the existing purple embroidery to cover it. Over the dress is an altar style apron/robe. I made it using an embroidered white taffeta and a Simplicity sew-easy pattern (#7382 with the sleeves from #7808). The back is floor length white organza with pin tuck pleats and the same embroidered taffeta used along the hem as trim. The leg o’ mutton sleeves are organza lace with fitted zipper closure gauntlets made of the embroidered taffeta. Using the same embroidered organza trim, I cut out teardrop shaped pieces then stitched them all together to create the separate collar. Each seam is stitched with a plastic bone to give it stability, and a full length zipper in the back. Over the cotton neckline are a couple of ruffled lace appliqués. The headpiece is a bridal buckram headband with satin pleated over the surface, and lace appliqués stitched along the front. The “wings” of the headpiece are pieces of organza stitched together to create a casing for plastic boning, and then cut into “petals”. There are three organza casings total that are stitched directly onto the buckram headband. To cover up the boning on the headband I stitched on white fake flower petals with pearls in the center.
I'm not sure on the time it took to make it as I broke up each piece into separate after work activities. Also I added a pic of the cat wearing the collar piece BEFORE the boning was stitched in. He's cute.
Tags
-
 Melanie D. favorited Undead Vampire Bride Lucy From Bram Stoker's Dracula
17 Mar 19:50
Melanie D. favorited Undead Vampire Bride Lucy From Bram Stoker's Dracula
17 Mar 19:50
-
Jesie V. added Undead Vampire Bride Lucy From Bram Stoker's Dracula to To Make
27 Sep 18:23
-
Jesie V. favorited Undead Vampire Bride Lucy From Bram Stoker's Dracula
27 Sep 18:23
-
 brooke M. favorited Undead Vampire Bride Lucy From Bram Stoker's Dracula
12 Nov 17:15
brooke M. favorited Undead Vampire Bride Lucy From Bram Stoker's Dracula
12 Nov 17:15
-
Bon G. added Undead Vampire Bride Lucy From Bram Stoker's Dracula to vamp
14 May 18:04
-
 karinharefelt favorited Undead Vampire Bride Lucy From Bram Stoker's Dracula
05 May 18:01
karinharefelt favorited Undead Vampire Bride Lucy From Bram Stoker's Dracula
05 May 18:01
-
 Lynn L. favorited Undead Vampire Bride Lucy From Bram Stoker's Dracula
17 Mar 13:51
Lynn L. favorited Undead Vampire Bride Lucy From Bram Stoker's Dracula
17 Mar 13:51
-
 rachealgrand favorited Undead Vampire Bride Lucy From Bram Stoker's Dracula
05 Oct 22:20
rachealgrand favorited Undead Vampire Bride Lucy From Bram Stoker's Dracula
05 Oct 22:20
-
 Plicka favorited Undead Vampire Bride Lucy From Bram Stoker's Dracula
24 Jul 06:40
Plicka favorited Undead Vampire Bride Lucy From Bram Stoker's Dracula
24 Jul 06:40
-
 EvalaniDiva favorited Undead Vampire Bride Lucy From Bram Stoker's Dracula
23 Jul 19:46
EvalaniDiva favorited Undead Vampire Bride Lucy From Bram Stoker's Dracula
23 Jul 19:46
Bridgette W. posted this project as a creation without steps
Here are some similar tutorials to help you make this one!


 1
Home Accessories »
Diy Jewelry Box
1
Home Accessories »
Diy Jewelry Box

XXX♥XXX
Fléance