


About
Turn any stuffed animal into a cute backpack
I've been wanting a stuffed animal backpack for a while now, and when I saw this bear at Goodwill for only 97 cents, I decided to make my own.
-
 Conner W. added Stuffed Animal Backpack to Things to try and make/ideas
13 Feb 18:49
Conner W. added Stuffed Animal Backpack to Things to try and make/ideas
13 Feb 18:49
-
 Corvus favorited Stuffed Animal Backpack
05 Sep 12:33
Corvus favorited Stuffed Animal Backpack
05 Sep 12:33
-
 Kendell V. favorited Stuffed Animal Backpack
24 Jul 23:16
Kendell V. favorited Stuffed Animal Backpack
24 Jul 23:16
-
 Alisa B. favorited Stuffed Animal Backpack
28 May 00:58
Alisa B. favorited Stuffed Animal Backpack
28 May 00:58
-
Conner W. added Stuffed Animal Backpack to craft ideas
15 Jul 18:00
-
Conner W. added Stuffed Animal Backpack to gift ideas
15 Jul 18:00
-
Conner W. added Stuffed Animal Backpack to fashion
15 Jul 18:00
-
 Aurelie L. added Stuffed Animal Backpack to Sacs
14 Mar 20:37
Aurelie L. added Stuffed Animal Backpack to Sacs
14 Mar 20:37
-
Jessica D. added Stuffed Animal Backpack to Other
04 Jan 07:01
-
Nikia N. favorited Stuffed Animal Backpack
09 Nov 20:46
-
 Step 1
Find a stuffed animal. I found this bear at Goodwill for less than a dollar.
(It had an ugly plaid bow tied on it, which I promptly ripped off of it. Now it looks better ^_^)
-
 Step 2
Eww. Wash the stuffed animal.
(Unclean plushies are gross. Just throw it in the washing machine with some other laundry.)
DO NOT PUT IT IN THE DRYER!!!
Stuffing is made of plastic fibers, so if you heat your animal, it will burn up and melt and be ruined. No one wants that.
-
Step 3
Allow your plushie to air dry for a little while.
-
Step 4
Carefully cut open your bear (or other animal) along the back seam. You should be able to pull the seam apart a little and find the thread holding it together. Just cut the little string and start working the seam apart.
-
 Step 5
Next, rip the innards of your poor little animal right out!
It may be a little wet from the washer, but no big deal. (It just feels gross.)
-
 Step 6
Next, check and see if your animal's limbs are open to the body. If they are (like mine) I suggest that you sew them up to prevent stuffing from coming out of the arms and legs since the belly is now empty.
-
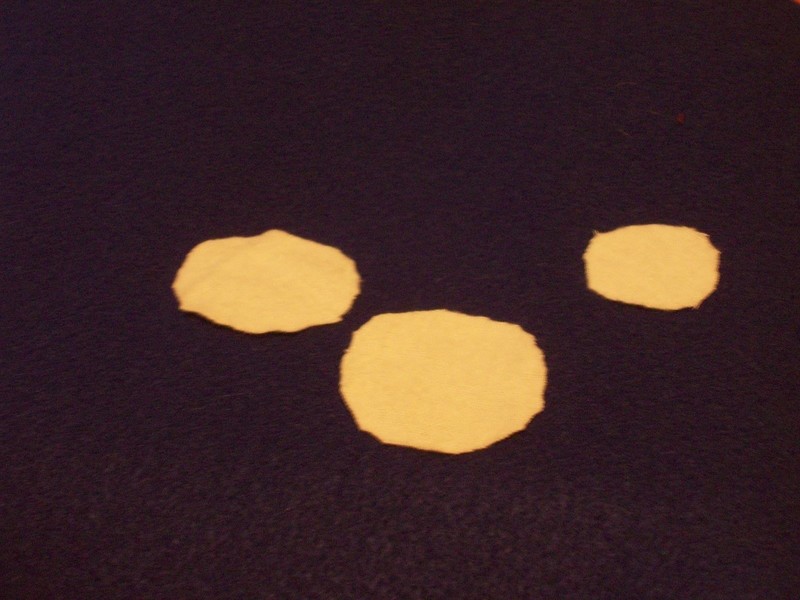
 Step 7
Cut circles from scrap fabric to cover the holes.
-
 Step 8
Sew them in place.
-
 Step 9
Yay. One down. Continue for all leg/arm holes.
Make sure the head has enough stuffing, and then cut a larger circle and sew the neck up as well.
-
 Step 10
Now, you need to make a lining for your bag.
This is tricky, and you mostly have to guess to get the shape right.
I started out by folding a piece of fabric (about 10 by 18 inches) in half (making it 10 by 9 inches) and then sewing along the short edges, leaving one side folded and the other open.
Then, I tried it out in my bear, and decided to make the edges rounder, so I sewed the corners of the rectangle and cut off the extra fabric.
Remember to leave an opening that matches the size of your bear/animal's seam.
-
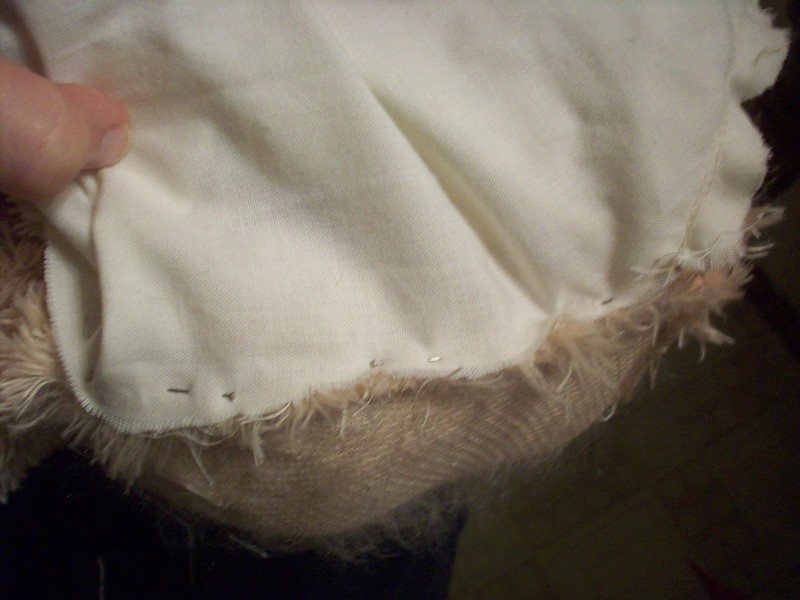
 Step 11
Now for the tricky part - attaching the lining correctly.
Place the lining in the bear, so that when you look it, you see the good seam.
Then, fold one side of the liner and the bear's seam inward and pinch them together like you want them on the finished bag.
Holding that part together, pull the liner out and turn it inside out, so that the good seam is on the outside.
Now, starting where you have the fabric pinched together, place pins to hold the liner in.
Work down one side like that, then sew it.
(This is very confusing, I know. I sewed the liner in right-side-out the first time by accident. If there's a way that works for you, just do it. It's hard to explain.)
-
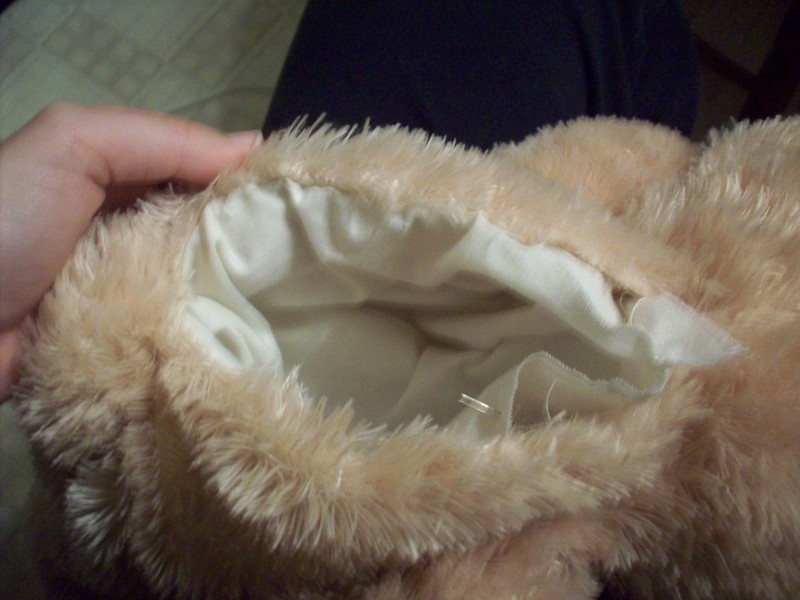
 Step 12
Now, to sew the other side.
It's difficult to get to, because the bear's in the way. Unlike a bag, which you can just stuff into the liner inside out to sew, the bear has a stuffed head and limbs to worry about.
Mostly, just do whatever you can to get the other side to match up so you can sew PART OF IT. (You still need to turn the bear right-side-out again, so leave room.)
I stuffed the arms and legs of my bear backwards into the stomach, and left the head out.
-
 Step 13
Turn the bear/lining right-side-out again, and tuck the lining inside.
If all went well, you see the good seam and your lining is almost completely secured to the bear.
Now, it's time to neatly slip-stitch the rest of the way up the lining.
-
 Step 14
Ta dah. The lining is finished.
-
Step 15


I don't know if I have the heart to do that especially to ones I already have, but if I ever find a cute cheap one one day I'll have to try this. He'll proably just end up as a secret storage stuffie. I have issues with germs and he would just get gross in public. Stuffies need love and I can't love one him if his gross.
If you weren't gonna use the stuffing again, it might have saved one dryin' time to "rip his innards out" prewash.
I have also heard that you can wash your stuffed animals in a tied-up pillowcase to keep them from being washed too vigorously (but I haven't tried it personally).
I didn't think of posting the project here until I had already started tearing the bear apart, so, when I started working on the second bear, I took some beginning photos.
p.s. Haha! the bear changes color!