


About
An adorable under the sea friend
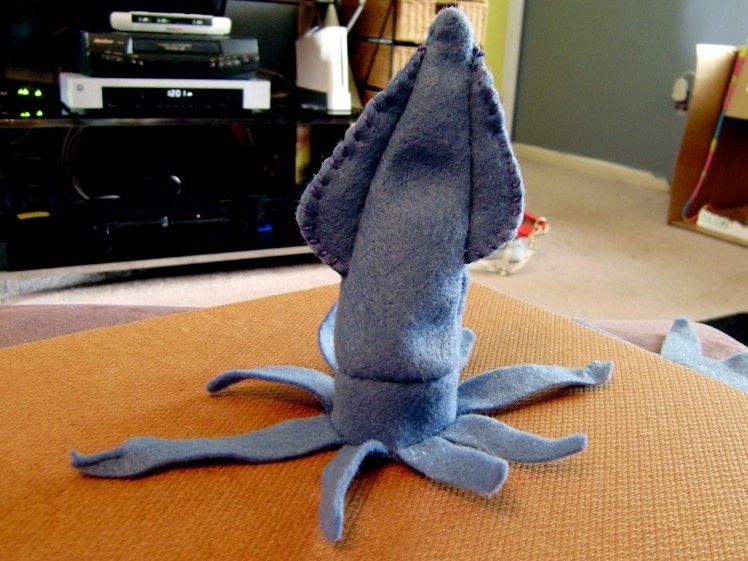
Meet Marco the Squid!
This project is really cheap and good for someone who is fairly new to sewing. I bought five 9"x12" felt sheets for this project (light blue, dark blue, black, white, and pink) which only cost me 25 cents a piece at my local craft store. I already had the polyester stuffing and the beads I used for his little tentacle suckers.
(Sorry for all the PDFs of the same thing, for whatever reason the website upload several of my file.)
Downloads
- Squid_Plush_Pattern.pdf 192 KB [ Download ]
- Squid_Plush_Pattern.pdf 283 KB [ Download ]
- Squid_Plush_Pattern.pdf 283 KB [ Download ]
- Missing file
- Missing file
-
 Ms Dorito added Squid Felt Plush to Plushie
12 Jun 17:24
Ms Dorito added Squid Felt Plush to Plushie
12 Jun 17:24
-
 Madison F. favorited Squid Felt Plush
08 May 12:34
Madison F. favorited Squid Felt Plush
08 May 12:34
-
 Julie R. favorited Squid Felt Plush
27 Jan 02:17
Julie R. favorited Squid Felt Plush
27 Jan 02:17
-
Jenna C. favorited Squid Felt Plush
28 Jul 22:31
-
 Neko-San K. favorited Squid Felt Plush
31 May 20:25
Neko-San K. favorited Squid Felt Plush
31 May 20:25
-
 Autumn E. favorited Squid Felt Plush
08 Apr 16:08
Autumn E. favorited Squid Felt Plush
08 Apr 16:08
-
 Harley Q. added Squid Felt Plush to Inspiration to be Creative
08 Apr 08:44
Harley Q. added Squid Felt Plush to Inspiration to be Creative
08 Apr 08:44
-
Harley Q. favorited Squid Felt Plush
08 Apr 08:42
-
 mmotse03 favorited Squid Felt Plush
16 Nov 15:59
mmotse03 favorited Squid Felt Plush
16 Nov 15:59
-
 ann w. favorited Squid Felt Plush
07 Sep 21:34
ann w. favorited Squid Felt Plush
07 Sep 21:34
-
 Step 1
Cut out all of your pattern pieces from the PDF I've included.
-
 Step 2
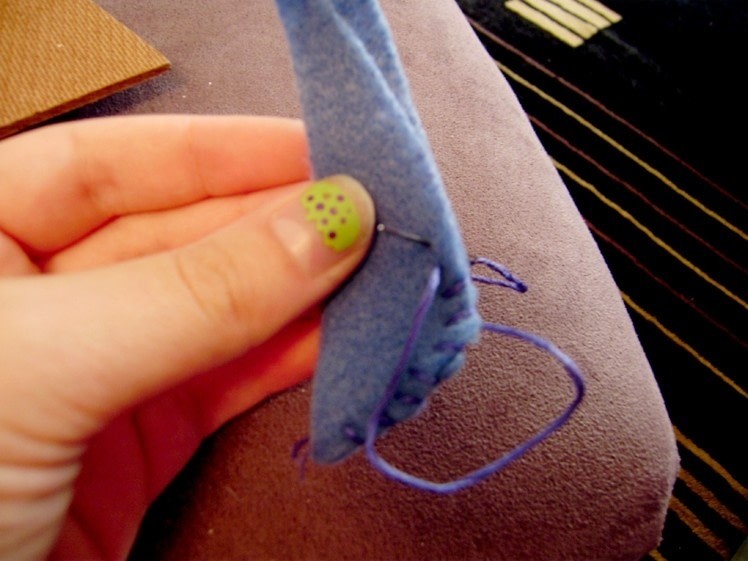
Take two fin pieces and sew them together using a whip stitch along the curved edge.
- DON'T sew the straight side yet.- Repeat with the other two fin pieces.
-
 Step 3
Take a bit of stuffing and fill the two fin pieces. You don't need to fill them a lot, just enough to give it some dimension.
-
 Step 4
Do a quick running stitch to close up the open fins. This doesn't have to be perfect, just to keep the stuffing from falling out while you're sewing the rest.
-
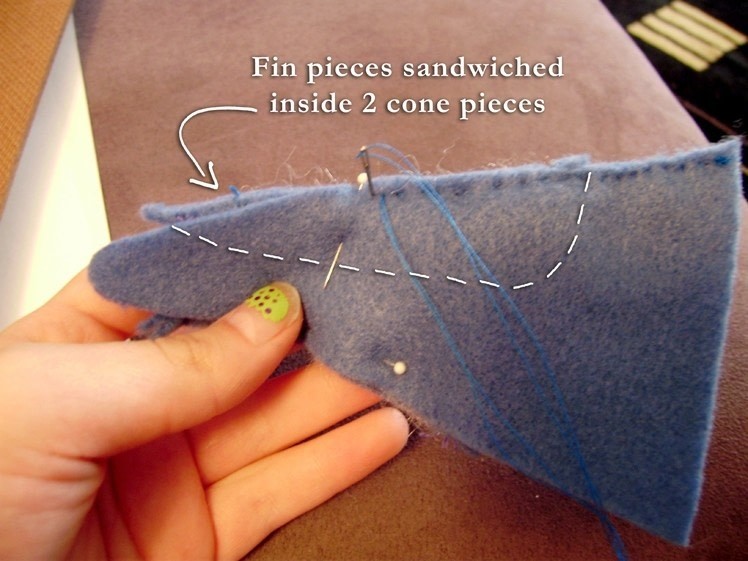
 Step 5
Take one of the cone pieces and lay the two fin pieces on it as shown. Then take your second cone piece and lay it on top so you can't see the two fins. When you pin it together it should be like a fin sandwich.
-
 Step 6
Sew a running stitch around the two sides, leaving the bottom part open.
-
 Step 7
When you turn it right side-out, it should look like this.
(I realized that my fins were a bit crooked, I like my projects to look like they're hand made, so don't fuss if you make any small mistakes.)
-
 Step 8
Next, take one of your long tentacle pieces and sew the split in the middle closed using a whip stitch. (This will give the tentacle some dimension)
- Repeat with the second long tentacle piece.
-
 Step 9
Take your head piece (the long strip) and arrange the tentacles along the top edge as shown using a running stitch.
- Make sure your tentacles follow the same pattern as mine, it should be:
Short, short, short, long, short, short, short, long.- Even though my pieces are pinned to the head, it's not necessary to pin them all down at once. It's easier if you sew them one tentacle at a time, just make sure you follow the correct pattern.
-
 Step 10
When you're finished sewing all the tentacle pieces, bring the two short sides of the head together with the tentacles facing in and sew a running stitch down the short side.
- You can trim any excess felt left on the short side.
- Turn right side-out. -
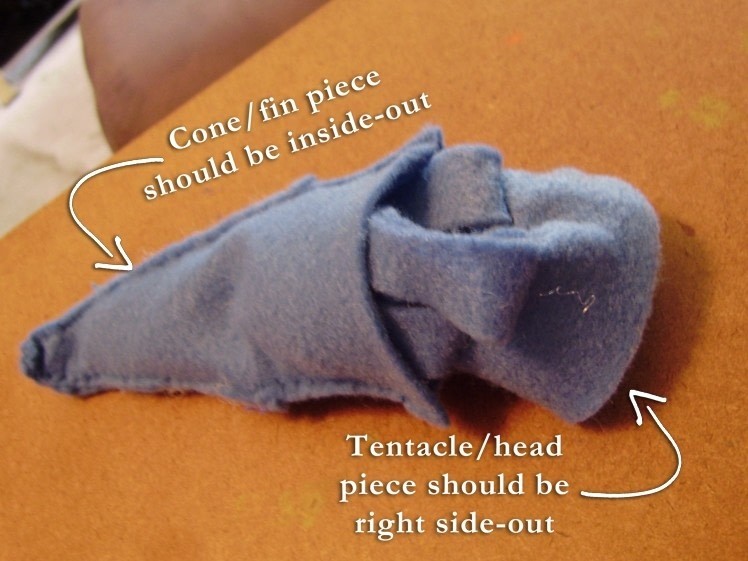
 Step 11
Next, take your cone piece (this should be inside-out) and your head piece (this should be right side-out) and stuff the tentacles into the cone as best you can. (The better they're in there, the easier it will be to sew.)
- You want to sew around the opening of the cone, sewing the top of the head (the side without tentacles sewn to it) to the cone using a running stitch. -
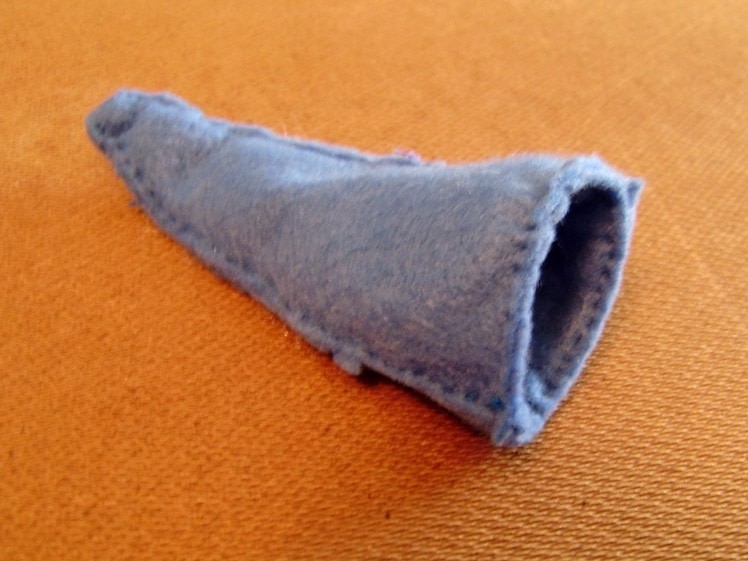
 Step 12
This is what it should look like when you're done.
Turn this right side-out.
-
 Step 13
Now he's starting to look like a squid!
But we're not done yet. He still needs a face! -
 Step 14
Now it's time to add some embellishments!
- I cut out all my face pieces (eyes, mouth, and his little spots) and sewed a small running stitch around each one using the appropriate colored thread so it's harder to see the stitches.
- I decided to add some suckers to his tentacles using colored beads I had lying around. If you don't have any beads handy, you could sew on some little felt circles using the same technique that you used for sewing on the facial features. -
 Step 15
Next, stuff the cone.
- Make sure you don't fill it too much, otherwise it will be more difficult to sew the tentacles. -
 Step 16
Now lay your bottom piece on the cone so the tentacles line up. Sew the tentacles together using a whip stitch all the way around.
- I found it was much easier to stuff individual tentacles as I finished sewing them, instead of sewing the whole thing and then stuffing them. I used a pair of tweezers to get the stuffing into the narrow parts (especially the long tentacles).
- Before you close him up, make sure you have the desired amount of stuffing in the cone. If you don't, now would be the time to finish filling it. -
 Step 17
Close him up, name him, and introduce him to his new friends!


Comments

 1
Home Accessories »
Diy Jewelry Box
1
Home Accessories »
Diy Jewelry Box
