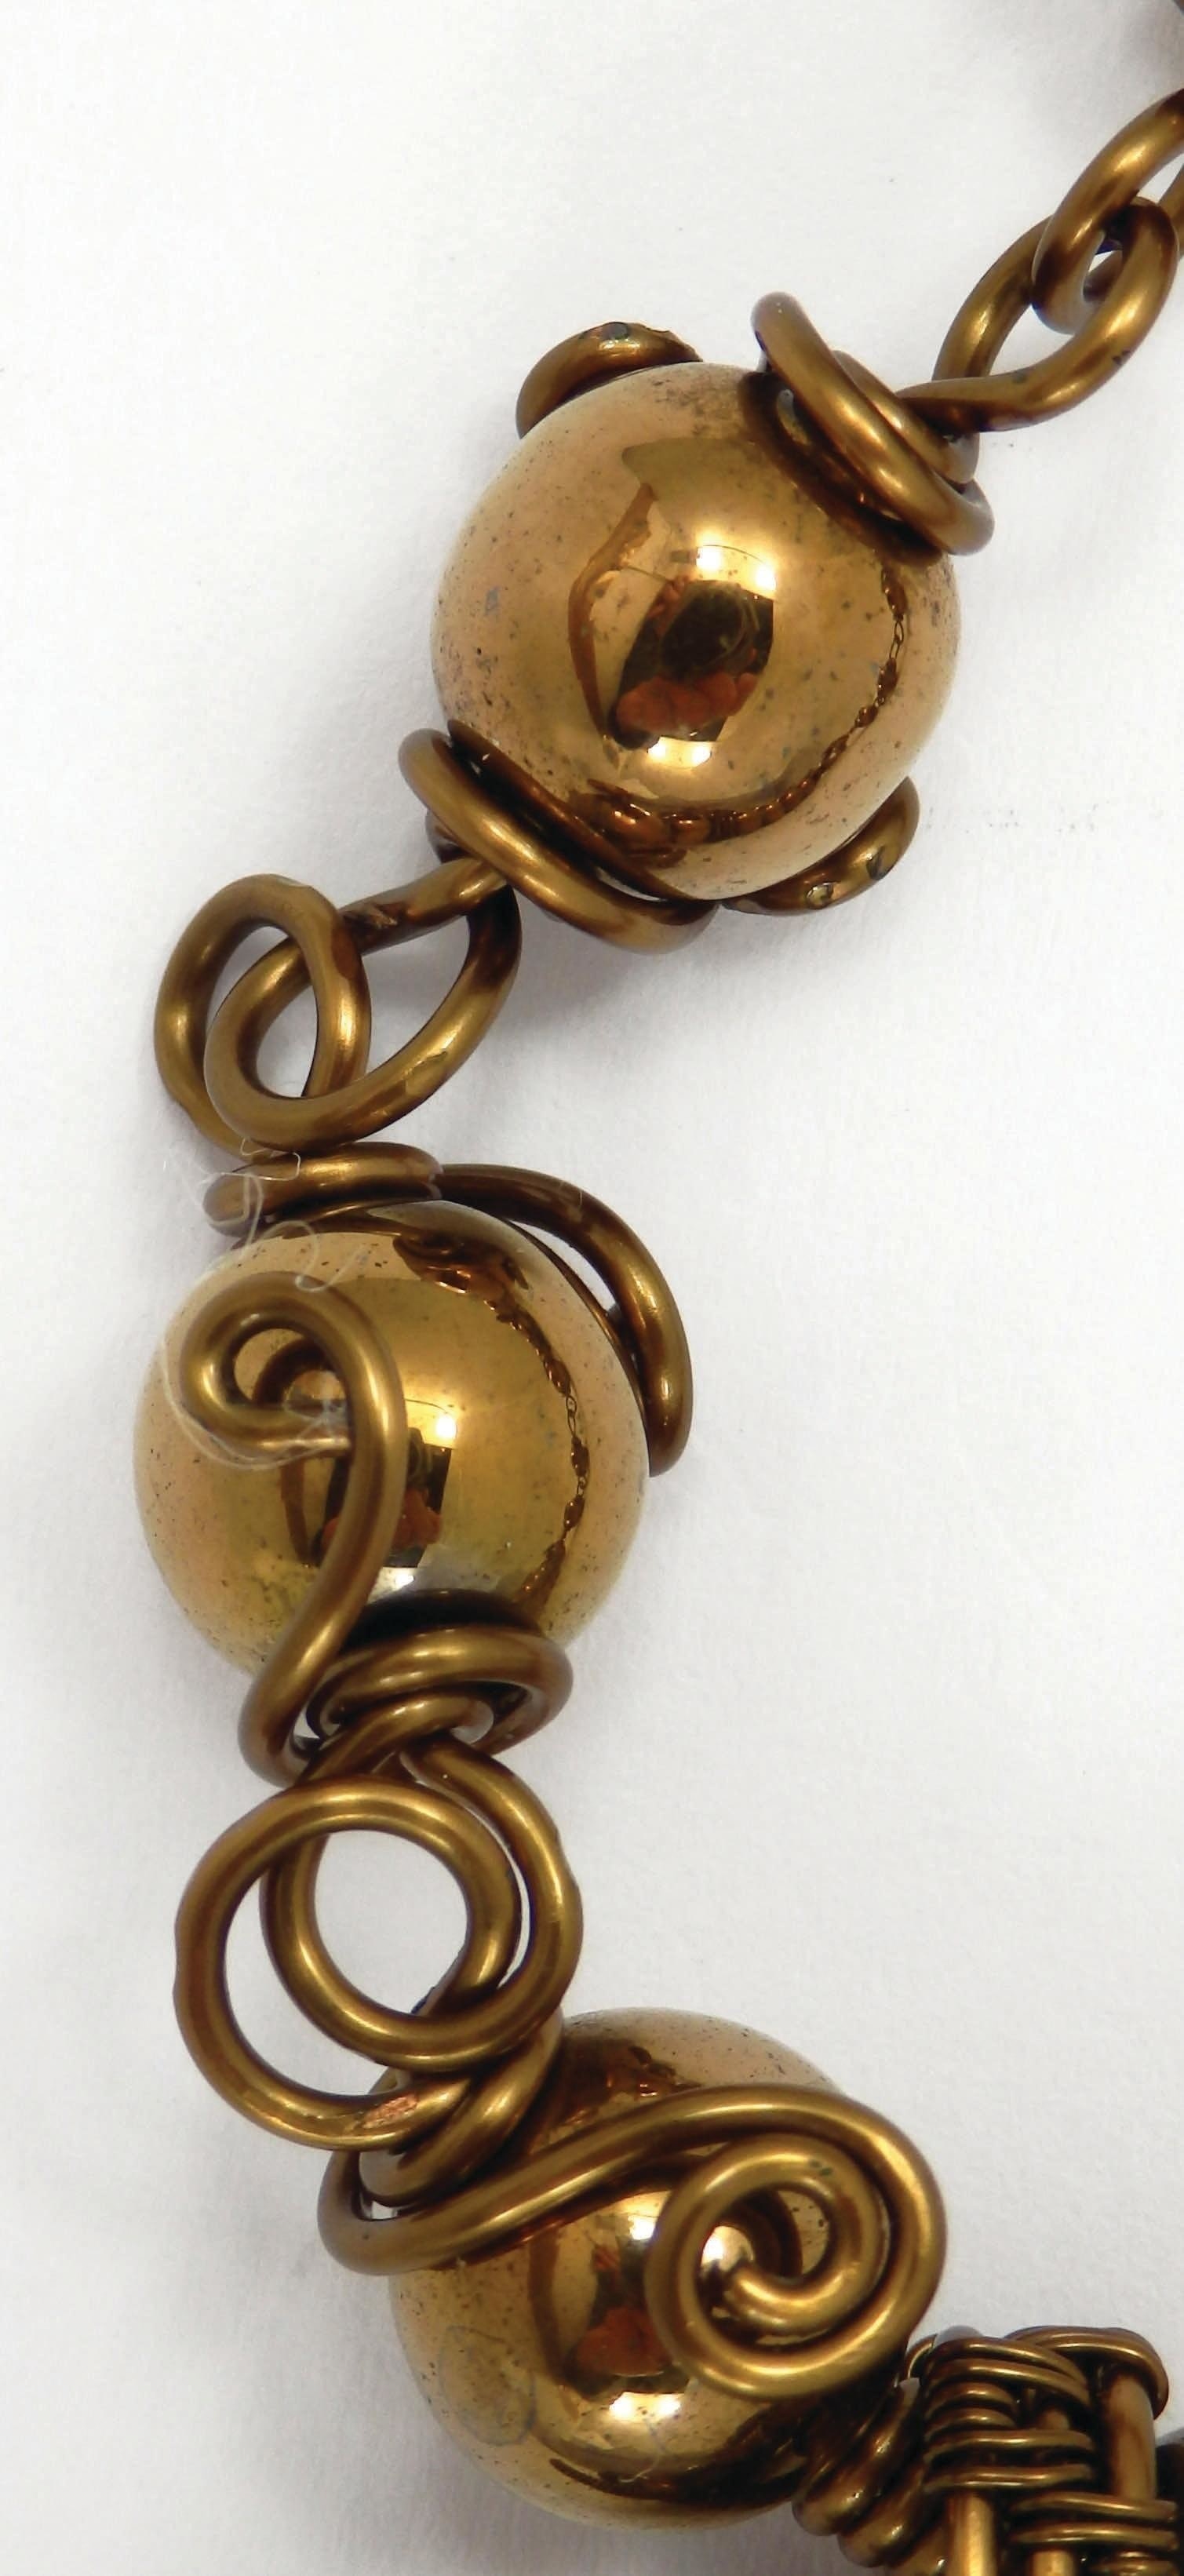
Rosary Links
Extract from Mastering Wirework Jewelry • By Rachel Norris • Published by GMC Publications

About
Making rosary links for a necklace
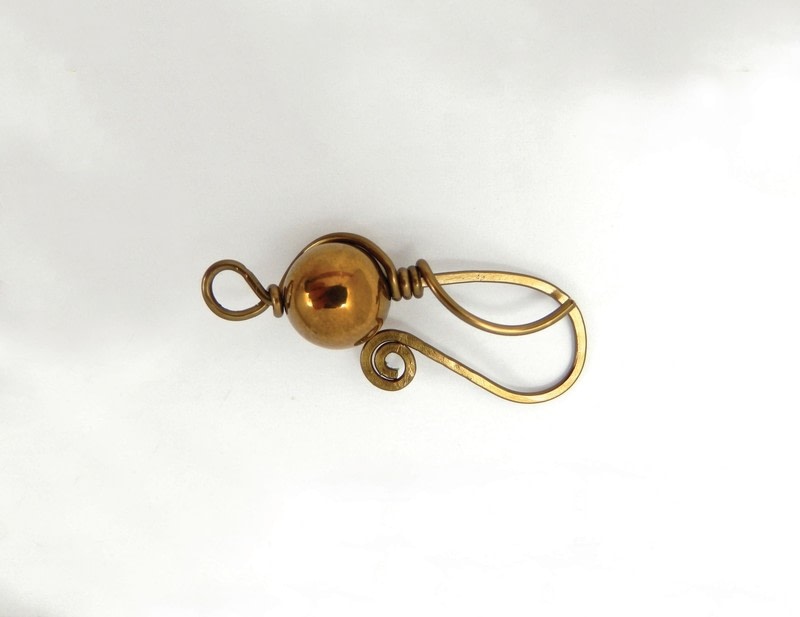
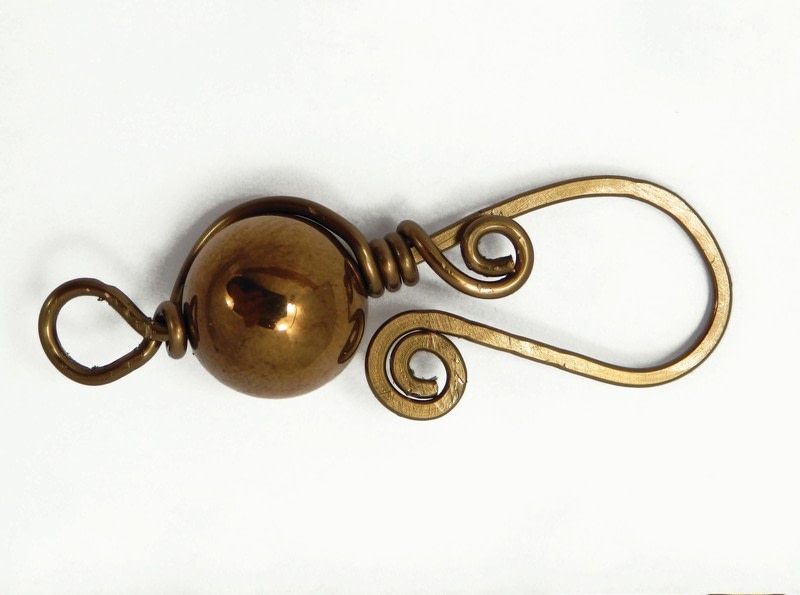
Rosary links are made with wrapped loops either side of the bead. The beads shown in images A and B are 8–10mm diameter rounds set on 18AWG (1mm) wire. 24–20AWG (0.6–0.8mm) wire can be used for smaller, more delicate, beads. There is also the option of making swirly curls at the end of each wrapped loop either side of the bead, as in image B. Make the swirly curls using 3⁄8in (1cm) lengths of the wire tails at the end of the wrapped loops.
NOTE: The wire you use may depend on the size of the drill hole through the bead.
Tip
I prefer to work with longer lengths of wrapping wire so I don’t run out along weave lengths. If you want to work with shorter lengths, try to spot a point where you can add in new wire, tucking in the old end and adding in new where there is the least disruption to what you are trying to do.
-
 Key West Witch favorited Rosary Links
24 Aug 03:49
Key West Witch favorited Rosary Links
24 Aug 03:49
-
 reese52 favorited Rosary Links
17 Oct 16:05
reese52 favorited Rosary Links
17 Oct 16:05
-
 Audrey S. favorited Rosary Links
01 Mar 17:46
Audrey S. favorited Rosary Links
01 Mar 17:46
-
Audrey S. added Rosary Links to Jewellery
01 Mar 17:35
-
 JadeSucksAtLife favorited Rosary Links
01 Mar 14:31
JadeSucksAtLife favorited Rosary Links
01 Mar 14:31
-
 Raven Quinzel added Rosary Links to Stuff of interest
22 Sep 13:08
Raven Quinzel added Rosary Links to Stuff of interest
22 Sep 13:08
-
 RAFI KHAN favorited Rosary Links
22 Aug 17:01
RAFI KHAN favorited Rosary Links
22 Aug 17:01
-
 Kinhime Dragon favorited Rosary Links
16 Aug 16:26
Kinhime Dragon favorited Rosary Links
16 Aug 16:26
-
 Crafterella featured Rosary Links
07 Aug 23:00
Crafterella featured Rosary Links
07 Aug 23:00
-
Alissa B. favorited Rosary Links
06 Aug 23:43
You Will Need
-
 Step 1
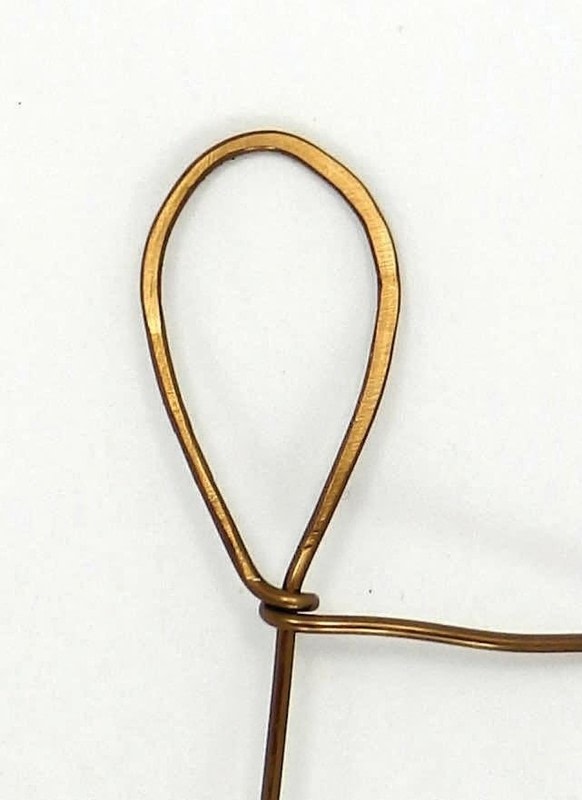
To make a wrapped loop necklace link
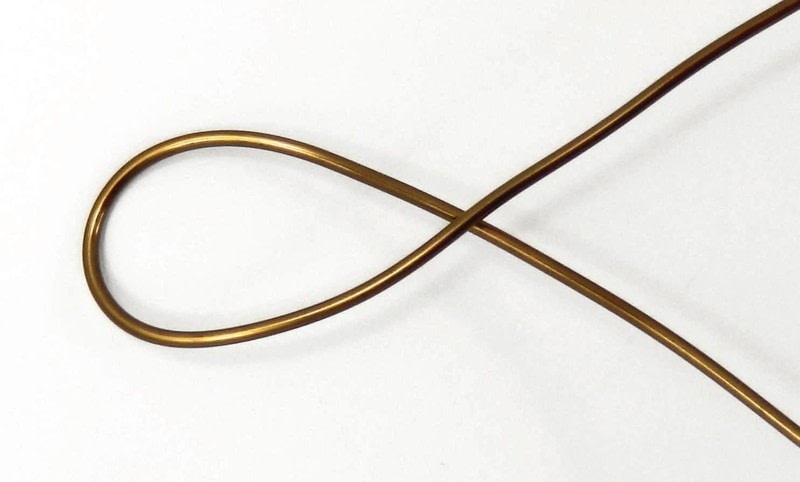
Take a 4–43⁄4in (10–12cm) length of 18AWG (1mm) wire and loop it as shown about 1 3⁄8in (3.5cm) from one end of the wire, into a round shape using your round-nose pliers.
-
 Step 2
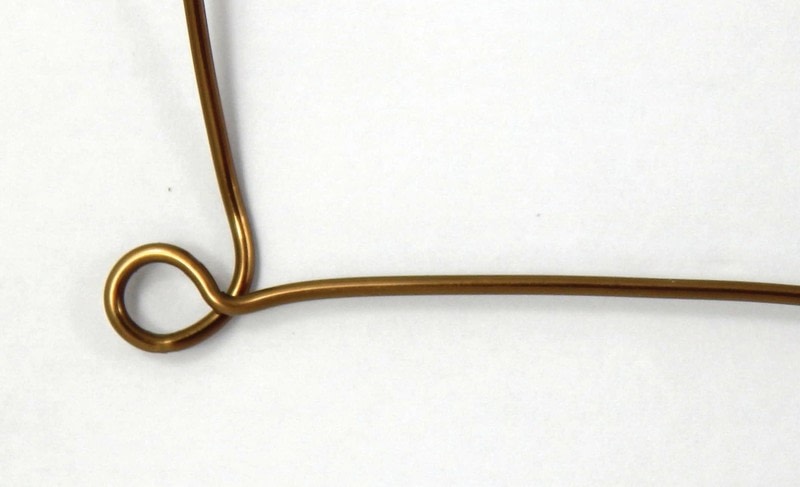
Grip nearer the base of the loop with chain-nosed pliers (if possible with the pliers placed flat across the whole loop). Bend the shorter wire tail to the side where it crosses under the longer length of wire. Straighten the longer length of wire, bending it slightly at the crossing point. Pull the shorter wire tail to wrap it around the longer wire length at the crossing point so that it points in the opposite direction.
-
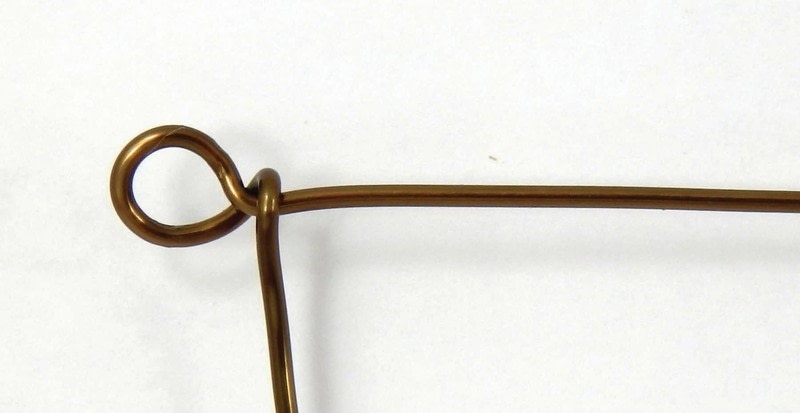
 Step 3
Thread a bead onto the longer length of wire so that it lies tight against the first loop you made. Make a loop at the other side of the bead using chain-nosed pliers, adjusting the loop so that there is no “play” or gap between the loops and the bead.
Tip
Try to make sure the loops are all the same size by making them at the same point on your chain-nosed pliers. -
 Step 4
Grip each loop with chain-nosed pliers and wrap the wire tails around the base of the loop with your fingers or another set of pliers. You have a few options now:
• You can cut the wire tail with flush cutters and press the ends down around the wrap to press the cut ends in so they don’t catch on skin or clothing.
• You can wrap the wire tails over to the other side of the bead.
• You can make a swirl curl detail over the bead, as follows: -
 Step 5
Cut the wire tails to 3⁄8–5⁄8in (10–15mm) depending on the size of curl you want to make over the bead or the size of bead you are working with.
-
 Step 6
Spiral the wire tails. Press the wire tails down over the bead using your fingers or the rubber ends of your pliers. Your little link is finished. Make more in the same way, but make sure you add on one link to the next before you close that loop.
-
 Step 7
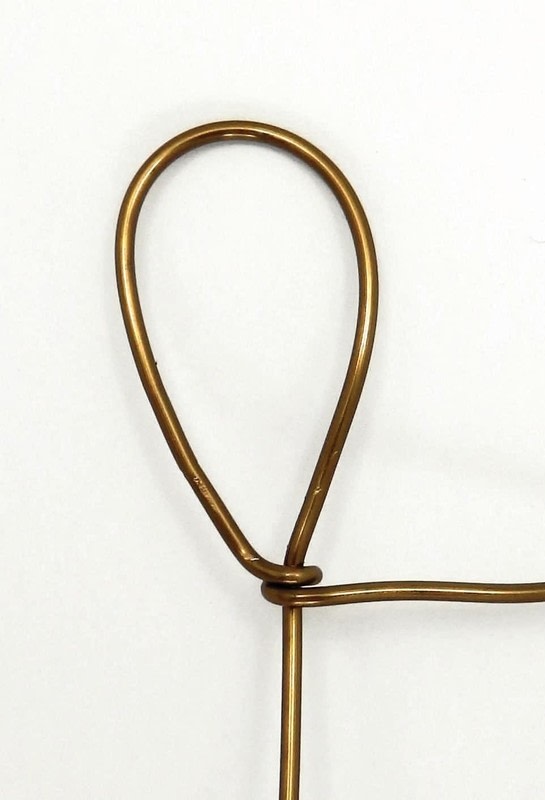
Making the loop end of the clasp
The loop end of the clasp is made in the same way as the links except with a much larger loop on the loop side.
Take a 6in (15cm) length of 20–18AWG (0.8–1mm) wire and loop it near one end of the wire into a teardrop shape. Use your fingers or a pencil-sized mandrel to make a more circular loop. -
 Step 8
Bend the shorter wire tail to the side where it crosses over the longer length of wire. Straighten the longer length of wire, bending it slightly at the crossing point.
-
 Step 9
Grip the base of the loop with chain-nosed pliers and pull the wire tail to wrap it once around the longer wire length at the crossing point in a 180-degree loop.
-
 Step 10
At this stage you can alter the shape of your loops using the chain-nosed pliers. You can make the loop teardrop shaped, angular, or completely circular by placing the loop around a ring mandrel to shape the wire.
-
 Step 11
Hammer the large loop on a steel block to create a flat, reflective surface.
-
 Step 12
Thread a bead onto the long length of wire so it sits tight against the large loop. Make a smaller loop on the other side of the bead as in Step 4. Grip the smaller loop with your chain-nosed pliers and pull the wire tail around the top of the bead to make a spiral over the end of the bead around the closed loop.
-
 Step 13
Cut the wire tail at this end to 3⁄8–5⁄8in (10–15mm). Grip the larger teardrop-shaped loop with your chain-nosed pliers near the base of the loop and across both sides of the loop, spiraling the wire end around and along the loop for a few wraps (you can also wind down over the bead; it is your choice).
-
 Step 14
Cut the wire tail at the large loop end to 5⁄8–13⁄16in (15–20mm).
-
 Step 15
Spiral the wire tails: Press the spiral at the small loop end over the bead and the spiral at the larger loop end over the base ofthe loop.
-
 Step 16
Making the hook end of the clasp
Take a 6in (15cm) length of 18AWG (1mm) wire and make a small spiral at one end.
-
 Step 17
Shape this end of the wire into a shepherd’s crook shape. You can wrap the wire around a mandrel, bale-making pliers, or a round pen. Make a slight bend at the base of the hook leaving a straight wire tail (see arrow in image above).
-
 Step 18
Hammer only the “crook” end, leaving the straight wire tail unhammered.
-
 Step 19
Thread a bead onto the straight wire up to the base of the crook and the edge of the hammered wire section. Make a loop at the other side of the bead using round-nosed pliers.
-
 Step 20
Make a closed wrap loop (see page 21). Pass the wire tail over and around the bead to wrap the wire tail at the base of the hook end a few times, leaving a 5⁄8–13⁄16in (15–20mm) wire tail.
NOTE: The wrap around the bead may cause the bead to travel up the hook end a little. Hold the bead in place as you make this wrap; once you have a few coils around the base of the hook the bead will be held in place.
-
 Step 21
Curl the wire tail and press into place over the base of the hook end.
-
 Step 22
Your clasp is now finished. You can join it to the rest of your necklace with a few jumprings or by slipping it onto a necklace link before you wrap and close the loop.
Tip
If the wire is difficult to thread through spaces, use your pliers to help grab the wire. Trim the tip if it looks ragged to make it thread through more easily.