

About
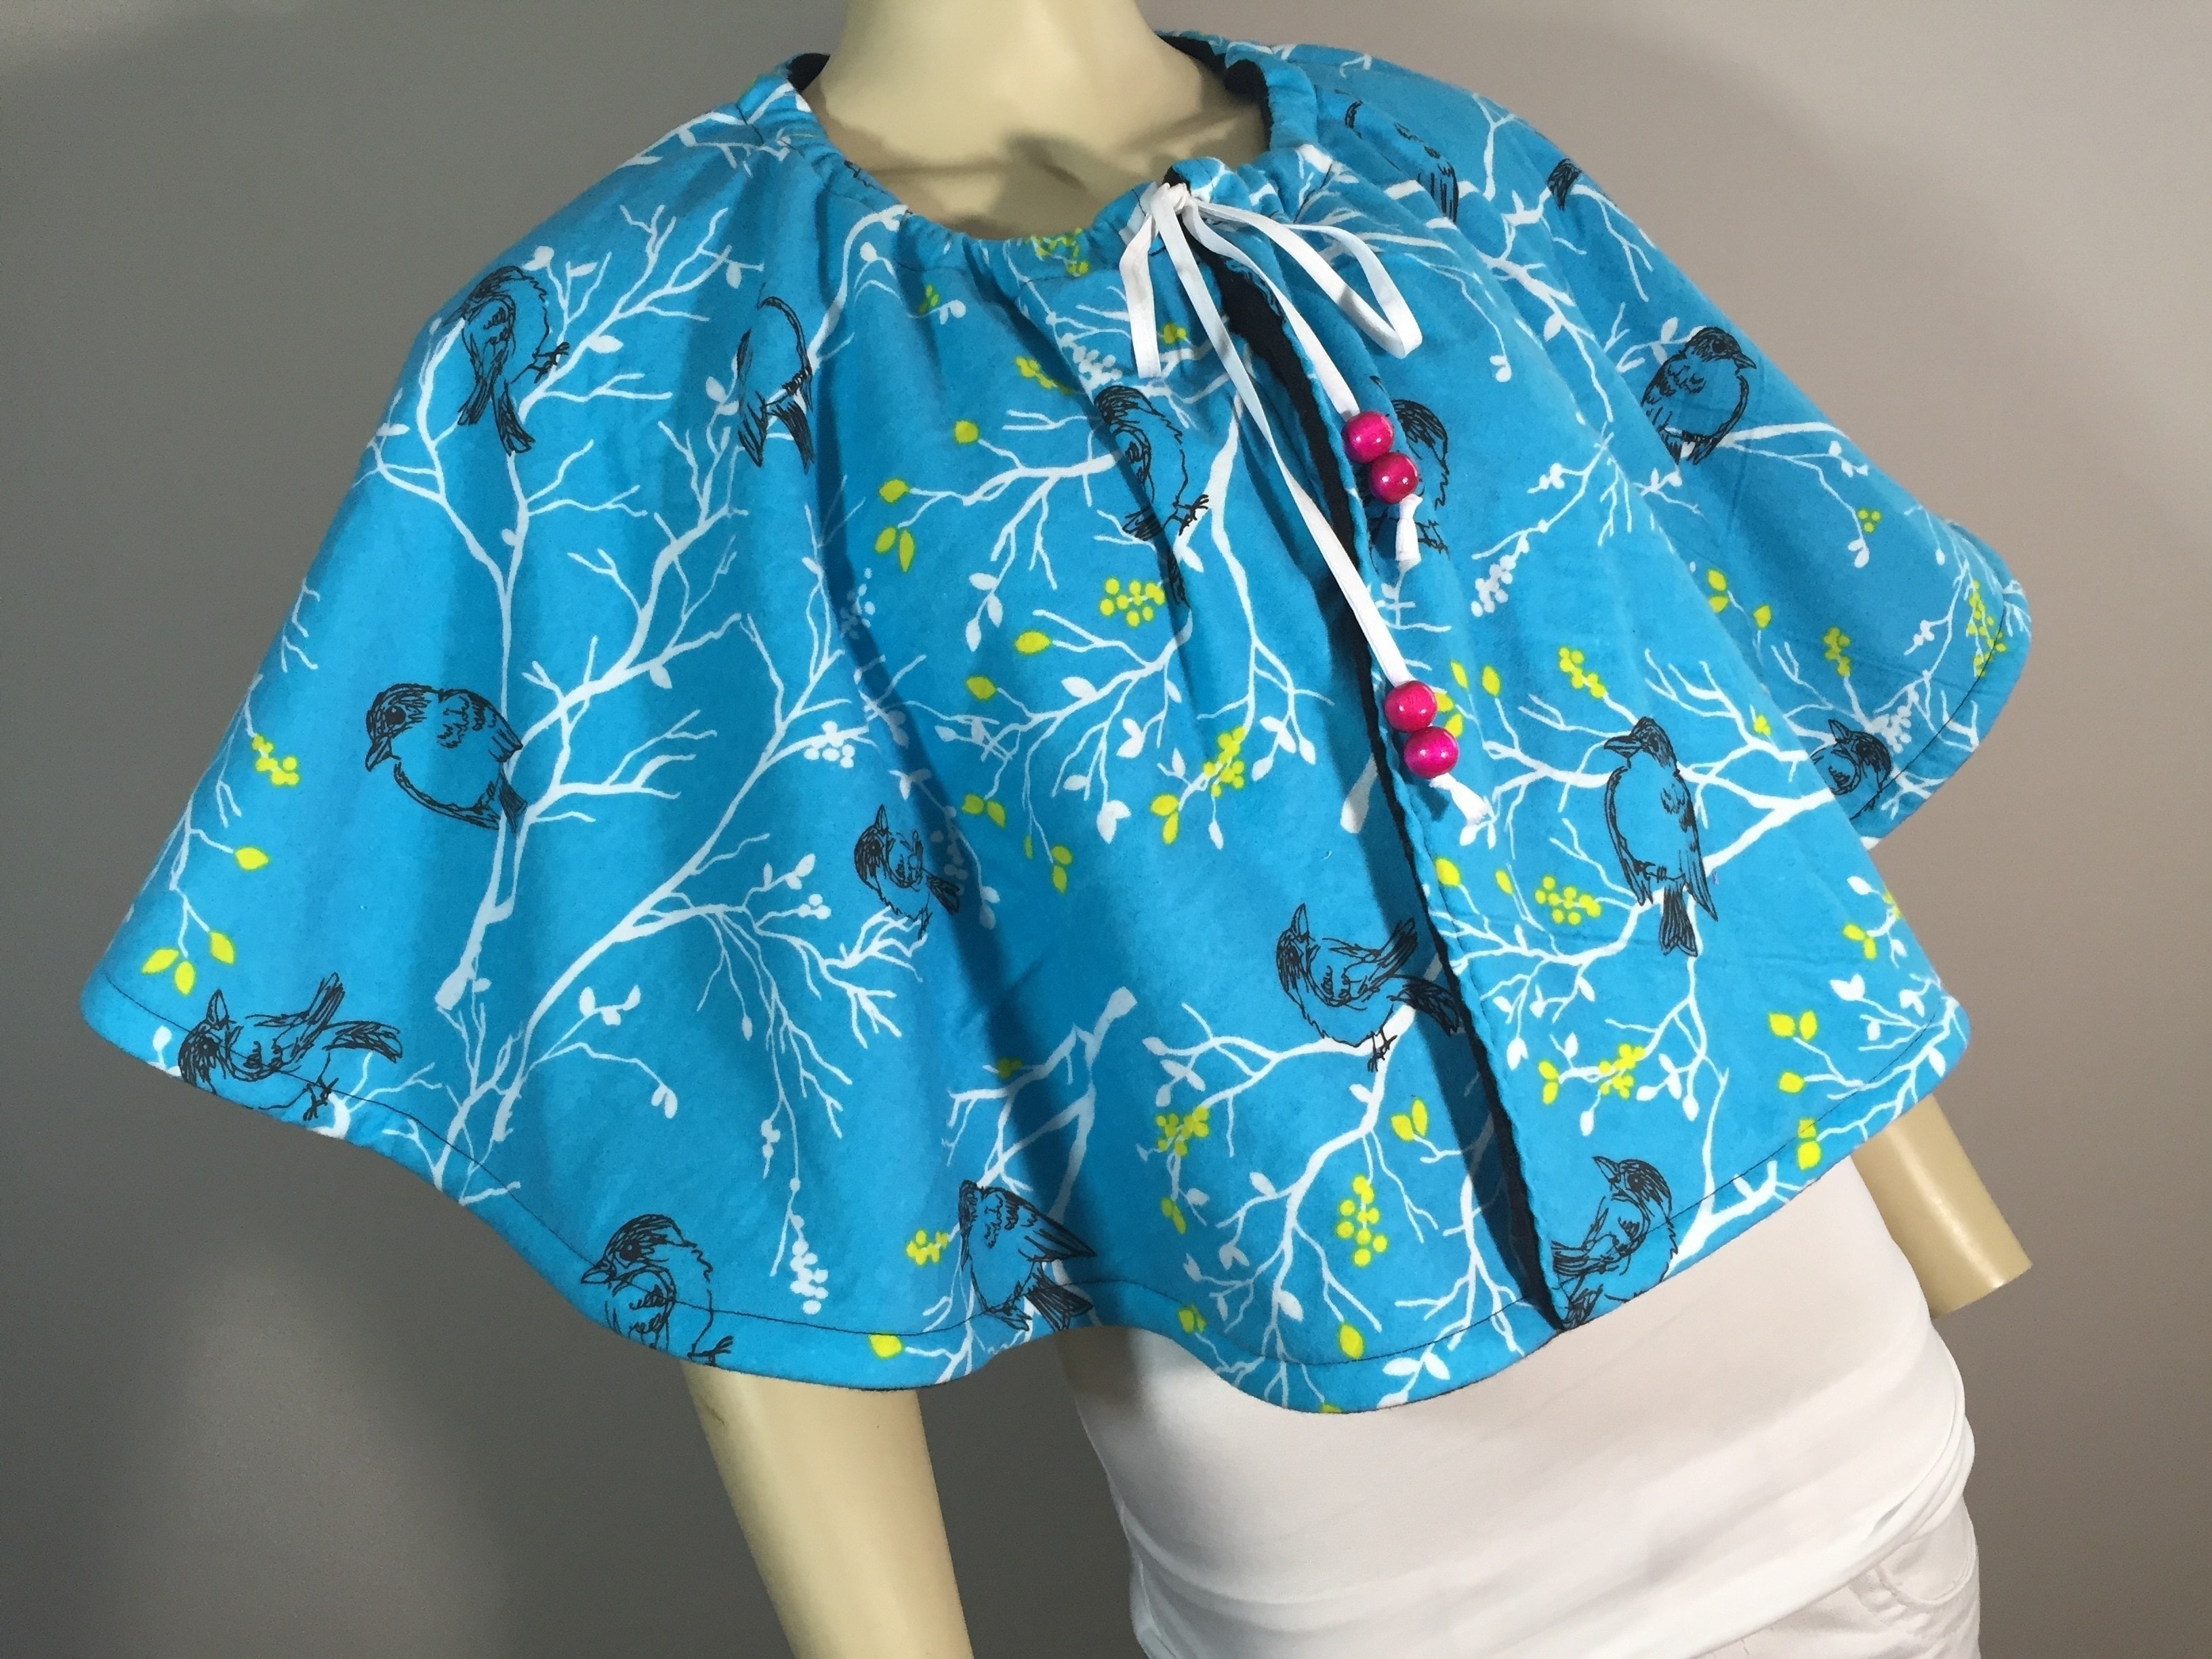
Easy Reversible Drawstring Poncho DIY
This reversible drawstring poncho is simple to make using a circle pattern you make yourself.
-
 Michela T. commented on Reversible Drawstring Cape Sewing Diy
05 Apr 12:13
Michela T. commented on Reversible Drawstring Cape Sewing Diy
05 Apr 12:13
-
 irma o. added Reversible Drawstring Cape Sewing Diy to clothes
16 Aug 00:13
irma o. added Reversible Drawstring Cape Sewing Diy to clothes
16 Aug 00:13
-
 Cheshire favorited Reversible Drawstring Cape Sewing Diy
19 Mar 23:46
Cheshire favorited Reversible Drawstring Cape Sewing Diy
19 Mar 23:46
-
 Brenna B. published her project Reversible Drawstring Cape Sewing Diy
09 Mar 02:37
Brenna B. published her project Reversible Drawstring Cape Sewing Diy
09 Mar 02:37
You Will Need
-
 Step 1
Make the pattern: using newspaper, draw a half circle by holding one end of a measuring tape on one edge of the newspaper and holding a pen with the measuring tape at 21″. Circle around, drawing a half-circle. Do this again at 5″ for the neck hole.
-
 Step 2
Cut the half-circle out of the newspaper and place the pattern with the neck hole on the fold of the fabric. Cut out of fabric and lining
-
 Step 3
On one half of the folded edge, cut from the bottom hem to the neck hole to create the front opening. I cut some of the circle off the edge to reduce the “fullness” of this cape. You don’t need to do this – you can simply cut the cape open on the edge.
-
 Step 4
Open the 2 pieces of fabric and place them right-side-together. Sew the 2 pieces together around the neck hole.
-
 Step 5
Open up the cape. At the raw edge of the neck hole, fold in 1/2″ and sew about 2″ from the seam to 2″ past the seam (to finish off edge where drawstring comes out). Repeat this on the other side.
-
 Step 6
Fold the cape right-sides-together again and sew the bottom edge together. Turn the cape right-side-out (you will have a tube of fabric – just pull through). The front opening will have raw edges on each side.
-
 Step 7
Sew around the neck hole, about 3/4"-1″ from the edge to create the casing for the drawstring.
-
 Step 8
Finish off the raw edges at the front opening: fold the fabric in about 1/2″ on each the outer piece and lining and sew them together – making sure to leave the opening for the drawstring to come out.
-
 Step 9
Topstitch the bottom edge of the cape.
-
 Step 10
Pull the drawstring through: attach a safety pin (or a blunt-end needle) to one edge of the drawstring and push it through the casing of the cape. Add beads to each end of the drawstring and tie a knot on each end.


