


About
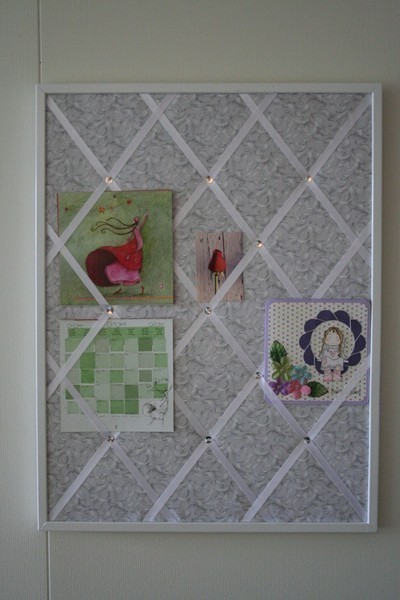
My Ikea cork board was old and getting really ugly. Now it is bright and cheerful!
I like that I no longer have to use pushpins. No more holes in my pictures and cards! The white colour feels much lighter than the natural cork and wood, and fits in much better in my living room. I love it!
I didn't time the project very carefully, but it was quite time-consuming... Fiddly, but not really difficult.
Mine is crisp white, grey and silver, but imagine it in a lovely floral print with vintage buttons... Or bold red and black?
-
 Renee D. added Revamped Cork Boards to DIY Craft Room
04 Oct 04:16
Renee D. added Revamped Cork Boards to DIY Craft Room
04 Oct 04:16
-
Renee D. favorited Revamped Cork Boards
04 Oct 04:16
-
 zoegirl221 favorited Revamped Cork Boards
21 Sep 22:20
zoegirl221 favorited Revamped Cork Boards
21 Sep 22:20
- zombisu favorited Revamped Cork Boards 13 Feb 06:28
-
 Mowdy28 favorited Revamped Cork Boards
26 Jan 15:52
Mowdy28 favorited Revamped Cork Boards
26 Jan 15:52
-
 Chloe V. favorited Revamped Cork Boards
09 Dec 03:57
Chloe V. favorited Revamped Cork Boards
09 Dec 03:57
-
 Belle favorited Revamped Cork Boards
26 Jul 07:32
Belle favorited Revamped Cork Boards
26 Jul 07:32
-
 Step 1
First, separate the cork from the frame. This took me a long time as I had glued them together (a little too well) some time ago...
Paint the frame in whatever colour you like. -
 Step 2
Cut the wadding ca. 5 cm bigger than the cork on all sides. Cut the fabric slightly bigger than that.
Attach the wadding to the reverse side of the cork. I used hot glue so I didn't have to wait for regular glue to dry. Do the same with the fabric.
Stretch the wadding and fabric a little as you attach it, to keep it nice and straight on the front side. Fold the corners and make them as flat as possible.
(The picture shows the reverse side of the finished project - not beautiful, but noone will see it anyway.) -
 Step 3
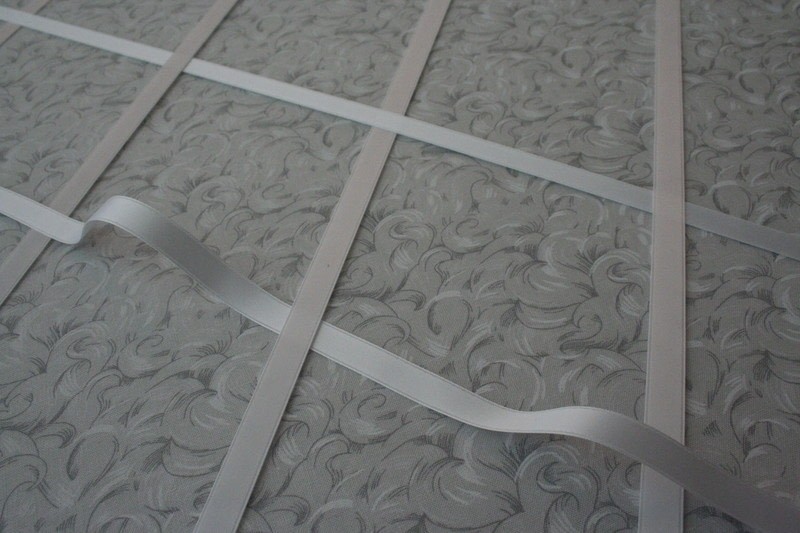
Lay out the ribbon - the easiest way is to start from one corner to the opposite. Glue it to the reverse side of the cork on both ends. Adjust all the other parallel ribbons from this and glue them in place.
I spaced them 10 cm apart, because that looked best. Adjust the spacing to fit your board, but I would say no less than a 10 cm spacing so that there is enough room to insert the cards etc between the ribbons. -
 Step 4
Then repeat the process the other way! Interlacing the ribbon looks good.
-
 Step 5
To hold all the ribbon in the correct position when you start to sew, insert a pushpin in every intersection to secure it in place.
Remove one pushpin at a time when you start to work.I chose to leave the intersections closest to the frame as they were, giving room to bigger cards there. The frame keeps them reasonably stable anyway.
-
 Step 6
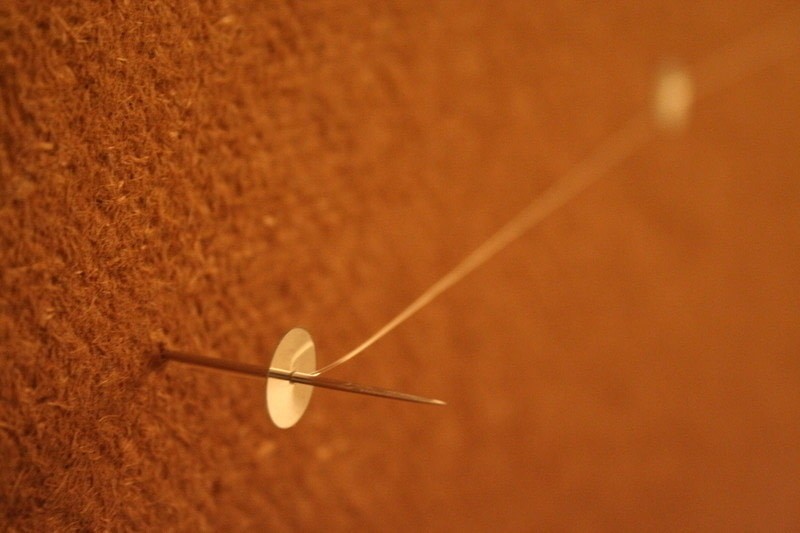
Time to start sewing! If necessary, push a thick sharp needle (no thread) all the way through the fabric, wadding and cork to expand the hole made by the pushpin.
Bring a nylon thread from the reverse side through a sequin first, then the cork/wadding/fabric, a sequin and finally a glass bead. Then bring it back to the reverse side again (sequin, fabric, wadding, cork, sequin). -
 Step 7
The sequin on the reverse side prevents the tight nylon thread from digging into the soft cork!
Repeat this process with every ribbon intersection, tightening the nylon well.
-
 Step 8
Glue the cork and frame back together, and you are done! Cards, post cards, photos, letters and anything you want can simply be slipped into the ribbon.
(And if you should need to, you can still use pushpins...)


 1
Home Accessories »
Diy Jewelry Box
1
Home Accessories »
Diy Jewelry Box
