


About
NYDS TOTE
Styling Tips:
1. Try tie dye-ing the shirts before using them to make the bag!! Could be super funky!
Tags
-
 Tally83 added Pretty Petal Tote to Bags DIY
18 Feb 22:11
Tally83 added Pretty Petal Tote to Bags DIY
18 Feb 22:11
-
 Kim.Marie favorited Pretty Petal Tote
13 Aug 07:35
Kim.Marie favorited Pretty Petal Tote
13 Aug 07:35
-
 Amy M. added Pretty Petal Tote to The Great Gatsby
15 Apr 15:10
Amy M. added Pretty Petal Tote to The Great Gatsby
15 Apr 15:10
-
 jasmine.thompson.98499 favorited Pretty Petal Tote
04 Dec 01:11
jasmine.thompson.98499 favorited Pretty Petal Tote
04 Dec 01:11
-
 Heather V. added Pretty Petal Tote to Badass Stuff
11 Nov 03:53
Heather V. added Pretty Petal Tote to Badass Stuff
11 Nov 03:53
-
 lauren.ostoich added Pretty Petal Tote to favorite crafts
07 Sep 16:37
lauren.ostoich added Pretty Petal Tote to favorite crafts
07 Sep 16:37
-
lauren.ostoich favorited Pretty Petal Tote
07 Sep 16:36
-
Marcela A. added Pretty Petal Tote to Bags
06 Sep 06:16
-
 mizukixinoue added Pretty Petal Tote to Bolsinhas
24 Jul 17:10
mizukixinoue added Pretty Petal Tote to Bolsinhas
24 Jul 17:10
-
mizukixinoue favorited Pretty Petal Tote
24 Jul 17:10
-
 Step 1
Gather materials and plug in your glue gun.
-
 Step 2
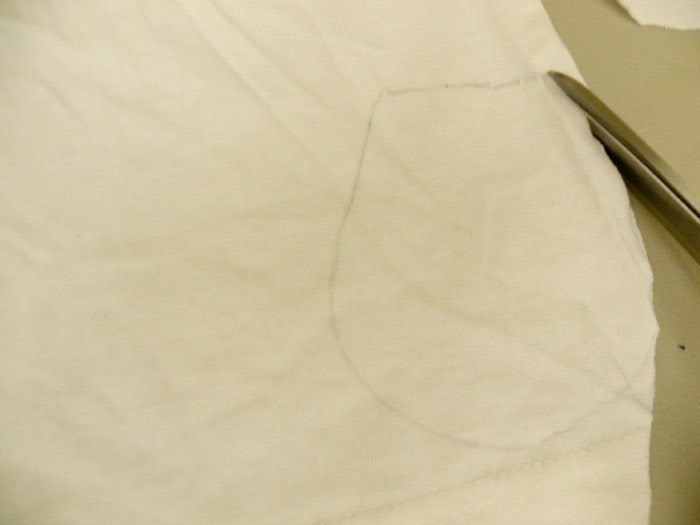
Lay the tee flat on a good work surface. Draw the shape shown on the tee with a pencil. It should resemble a petal.
-
 Step 3
Cut out the shape through both layers of the tee.
-
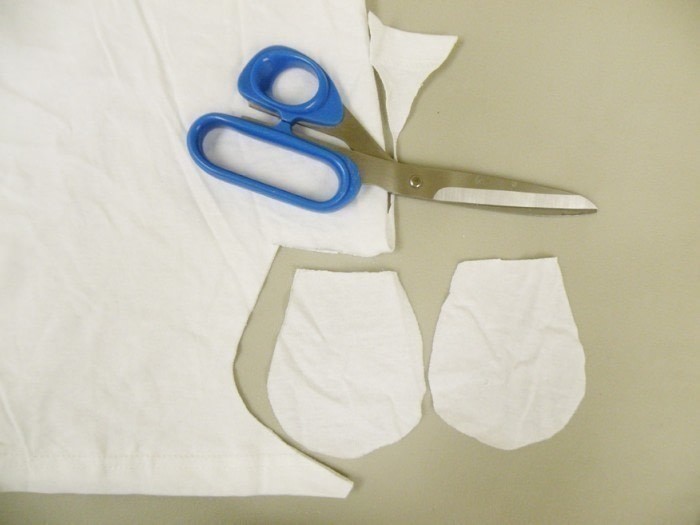
 Step 4
Now you have 2 petals! A long way to go...
-
 Step 5
Lay one petal on the tee and cut around it.
-
 Step 6
Continue to develop a stack of petals. This stack is going to be huge! You might want to fold the tee shirt several times and cut the petals out several at a time. You'll need a very sharp scissor to get through more than a couple of layers.
-
 Step 7
Keep all scraps!
-
 Step 8
Cut as many petals as you possibly can out of the 2 XL tee shirts. Our stack looked like this...
-
 Step 9
Line the tote with cardstock, cardboard or paper.
-
 Step 10
Place a few petals down just to get a feel of how you want to glue them. Each new petal should go on top of and in the middle of the ones beneath it. There really is no rhyme or reason, it'll look great anyway you do it.
-
 Step 11
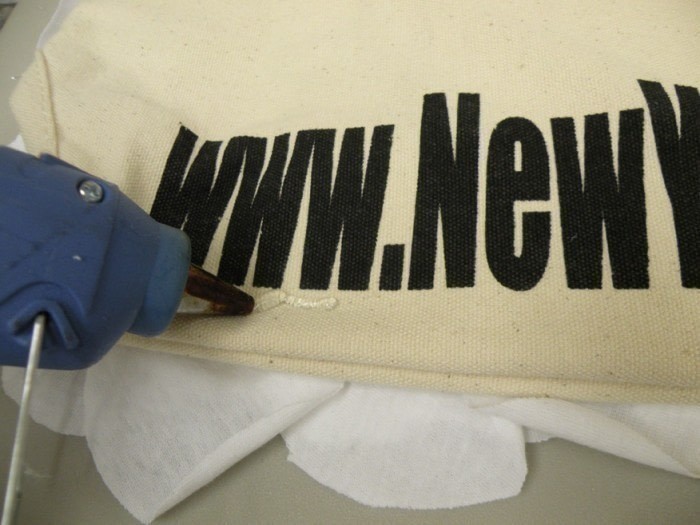
Start on the bottom corner. Place a line of hot glue towards the bottom of the bag.
-
 Step 12
Continue petaling...
-
 Step 13
Now you can start to see what the tote will look like.
-
 Step 14
Continue...
-
 Step 15
Make sure to cover the side seams :)
-
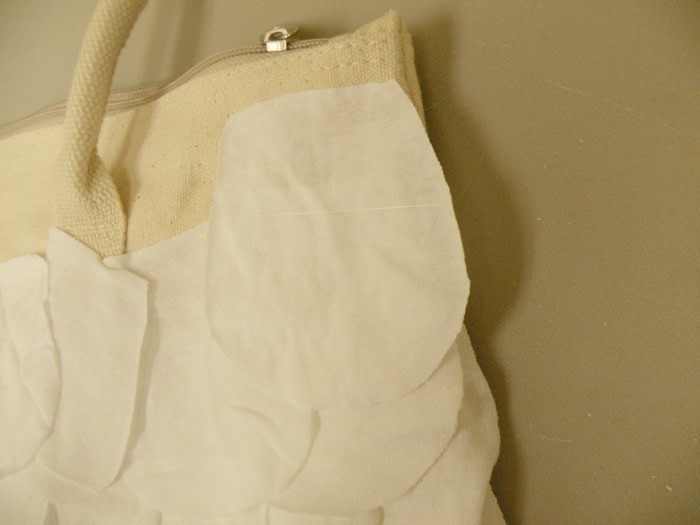
 Step 16
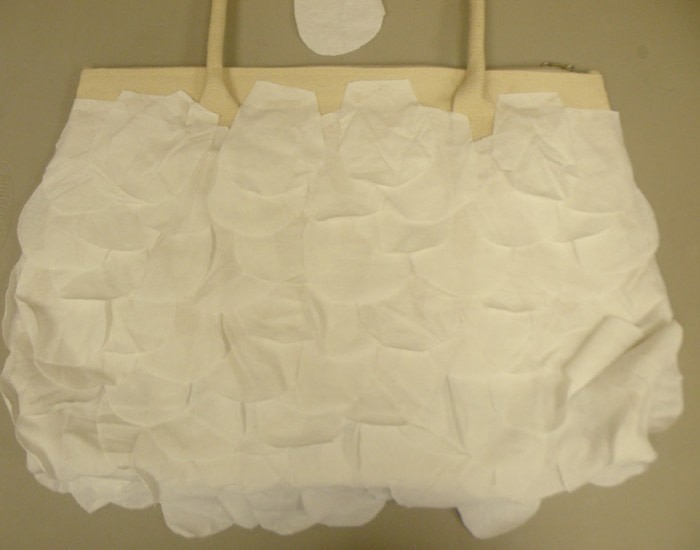
Continue gluing petals until you have almost reached to top of the tote.
-
Step 17
To make sure it looks nice, place a line of glue at the cris cross on the handle of the tote. Lay the top of a petal on the line of glue, and smush the top of the petal in so it gathers around the tote handle.
-
 Step 18
Now that the front of the bag is covered, fold down the handles, and pull out the rhinestone trim.
-
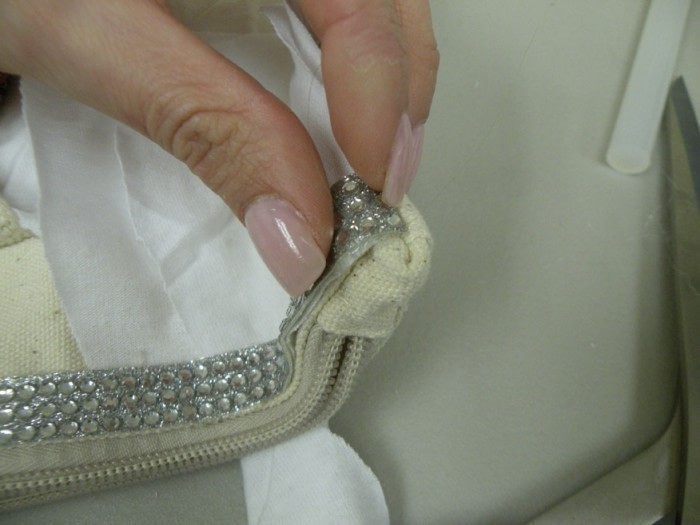
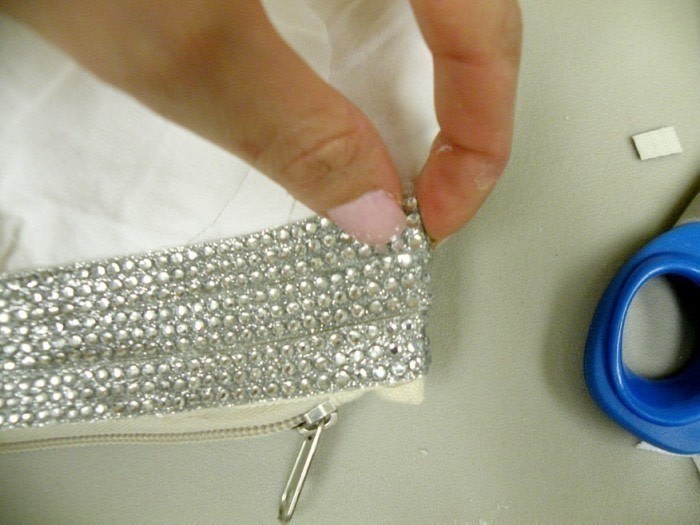
 Step 19
Measure from seam to seam with the rhinestone trim and cut 3 identical pieces. Leave an extra inch of space on each just in case :)
-
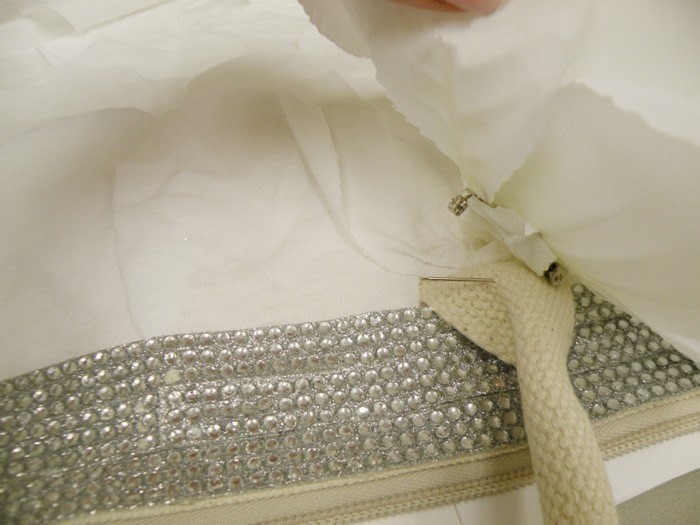
 Step 20
Glue them down starting at one seam. Make sure to hold the ends securely until they are dry. Place lines of glue on the tote where the trim will go. The trim can be ironed on as well, but we prefer hot glue for this project.
-
 Step 21
Gluing...
-
 Step 22
Cut off any extra trim at the end and save it!
-
 Step 23
Repeat with the other rhinestone trim strips.
-
 Step 24
Here is a photo of the front of the bag, all done! It's great because one XL tee by Hanes covers one side of the bag! That's why we got two tees...time to start on the back!
-
 Step 25
We happened to spill coffee on our tote this morning, which makes this project even more perfect!! LOVE covering up stains :)
-
 Step 26
You know the drill...
-
 Step 27
Cover this side of the bag just like the front.
-
 Step 28
Add the rhinestone trim...
-
 Step 29
Finish it off!
-
 Step 30
Pick out a flower or a pin to add some umpf! Not that it needs it... This step is optional**
-
 Step 31
Pin the flower onto the handle of the tote.
-
 Step 32
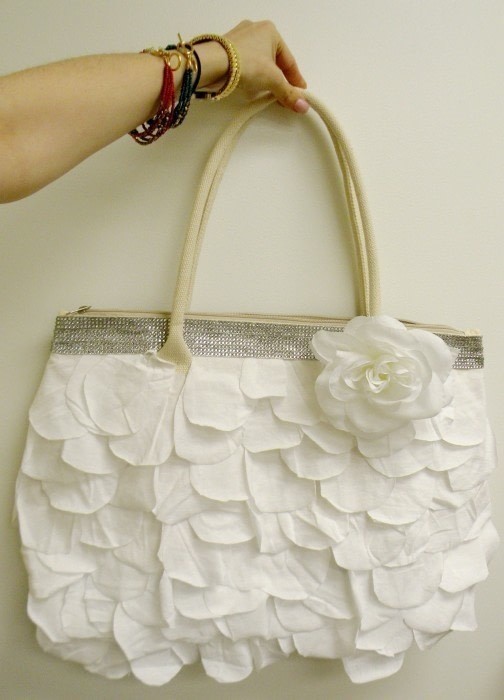
And finally.......ALL DONE!!!!!!


 1
Home Accessories »
Diy Jewelry Box
1
Home Accessories »
Diy Jewelry Box

It all works so well together.
We spent about an hour just cutting out the petals and then another 2 gluing the petals and the trim onto the bag.
CO + K User