


About
Folded Book Art
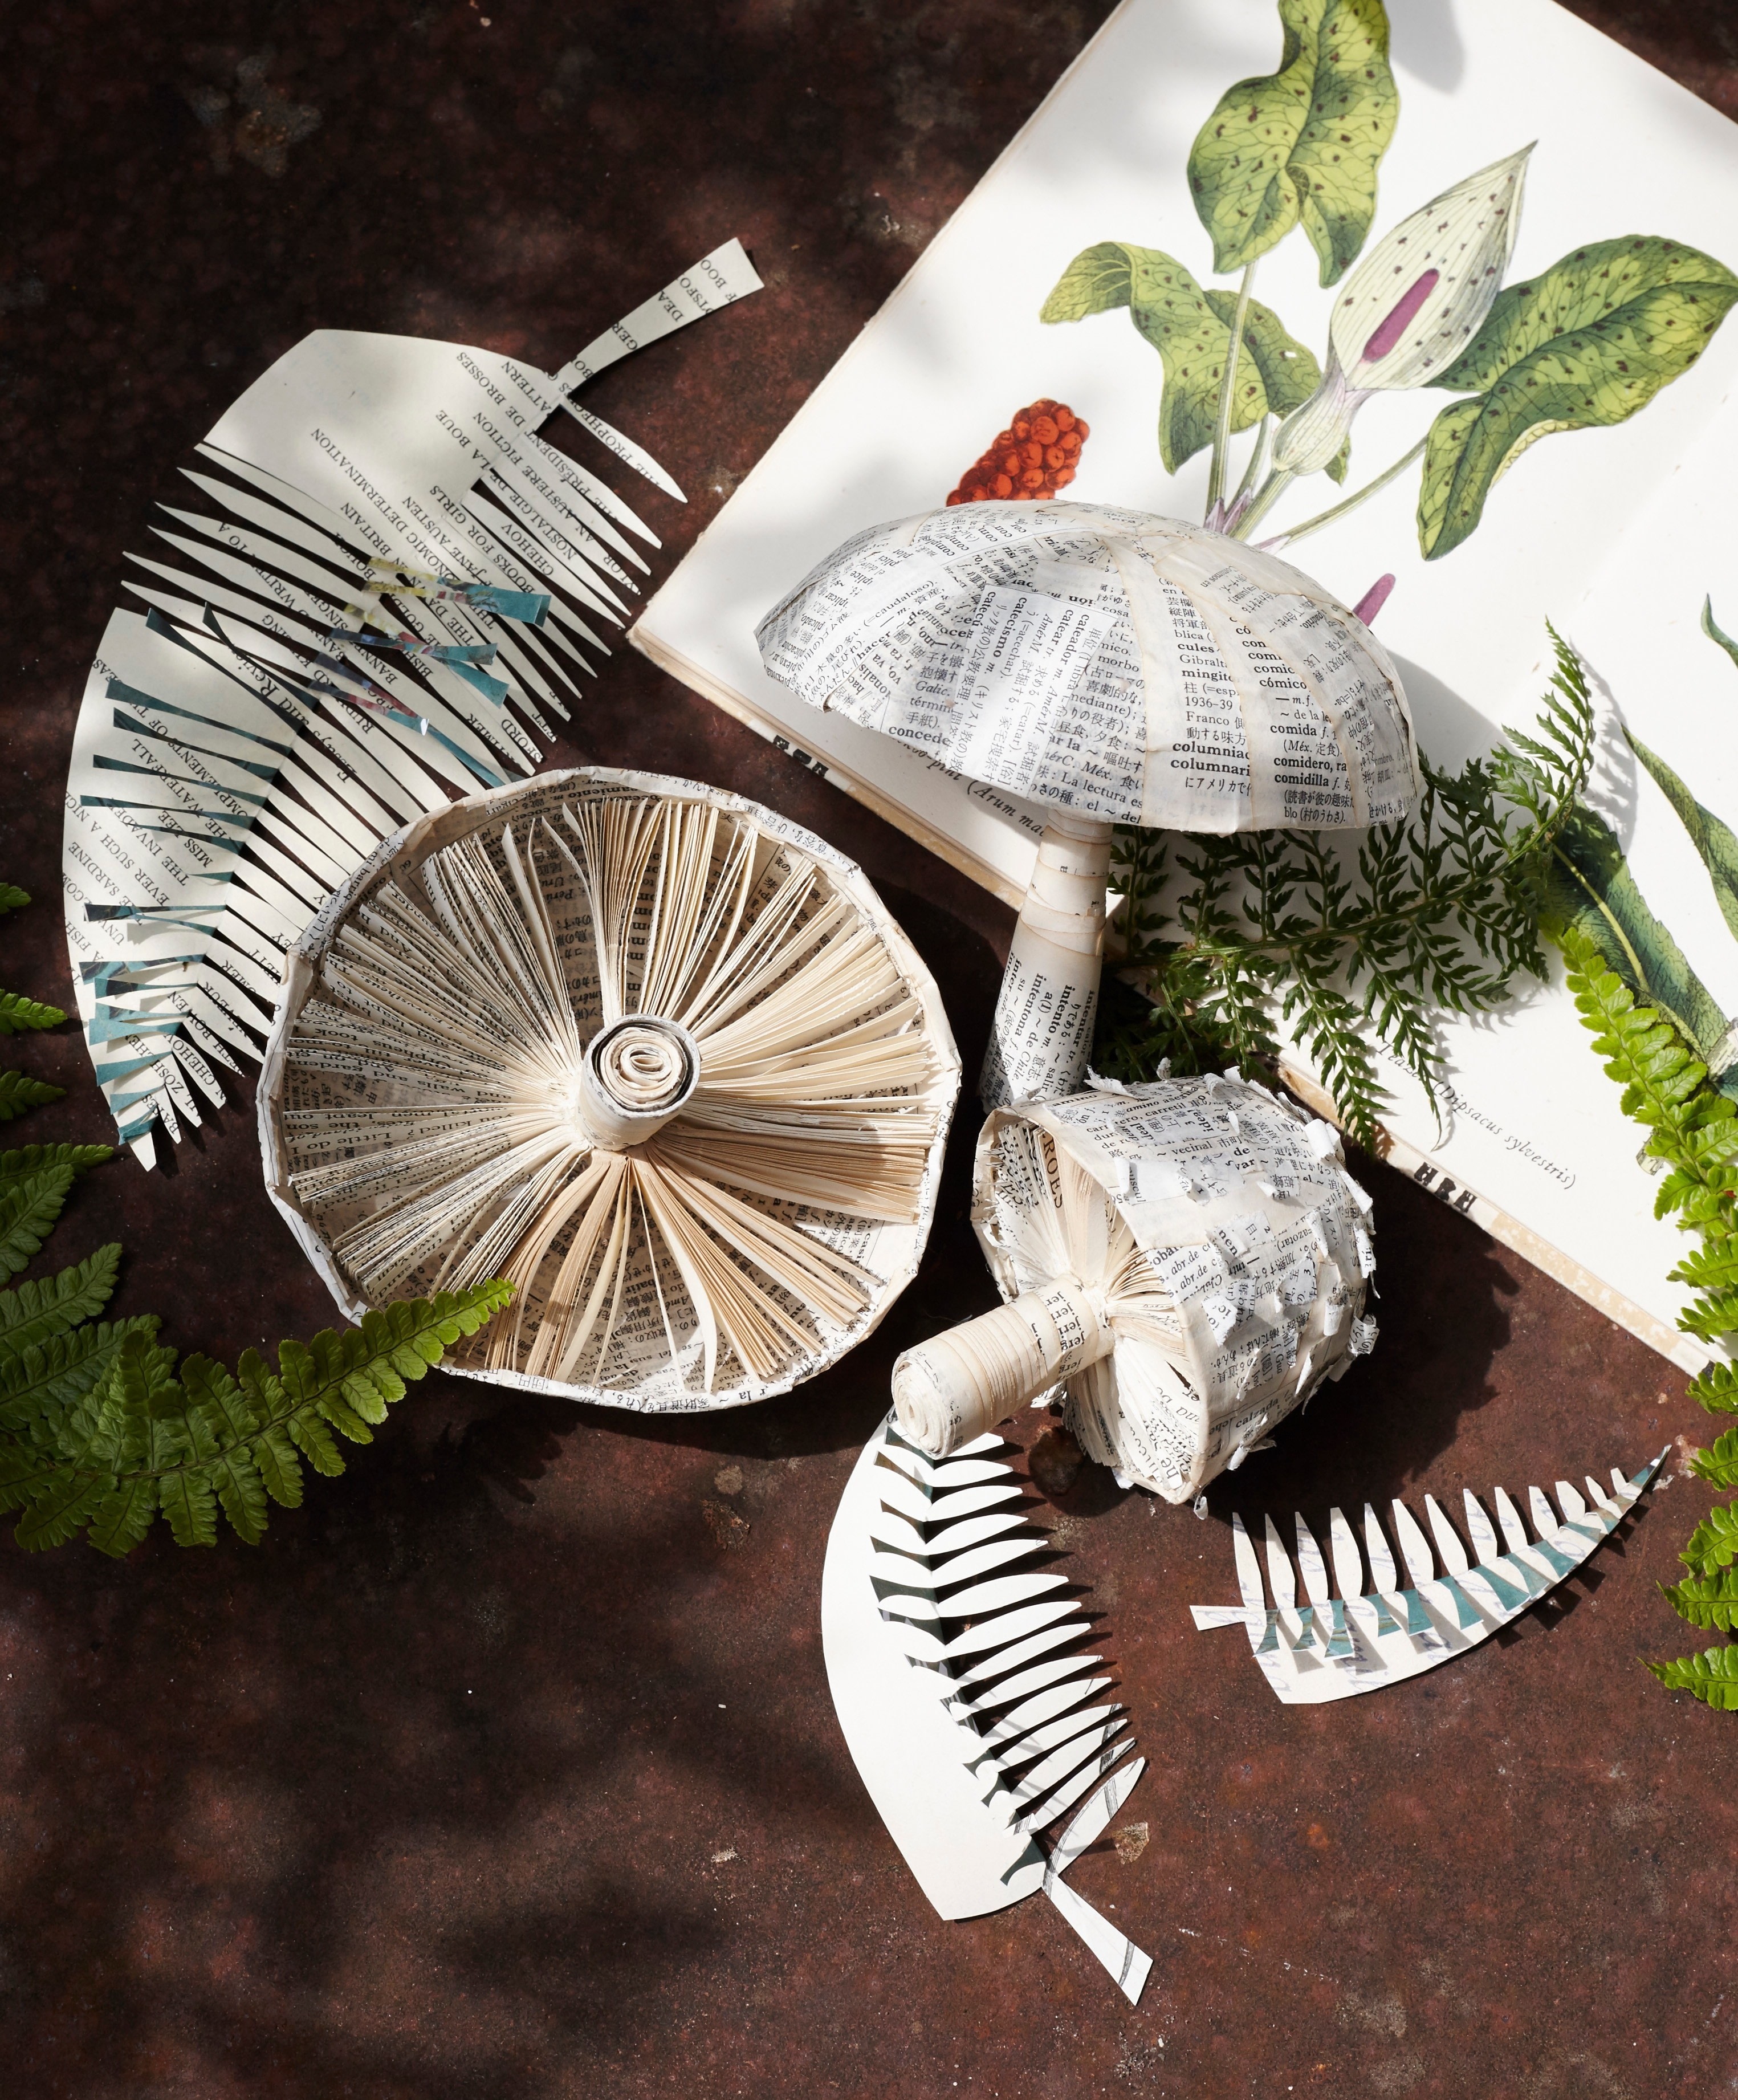
When I started planning the projects for this book, I thought I would like to make some paper mushrooms. I knew it would be a challenge, but also that it would make a lovely and unusual project.
It worked out better than I could imagine. I like the way the fanned-out pages make the underside of the mushroom, and even the discolored pages of the old book have the right feel to them.
Tags
Downloads
- 2017-11-08-160328-mushrooms+and+ferns+template.eps 2.11 MB [ Download ]
-
 Lacquered Lawyer favorited Mushrooms & Ferns
15 Feb 05:11
Lacquered Lawyer favorited Mushrooms & Ferns
15 Feb 05:11
-
 Angelshimmery favorited Mushrooms & Ferns
18 May 21:05
Angelshimmery favorited Mushrooms & Ferns
18 May 21:05
-
 Mikayla B. favorited Mushrooms & Ferns
08 Sep 02:31
Mikayla B. favorited Mushrooms & Ferns
08 Sep 02:31
-
christina p. favorited Mushrooms & Ferns
04 Mar 17:33
-
 JadeSucksAtLife favorited Mushrooms & Ferns
25 Feb 10:09
JadeSucksAtLife favorited Mushrooms & Ferns
25 Feb 10:09
-
 Anneke T. favorited Mushrooms & Ferns
13 Feb 10:47
Anneke T. favorited Mushrooms & Ferns
13 Feb 10:47
-
 Jennifer P. favorited Mushrooms & Ferns
07 Feb 16:49
Jennifer P. favorited Mushrooms & Ferns
07 Feb 16:49
-
 Pam favorited Mushrooms & Ferns
17 Dec 20:52
Pam favorited Mushrooms & Ferns
17 Dec 20:52
-
 Crafterella featured Mushrooms & Ferns
19 Nov 23:00
Crafterella featured Mushrooms & Ferns
19 Nov 23:00
-
 Ruby Autumn favorited Mushrooms & Ferns
18 Nov 19:40
Ruby Autumn favorited Mushrooms & Ferns
18 Nov 19:40
-
 Step 1
Cover one of your round objects with plastic wrap, pulling it as smooth as you can. Cover with a layer of petroleum jelly.
-
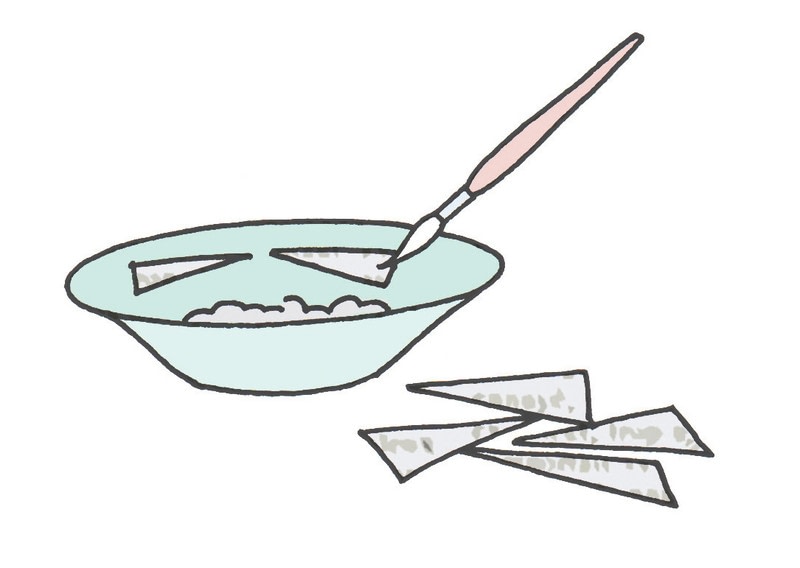
 Step 2
In a bowl, mix some PVA glue with a little water, to make a thin solution. Cut some pages from your book into triangles measuring 11⁄2in. (3–4cm) in length and 3⁄4in. (2cm) across the base. Brush one triangle with the glue solution, so that it is soaked through. Position the triangle on the wrapped ball, placing the thin top of the triangle at the top of the ball.
-
 Step 3
Work around the ball, overlapping triangles of gluesoaked paper, until you have covered enough of the ball to make a mushroom shape. Add another two layers of paper to make it nice and sturdy once dry. Leave this to dry.
-
 Step 4
Make the stalk. Cut out a rectangle of paper however long you want the stalk to be. My large mushrooms were 4in. (10cm) across and 11⁄2in. (4cm) to the top of the dome. I made my stalk 4in. (10cm) in length. Roll the rectangle of paper into a tight tube shape. Add more rectangles of paper, until the tube is 1⁄2in. (1cm) thick, gluing the edge down when you have finished rolling.
-
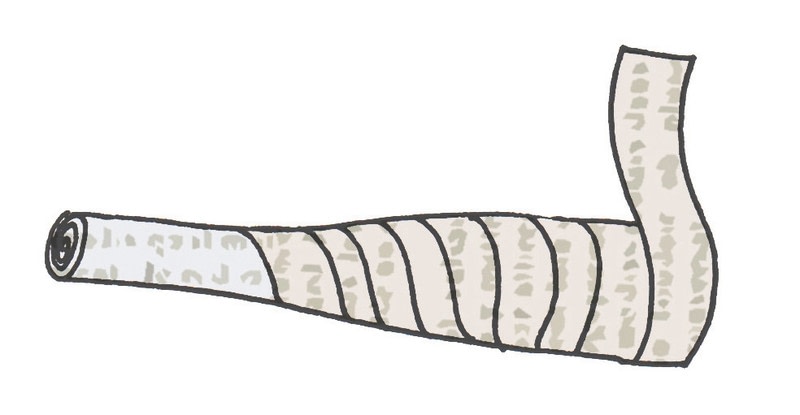
 Step 5
Cut some strips of paper that are 3⁄4in. (2cm) in width. Glue and wind the strips around the stalk, starting about 2in. (5cm) down from the top of the tube. Continue winding strips around this section of the tube to thicken the bottom of the stem.
-
 Step 6
Once the mushroom shape is dry, ease it off the ball. Trim the edges if you need to and fold in 2–3mm all around the rim.
-
 Step 7
Glue the stalk to the center of the inside of the mushroom. You need strong, quick-drying glue for this.
-
Step 8
Making the fanned-out underside of the mushroom takes a little guesswork. You are going to cut a section of pages from one corner of the old book, with a spine width of about 1⁄3in. (10mm). Measure the distance from the stalk to the inner edge of the mushroom and mark this measurement from the top edge of the book, down the spine. Mine measured 13⁄4in. (4.5cm).
-
 Step 9
Now mark the stem at a point that is level with the edge of the mushroom, just below the rolled-over section. Measure from this point down to the base of the mushroom. On the book, mark this point along the top edge of the page, from the spine. You will now have two marks—one on the spine and one along the top edge of the page. Join up the two points with a curved line, as shown.
-
 Step 10
Cut this section out and place it inside the mushroom, with the pages fanning out around the stem. If the curve is too big, you can trim it a bit. You can also trim off the ends of the pages, for a better fit.
-
 Step 11
Once you are happy with the shape, use this as a guide to cut more sections until you fill the mushroom shape completely. Stick the spine sections to the mushroom stalk. You can still trim a little to improve the fit.
-
Step 12
Follow Steps 1 to 11 to make a smaller mushroom using your second round shape.
-
 Step 13
For the smaller of the mushrooms, I tore little pieces of paper and stuck them to the outside of the mushroom, to give it the textured appearance that some species have.
Simply glue the tip of the torn bit of paper and curl the opposite edge. -
 Step 14
To make the ferns, trace out the template and transfer it on to a page from your book. I used a piece of paper that was pale on one side and dark on the other, to show a lovely contrast. Cut out the shape using a craft knife and protecting your work surface with a cutting mat. Bend back the leaf sections. Enlarge or decrease the template to make different size ferns.