Mosaic Effect Block Print
Extract from Block Print for Beginners • By Young, Elise • Published by Quarto


About
Block Print for Beginners
There are several techniques you can use to create multicolored prints on a single surface. In this project, we’ll explore creating a print with multiple textures, which can be achieved relatively easily without going through a complicated registration process. In printmaking terms, this technique is called chine-collé. It involves adding different papers in varying textures on the original base paper. Usually, lightweight and delicate papers are used, which can bring some transparency to the finished product. These paper pieces can fill the space of an object or be used as the background. Materials that work well for chine-collé include tissue papers, thin origami papers, and even thin fabrics.
-
 Crafterella featured Mosaic Effect Block Print
22 Apr 23:00
Crafterella featured Mosaic Effect Block Print
22 Apr 23:00
-
 C.J. M. added Mosaic Effect Block Print to Printing
21 Apr 13:47
C.J. M. added Mosaic Effect Block Print to Printing
21 Apr 13:47
-
C.J. M. favorited Mosaic Effect Block Print
21 Apr 13:46
-
 Aurum Press published her project Mosaic Effect Block Print
21 Apr 09:00
Aurum Press published her project Mosaic Effect Block Print
21 Apr 09:00
You Will Need
-
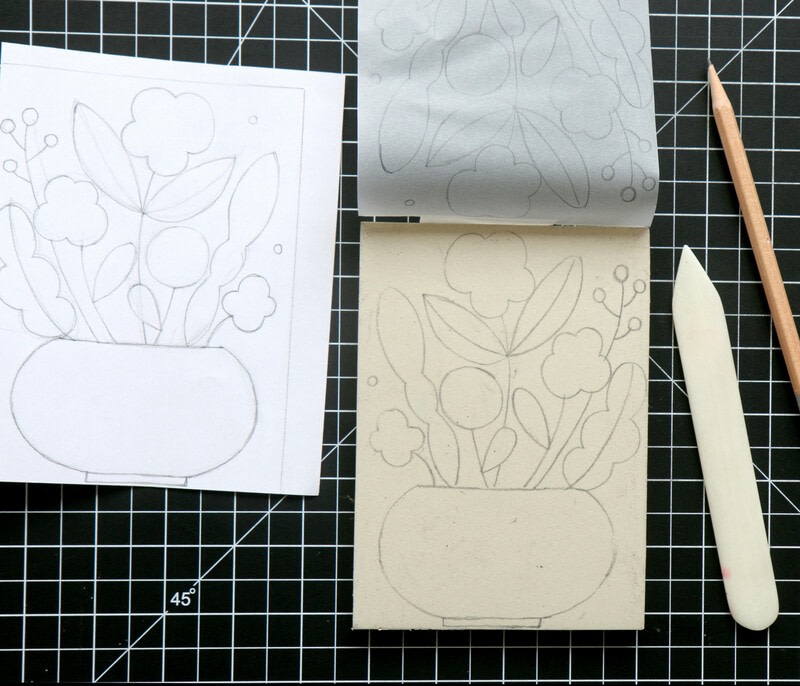
 Step 1
Start by creating your sketch on drawing paper with a soft-lead pencil. Keep in mind that for this project, the inside of the object will be filled with paper materials, so only the outlines should remain after carving. Once you have finalized the design with clean and accurate lines, cut a sheet of tracing paper to the same size as the sketch. Place the tracing paper on the original and trace the image, using masking tape on the corners to keep the papers in place. Place the tracing paper on the prepared carving block and carefully rub over the traced design with a bone folder, following each detailed line.
-
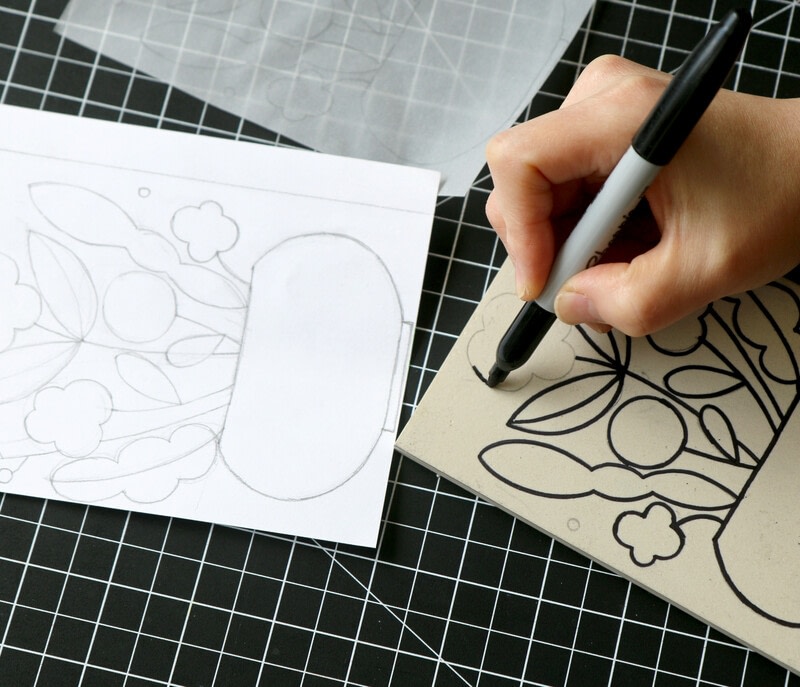
 Step 2
Since this block will be carved as a positive-space design, add bold and even lines over the traced outlines with a permanent marker. This will help you achieve more consistent lines throughout the carving process.
-
 Step 3
Start by carving with the finest V-shaped gouges inside the outlines. It’s important to keep the lines consistent, with similar thickness, during the carving process. After carving the outlines, move on with your U-shaped wide gouges to finish carving the design.
-
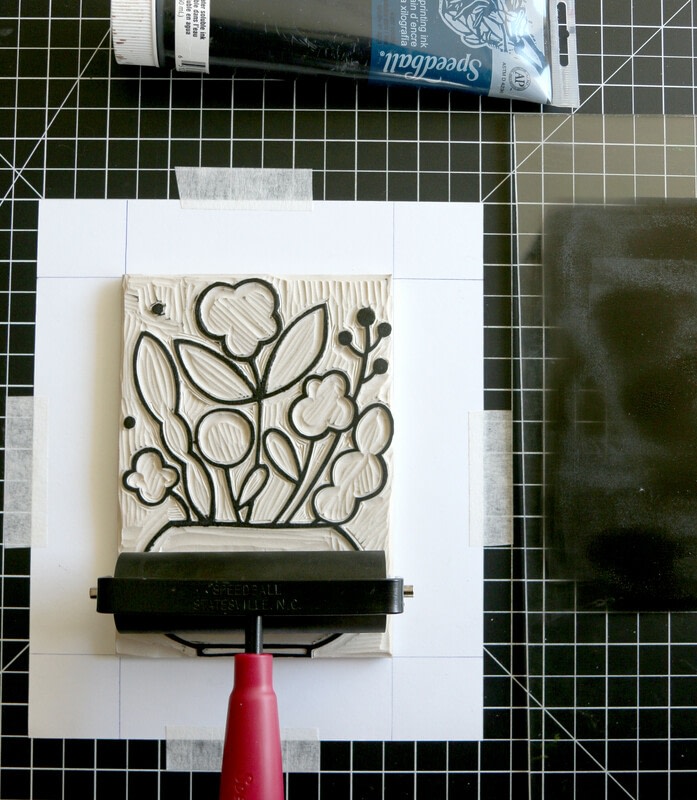
 Step 4
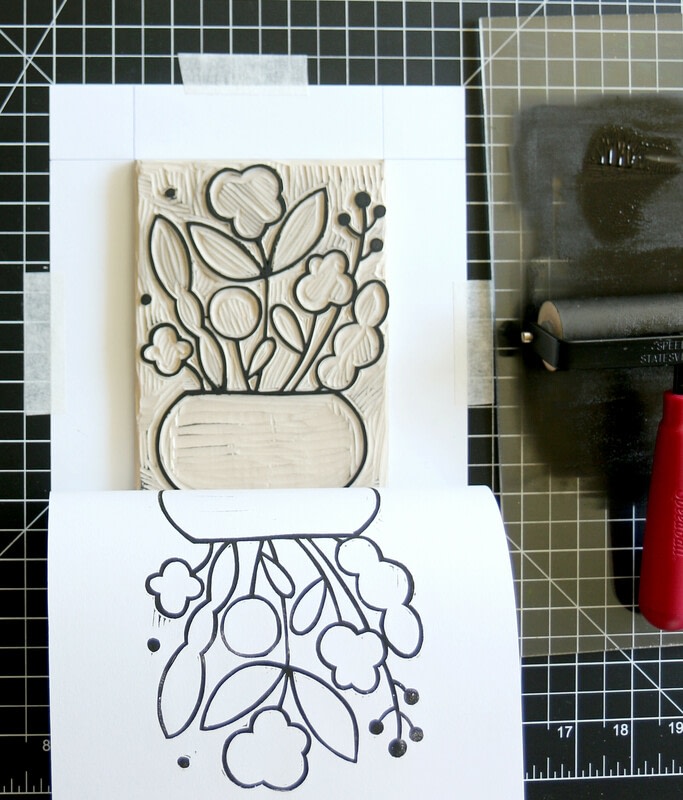
Once you finish carving the block, prepare for the inking process. Ensure every surface is clean and dust-free, and then apply a small amount of ink to the inking plate. Coat the brayer with a thin, even layer of ink, and then gently roll it on the block to ink the design. Carefully line up a sheet of kraft paper, trimmed to the size of the block, on the carved block. Use a wooden spoon to burnish the back of the paper thoroughly. Kraft paper is quite thick, so it’s important to press firmly. Pull the paper off. If you are satisfied with the result, let it dry before cutting the pattern for the final print.
-
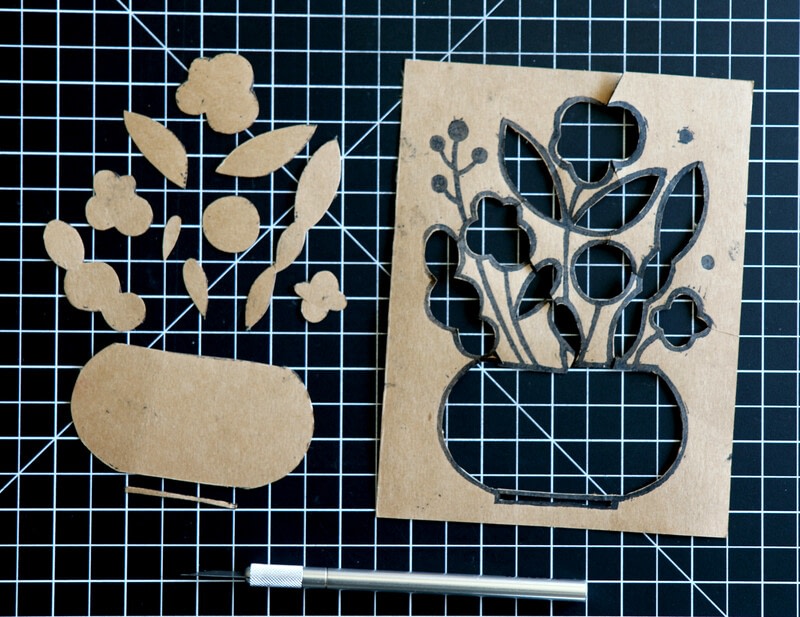
 Step 5
Using a sharp craft knife, carefully cut out each shape inside the printed area. It’s important to make clean lines inside, not outside, the printed area. Otherwise, the patterns for your collage will cover the printed lines when you place them over the final print.
-
 Step 6
Place the cut-out shapes on various origami papers. Trace the shapes with pencil and cut out each element with a craft knife or scissors. When all the shapes are ready, try them out on the kraft paper to check the visual balance before the final printing process. If you’re unhappy with any element of the design, try a different pattern or color for that shape.
-
 Step 7
Prepare for inking and printing by making a simple registration board with a sheet of blank board paper. Use the carved block to draw registration lines on the base board for all sides of the block. Apply ink to the inking plate, evenly coat the brayer with ink, and apply the ink evenly to the carved block.
-
 Step 8
Carefully line up the printing paper, starting with the bottom corner, and lay it on the inked block. Use a baren and wooden spoon to burnish the back side of the paper. Once you are satisfied with the ink transfer, slowly pull the paper from the block. Set aside to dry before applying adhesive to the surface.
-
 Step 9
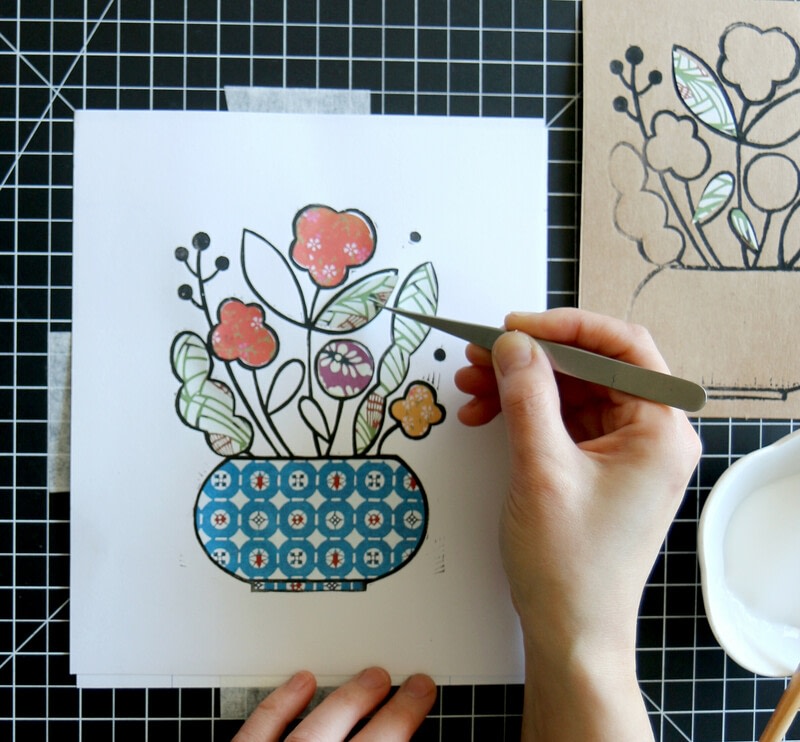
Once dry, begin pasting the origami paper pieces. Use a paintbrush to apply a small amount of glue to the back of each shape. It’s important to apply a thin coat so the papers don’t warp. Pointed tweezers are a helpful tool for getting a tiny edge of origami paper to settle onto the print.
-
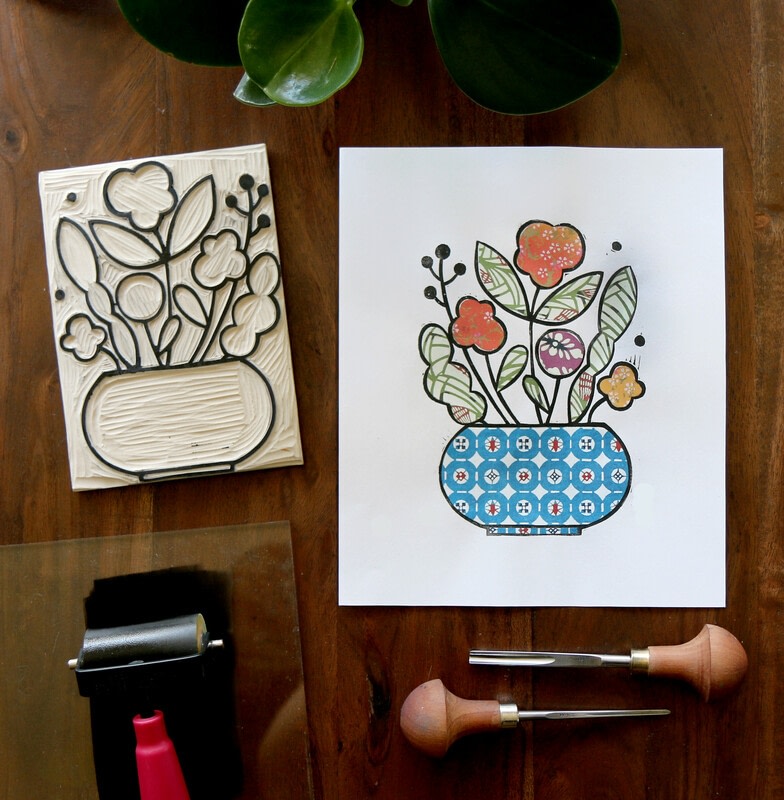
 Step 10
Once all the shapes have been applied, allow the adhesive to completely dry. Feel free to try making additional editions with papers of different textures and colors.
Tip:
You can also choose to simply print the design on a patterned sheet of paper for another variation.