About
a beautiful place to hold small jewels
Whether you are newly engaged or have been married a while (or just have a special piece of jewelry!), trinket dishes are inexpensive, beautiful and fun to make. Make our DIY engagement ring bowl for yourself or as a gift for someone else. So practical and pretty!
Tags
-
 Super Shanimal favorited Marbled Ring Dish
23 Aug 02:52
Super Shanimal favorited Marbled Ring Dish
23 Aug 02:52
-
 RareJewel favorited Marbled Ring Dish
23 May 07:49
RareJewel favorited Marbled Ring Dish
23 May 07:49
-
 Pam favorited Marbled Ring Dish
05 Mar 07:25
Pam favorited Marbled Ring Dish
05 Mar 07:25
-
 markus.paulsson favorited Marbled Ring Dish
23 Feb 23:00
markus.paulsson favorited Marbled Ring Dish
23 Feb 23:00
-
 JadeSucksAtLife favorited Marbled Ring Dish
19 Feb 20:44
JadeSucksAtLife favorited Marbled Ring Dish
19 Feb 20:44
-
 Jennifer P. favorited her project Marbled Ring Dish
03 Feb 13:18
Jennifer P. favorited her project Marbled Ring Dish
03 Feb 13:18
-
Jennifer P. published her project Marbled Ring Dish
02 Feb 09:00
You Will Need
-
 Step 1
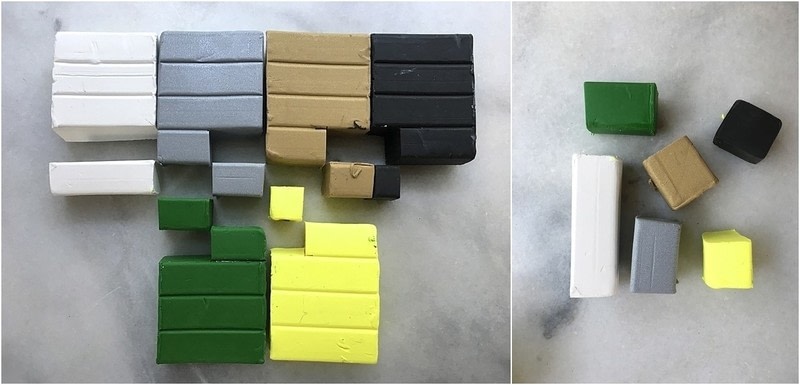
Here are your supplies!
-
 Step 2
First, decide how much of each clay color you’d like to use. The clay comes with striations for easy cutting, and for this dish, I used:
One full stripe of white clay
Half stripe of gray clay
Half stripe of beige clay
Quarter stripe of black clayI like a more natural look for the bowls, so I like to concentrate on the more neutral colors as the bulk of the clay. Then for this bowl, I added in the following colors:
Half stripe of green clay
Quarter stripe of yellow clay -
 Step 3
After portioning the clay, I then used the “snake” method of rolling clay in my hands – you know, the one we all learned in preschool? It’s kind of fun, actually! I randomly created segments of about the same length and laid them out. Once laying them out, I squished them together and then twisted them. This is a process, and the more you twist, the more “marbled” your bowl will look. I suggest doing this 2-3 times, and once you are done, you can roll the whole bit of clay up into a ball.
-
 Step 4
Ball of clay - now flatten it out on a surface covered in wax paper.
Use a rolling pin or round object to flatten out the clay to be about 1/4″ thick. Depending on the size dish you’d like, use a cookie or biscuit cutter (or another object) to press out a circular shape in the rolled out clay.
-
 Step 5
This next part was a bit hard to photograph, but basically, take the existing bowl and use it as a template for your own dish. Depending on the one you choose, you can use the inside or outside of the bowl as a guide.
You can also try to freehand your dish. If you want to bake the bowl in the oven along with your clay, please be certain that it is made of a substance that can withstand oven temperatures.
-
 Step 6
Then, bake your bowl!
The clay recommends baking at 275 degrees F for 15 minutes per 1/4″ thickness of clay. Do preheat your oven, and do not over bake.
-
 Step 7
Once your bowl is finished, let it cool, and finish off the edges with your metallic paint. I LOVE how this looks – it really gives it a polished edge worthy of your engagement ring.
-
 Step 8
I LOVE how this looks – it really gives it a polished edge worthy of your engagement ring.