


About
juicy desk DIY makeup
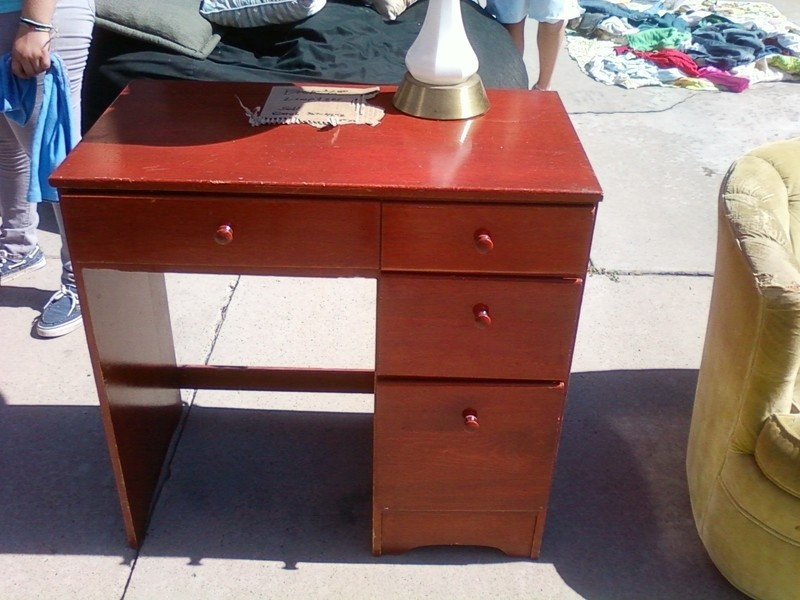
ok, so i LOVE makeup and have collected a lot, so much that i needed a vanity! WELL vanitys are quite pricey, so i went to a yard sale and found a small computer desk for $5. This whole project cost me a little under $20
Materiels:
desk
card stock, decorative paper/tissue paper
modpodge
paint
sealer
new drawer knobs ( optional )
-
 Charyawn221 favorited Juicy Makeup Vanity
29 Sep 03:44
Charyawn221 favorited Juicy Makeup Vanity
29 Sep 03:44
-
 Danielle H. added Juicy Makeup Vanity to To-make list
07 Jan 08:51
Danielle H. added Juicy Makeup Vanity to To-make list
07 Jan 08:51
-
 Justina S. added Juicy Makeup Vanity to must create
19 Nov 07:45
Justina S. added Juicy Makeup Vanity to must create
19 Nov 07:45
-
 OH! Its the Domo :3 favorited Juicy Makeup Vanity
28 Sep 01:05
OH! Its the Domo :3 favorited Juicy Makeup Vanity
28 Sep 01:05
-
Emmy S. favorited Juicy Makeup Vanity
10 Mar 00:05
-
 AXYL favorited Juicy Makeup Vanity
26 Sep 05:21
AXYL favorited Juicy Makeup Vanity
26 Sep 05:21
-
 Sarah I. entered her project Juicy Makeup Vanity to Lime Crime
29 Jul 23:11
Sarah I. entered her project Juicy Makeup Vanity to Lime Crime
29 Jul 23:11
You Will Need
-
 Step 1
Choose a desk for you to work with ( $5 dollars at yard sale )
-
 Step 2
Sand the desk down ( had help from dad on that part )
-
 Step 3
paint your vanity your desired color ( i chose black )
-
 Step 4
The drawers!
I owned light pink juicy couture tissue paper that i had gotten from he juicy store, or items from Ross that has juicy paper inside, i saved it
paint your drawer pink first ( or whatever color) or the wood will show through
so paint pink... let dry...and go over with tissue/paper/cadstock and MODPODGE
after i sprayed with glitter spray
-
 Step 5
cover everything with a sealer ( i used a paint on sealer because its thicker)
i got diamond shaped drawer knobs from Joanns for $1 each
and let dry! put in your room and enjoy :)


 1
Books & Journals »
Locking Box And Journal
1
Books & Journals »
Locking Box And Journal
 2
Babies & Kids »
A Toy Kitchen For A Child
2
Babies & Kids »
A Toy Kitchen For A Child
 3
Origami Flowers »
Origami Orchid
3
Origami Flowers »
Origami Orchid
 4
Office »
Pretty Sketchbooks
4
Office »
Pretty Sketchbooks
 5
Charms & Keyrings »
Shugo Chara Inspired Pop It
5
Charms & Keyrings »
Shugo Chara Inspired Pop It
 1
Recycled Boxes »
Ballerina Box
1
Recycled Boxes »
Ballerina Box

I actually didnt use cardstock on this, i had tissue paper like for stuffing presents, and because it was thin and light pink, i painted the drawer pink first till dry
then added a bit of the mod podge glue and spread it thin and slowly laid the tissue and at first it was very wrinkly, but i used the flat front on my finger nails and it actually ironed it out completly smooth
when that was done with, i sprayed a clear sealer over it and some spray gliter
if u wanna use card stock u can use the exact same method, but i dont think u would need to use ur nail, maybe a card or a roller to help smooth it out in bits, but it should come out great and i wish u luck
Here's my question. What do you do with the card stock. I'm old and dense sometimes, lol. But you said add the tissue cardstock and modgepodge. Where's the cardstock come in? Did you use it to get out any bubbles and wrinkles in the tissue paper after modgepodging it?
Looks great!