Hexie Pillow
Extract from Learn to Sew in 30 Minutes: Machine Sewing • By Von Grabler-Crozier, Debbie • Published by Search Press


About
Learn to Sew in 30 Minutes: Machine Sewing
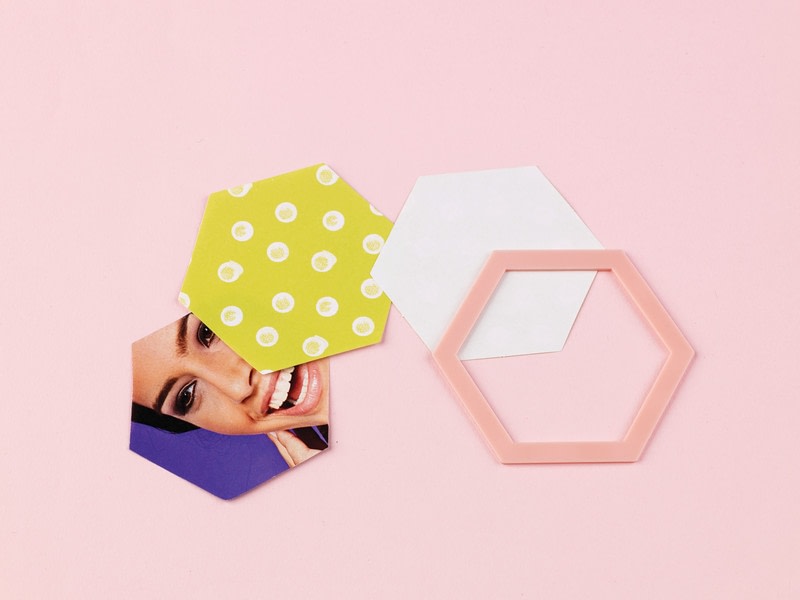
(Cheat’s) English Paper Piecing- Hexie Pillow
One of the oldest forms of quilting is English paper piecing (known also as EPP). Traditionally, this is a sit-by-the-fire sort of patchwork that doesn’t need a sewing machine, making it a bit more portable.
Basically, you decide on a pattern shape – hexagons, or ‘hexies’ to the avid quilter, are a bit of a classic – then you cut this pattern shape out of paper. The next step is to cover the paper with fabric; this is the same shape as the paper, just a little bigger to allow you to wrap it around the paper shape, that you then tack/baste in place. Keep doing this to make as many shapes as you need. Then, to finish, you hand-stitch these fabric-covered shapes together as invisibly as possible to make a kaleidoscopic surface pattern! The paper in each shape is then removed and this pieced top interfaced, backed and quilted in the same way as the pot holder .
It is a lovely old-fashioned method with an old-fashioned feel, but it is a slow process. For this pillow cover we’re going to modernize the method to give your EPP a totally different feel (and make the process a little quicker too!). Let’s take a look below.
What you will learn:
A new (and quicker) way of
English Paper Piecing
Choosing your paper
for paper piecing
Making a pillow cover
Sewing 101
A new (and quicker) way of EPP
Normally when making an item with the EPP method, you do not remove the papers until each shape is fully surrounded by others. This is to help it to keep its shape. With the method that I am going to show you, the papers can be removed earlier because your shape won’t be joined to any others, and will stand alone. To secure the shape of the fabric and set the creases, press it first then allow it to cool. Then snip or unpick the tacking/basting thread and carefully remove the paper. Gently fold the fabric edges back in.
So if we’re not sewing the shapes together, how do we EPP? Here’s the next unusual bit: we’re going to treat our shapes as appliqué, tacking/basting them in place onto our base fabric then machine quilting them in place to secure. Not only does this method give you the opportunity to play around with the layout and design of your EPP pillow cover, it’s much quicker than sewing each paper piece together by hand.
Choosing your paper for paper piecing
For obvious reasons, paper plays an important part in EPP. Pundits will assure you that you must not use cheap stuff like old catalogues and magazines; you must buy special EPP papers.
Erm. This is not my experience, actually, and I have made a lot of quilts with junk mail. You can, of course, buy the pattern papers – and they will be more accurate, especially if you need hundreds to make a quilt – but for smaller items like this, tearing up old paper and ‘zines for cutting is fine. The only thing that I would avoid is newspaper because the print can rub off – although I’ll bet that this is what the pioneer women would have used if that was all they had!
If you have a die-cutting machine, think about die-cutting the paper shapes too – this makes the cutting process quicker as they can cut a fair few in minutes. Hexie dies tend to come in a small range of sizes.
Making a pillow cover
For me, the worst thing about a handmade pillow is making
one that’s too floppy. I like to make the outer case quite firm,
so besides interfacing both the front and back pillow pieces, I like to quilt over the back pieces too. Interfacing the cover completely adds rigidity, but quilting the back (in addition to the front) ‘magically’ adds more structure to the fabric too and makes it tighter. This back piece is usually one large piece of fabric, so I use the wholecloth quilting technique and sew the same quilting pattern on the back as the one used on the front.
-
 Claire K. favorited Hexie Pillow
14 Aug 05:45
Claire K. favorited Hexie Pillow
14 Aug 05:45
-
 Crafterella featured Hexie Pillow
08 Aug 23:00
Crafterella featured Hexie Pillow
08 Aug 23:00
-
 C.J. M. favorited Hexie Pillow
07 Aug 14:46
C.J. M. favorited Hexie Pillow
07 Aug 14:46
-
 Search Press published her project Hexie Pillow
07 Aug 09:00
Search Press published her project Hexie Pillow
07 Aug 09:00
You Will Need
-
 Step 1
Pattern
For this pillow, we’ll be using the traditional hexie shape and making eighteen hexies to appliqué onto the pillow front. To begin, prepare your hexie shape using either a bought EPP hexie, a die-cut one, or one transferred from Pattern Sheet A. Pin your hexie to the wrong side of your floral FQ or a floral scrap and trim the fabric to the shape of your hexie, making sure you leave a 2cm (¾in) seam allowance all around your paper piece.
-
Step 2
Gather these supplies:
Fabric
- FQ of neutral quilting cotton, for the pillow front
- FQ (or scraps) of floral quilting cotton, for EPP
- FQ of corresponding patterned quilting cotton, for the pillow back
Interfacing
- Two 56cm (22in) squares of soft, light-weight, cotton/polyester mix, sew-in wadding/batting: I have used #279 80/20 cotton mix by Vlieseline®
50cm (20in) square pillow pad
Paper, for making the paper pieces
Your essential sewing kit, plus walking footTemplate on Pattern Sheet A
Saving paper
One advantage to this method is that you could actually use the same hexie template to prepare all your fabric hexies – saving more effort, money and paper! If you decide to do this, I recommend using a slightly tougher template material – such as card – to make it a little more long-lasting.Trim your FQ of neutral fabric to a 50cm (20in) square and lay out your hexies in a pleasing way. Once you are happy with the arrangement, dab a bit of fabric glue on the back of each one to keep it in place temporarily. For my pillow, I made a ring of six hexies at the centre of the fabric, then surrounded them with another ring with the remaining hexies, leaving a 1cm (⅜in) gap in between each one.
Tip
I have chosen to make a giant hexie motif but you can play around and make any shape that you like – you could even cover the whole pillow front with appliqué hexies! You may need to make some more though, if you decide to make a more complex design. -
 Step 3
Tack/baste the the edges in place temporarily by hand.
-
Step 4
Lay your embellished pillow front fabric centrally onto one of the pieces of wadding/batting, right side facing up, then pin.
-
 Step 5
Fold one edge over, then the next and so on, finger pressing each time to crease.
-
 Step 6
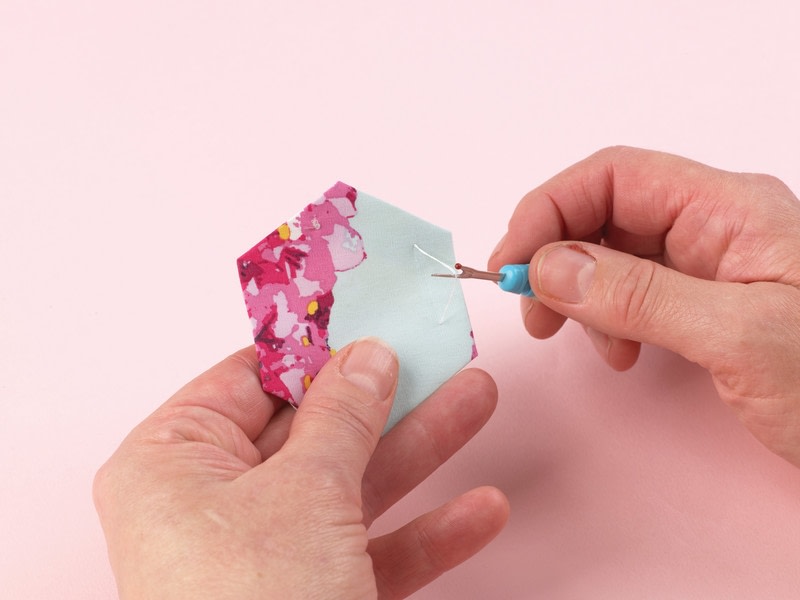
Press your hexie with an iron and leave to cool. Unpick one stitch with a quick unpick.
-
 Step 7
Carefully remove your paper piece and fold any bent edges back in place. You should have a perfect fabric hexagon ready to appliqué! Repeat Steps 1–4 with the remaining seventeen hexies.
Storing Scraps
If you like these hexie patterns, consider making a few every time you have suitable scraps. As I mentioned earlier (and often) never throw your scraps away. Consider cutting up your scraps as above or in useful strips for patching and arrange them by colour or size in bags or boxes. Storing scraps this way has a two-fold benefit: not only does it make your collection much nicer and easier to root through – as opposed to facing a threatening mound of disparate fabrics squashed in the corner of your room – but you also have some ready-to-go quilting components so that, if the muse descends, you can get on with the making. -
 Step 8
Set up your machine with a walking foot, then quilt the whole pillow front. You want to quilt though all the ‘points’ of the hexies. I recommend using the step photo below and the photo of the pillow, right, as a guide. Starting with the bottom row of hexies, quilt a horizontal line that runs just underneath the base of the hexies, sew another through the middle of the hexies, and then sew another line just above the top of the hexies. Repeat this across the whole of the pillow, working from edge to edge. Sew additional ‘rows’ below and above the ring of hexies onto just the neutral fabric, to keep the quilting pattern consistent. Now, sew diagonal lines across the whole of the front to stitch through the remaining ‘points’ on your hexies. Remember, each hexie should have a ‘star’ of quilting lines in the centre. You should end up with rows of little quilted triangles throughout the whole pillow front.
Tip
If the thought of quilting all these lines makes your nervous, use a quilting guide for your machine or draw them on first with a water-soluble marker pen and a quilting ruler.Then, just spritz your fabric with water when you’ve finished sewing to remove your guide lines. -
Step 9
Trim the wadding/batting back to the size of your pillow front. If your hexies form a central motif, like mine, make sure you trim all the edges of your pillow evenly to keep the design centred.
-
Step 10
Lay the FQ backing fabric onto the remaining piece of wadding/batting, and quilt it using any of your favourite designs – I worked simple, diagonal lines (see the blue backed pillow, opposite). Don’t trim it just yet.
-
Step 11
Place the trimmed pillow front onto the untrimmed back, right sides facing. Sew around the perimeter using a normal seam allowance, leaving a turning gap in the bottom seam. Trim the backing up to the seam allowance and clip across the corners.
-
 Step 12
Turn out through the gap and insert the pillow pad. Close the gap by hand with ladder stitch. The pillow pad will fit snugly, giving a lovely plump look.