


About
Necklace with matching earrings.
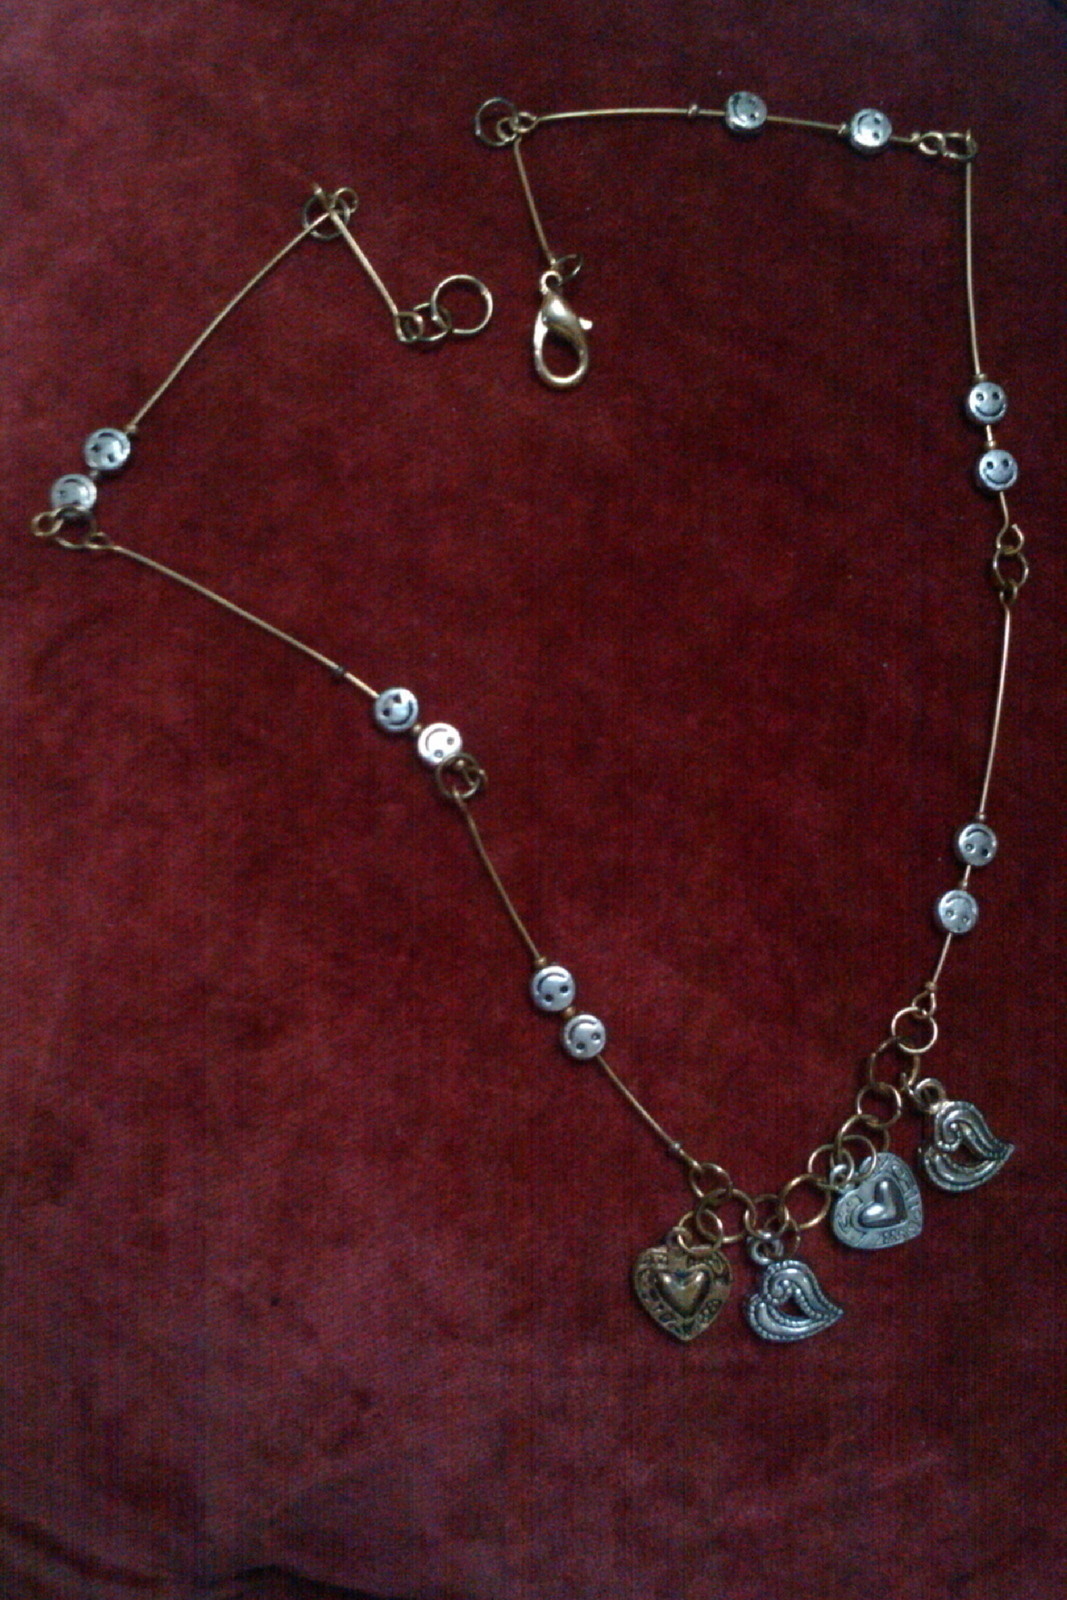
I made this last November/December. I count this as my first 'wire' necklace and I thought it was the bees knees - as you can see I wasn't shy about wearing it. It was very simple to make (it had to be!) but I put it together using headpins because I was itching to make something but didn't have the right components - no chain or wire for a necklace.
Note: The smiley faces are not upside down as they appear to be in the photos - the 'reverse' side of the bead features the face the other way up!!! I've also included a couple of pictures of me wearing the necklace so you can see that it's not at all angular as it might seem.
(Reading the below back, the instructions seem rather complicated. If you find yourself getting lost in my text, just refer to the piccies for clarification :))
NECKLACE STEPS:
-Add the beads to headpins with a crimp bead on either side as a separator, e.g. crimp-smiley-crimp-smiley-crimp, starting and ending with a crimp bead. My original intention, and why I used the crimp beads, was to fix them in the centre of the headpin, but for some reason I liked the free movement along the headpin so left them as is. Depending on how long or short you would like the necklace to be, allow, say 3 or 4 headpins for each side. I've used 3-and-a-half on each side. I cut one of the headpins in half and used it either side of the clasp.
-Once you've added the beads to the headpin, make a loop at the other end. You will now have a loop at each end.
-Create the front detail of the necklace by alternately connecting a number of the small and large jump rings together, i.e. large-small-large-small-large, etc, starting and ending with a large ring.
-Join the headpins and the front chain detail together using the small jump rings.
-Add a small jump ring to each of the heart beads, then attach these to the large rings of the front detail.
EARRING STEPS:
The earwire itself was created with a headpin.
-With the loop at the bottom end of the headpin, add the beads and crimp beads.
-Mould the upper part of the wire around something circular like a pen to create the earwire shape - make sure it is perfectly round or you will end up with something like mine which is a rather jaggedy curve!!! Before you do this, however, you can add a bit of detail to the neck area just above the beads - for example, I created a wavy line. This will also have the added function of keeping the beads from moving up the earwire. Alternatively, just crimp the top crimp bead to hold them in place!
-Attach a heart bead to a small jump ring and connect this to the loop at the bottom of the earwire.
Enjoy!
Tags
Jassie '. posted this project as a creation without steps
Here are some similar tutorials to help you make this one!


