


About
Hide them in color
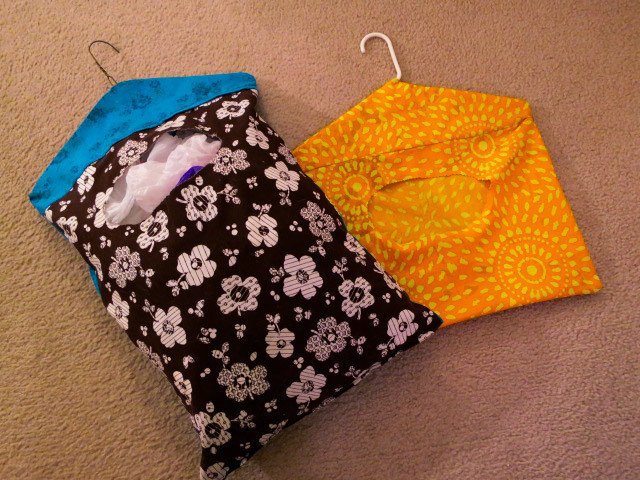
I've been tired of throwing some of my plastic bags in a corner, and I've always wanted them somewhere easily accessible and nice to look at.
For now this will work until I come up with something better.
So a bit of an up date decided to make this into a how to, though it's been a while since I made the first one...so bare with me.
-
 forbunnie favorited Hanging Plastic Bag Holder
06 Mar 02:21
forbunnie favorited Hanging Plastic Bag Holder
06 Mar 02:21
-
 Beverly B. favorited Hanging Plastic Bag Holder
17 Feb 05:28
Beverly B. favorited Hanging Plastic Bag Holder
17 Feb 05:28
-
 Caron K. added Hanging Plastic Bag Holder to Sewing4Home
23 Dec 07:31
Caron K. added Hanging Plastic Bag Holder to Sewing4Home
23 Dec 07:31
-
 l33tingl4dy favorited Hanging Plastic Bag Holder
08 May 03:19
l33tingl4dy favorited Hanging Plastic Bag Holder
08 May 03:19
-
 02jhseaby added Hanging Plastic Bag Holder to Try
08 Jun 15:58
02jhseaby added Hanging Plastic Bag Holder to Try
08 Jun 15:58
-
02jhseaby favorited Hanging Plastic Bag Holder
08 Jun 15:58
-
 marilyn.steckly favorited Hanging Plastic Bag Holder
21 Apr 02:43
marilyn.steckly favorited Hanging Plastic Bag Holder
21 Apr 02:43
You Will Need
-
 Step 1
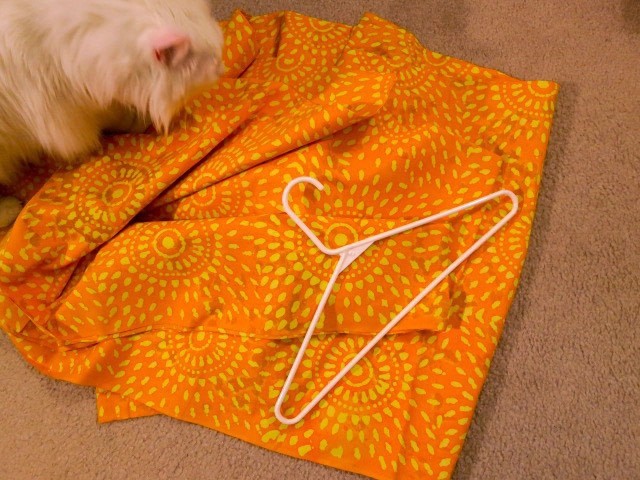
First off, you pick your fabric, your hanger and get your kitty out of the way.
-
 Step 2
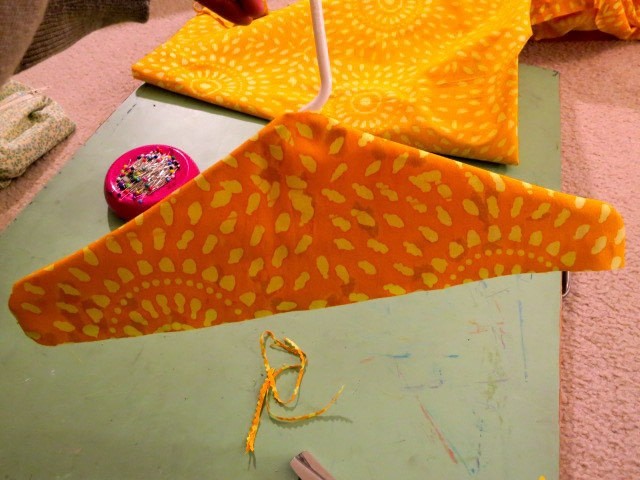
Place your hanger on the fabric with the hook just hanging off the edge. **NOTE: THIS FABRIC IS FOLDED IN HALF,RIGHT SIDES TOGETHER. THIS MAKES LIFE A LITTLE EASIER.***
What you're doing now is making the top half of the hanger bag, so we're going to cut the shape of the triangle out. -
 Step 3
See, I have 2 layers of fabric here where I'm going to trace the hanger out of.
-
 Step 4
So trace around your hanger and giving yourself about a 1/4" seam, cut BOTH layers of/fabric out, keeping them together.
-
 Step 5
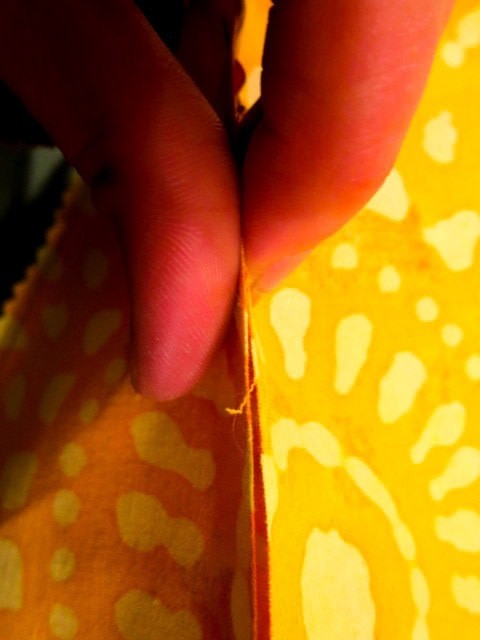
Now you should have 2 pieces of a triangle. (right sides together) Don't pull them apart though. Just pin the top sides together.
-
 Step 6
But you want to leave a gap at the top point, because that's where you thread the hook of the hanger through.
-
 Step 7
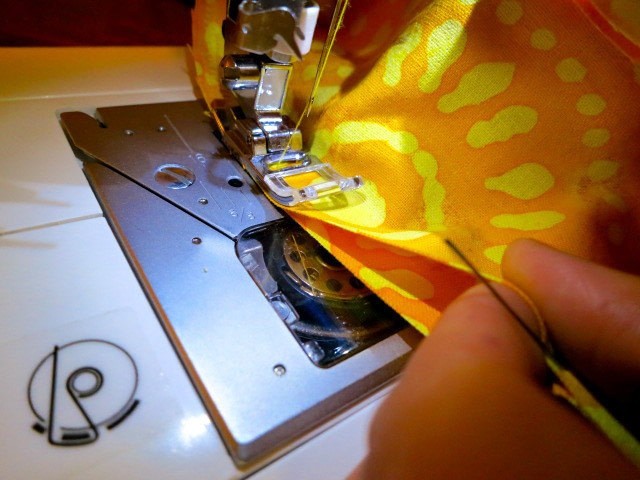
Now take this to your sewing machine, and sew along the line you traced only where you pinned. **Remember to leave a gap at the point of the triangle** Don't sew the bottom of the triangle!
-
 Step 8
turn inside out, and you should have a hole at the top.
-
 Step 9
Just to make sure (Because I wasn't) thread your hanger in to make sure it fits.
-
 Step 10
Now for the base. Again, with the fabric folded, trace out how long you want your bag to hang. Keep in mind of the width of your hanger. Because this was all from one piece of fabric I traced from where I had originally cut the top of the hanger tracing out. This way I know how wide to cut.
-
 Step 11
Once you've cut that out, you should have 2 ssquare pieces. This is your base, don't pull them apart. Pin once side to make sure they don't come apart. This way you know they'll be even.
-
 Step 12
Now you want to draw out your circle. Don't sew anything, but just draw out your hole on one side. This is a must because it'll be necessary later.
For your hole, you can make it any size or shape you want. Just keep in mind what you're putting in your bag.
-
 Step 13
With the 2 pieces pinned together, cut out your shape. I used pinking shears to keep from fraying and because I don't want to put a hem on the edge, but if you do, go ahead. (I would suggest using bias tape.????)
-
 Step 14
So now you should have a hole where you can see the other fabric. (Remember, right sides together!)
-
 Step 15
Okay, this is where I started to question myself. After pinning the 3 sides (bottom and sides) of my square(s), I pinched one piece of fabric with the bottom part of the triangle together and pinned those together. Flipped it over and did the same with the other side of the 2nd piece of fabric.
-
 Step 16
Essentially after pinning the one side, this is what you should have inside the bag.
I know, this will make sense as you do it.
(Okay, this won't let me move steps, so see step 21, then come back to step 17) -
 Step 17
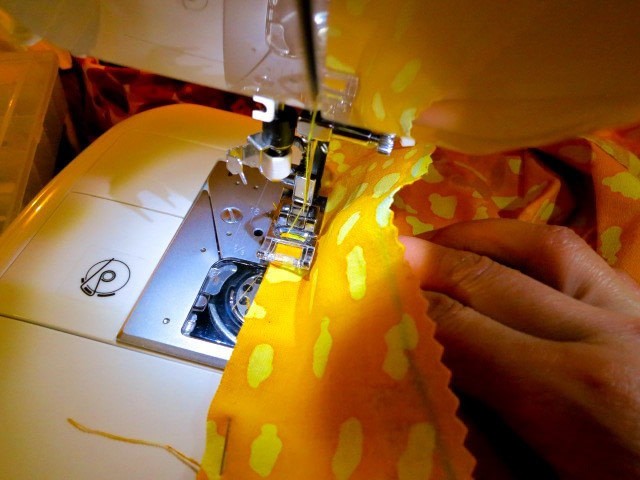
Take this to your sewing machine and starting just above where you sewed the one side of the triangle together start sewing the pinned/pinched ends together. MAKE SURE YOU ARE ONLY SEWING THOSE TOGETHER, NOT THE OTHER SIDE AS WELL. OR YOU'LL BE SEWING THE TOP SHUT.
See next photo. -
 Step 18
(I'm pulling the ends together as I sew here...)
-
 Step 19
This is where that hole you cut comes in handy. As you're sewing one side of the square to the triangle, to keep the 2 pieces of fabric separated, slide your hand through that hole as you go along.
-
 Step 20
Essentially, this is what you should have on one side. Flip it over and do the same as in steps 17-19.
-
 Step 21
Once you've pinned these together, they should look like this. I know it's a bit hard to see, but as you pin, you can see that you're forming the bag to the triangle.
-
 Step 22
Now to sew the sidesand corners closed.
This is where it gets fussy, but start on one side, making sure that your sides are tucked together with the corner of your bottom triangle.
I started a little above where the 2 corners of the triangle joined and went from there all the way around 'till you get to the other side of the bottom corner triangle. Again I finished just a little past the corner to make sure I got it attached. -
 Step 23
This is what i meant from step 22. But I sewed just a little past the bottom of the triangle. This way I know that the corner of the hanger won't poke out.
-
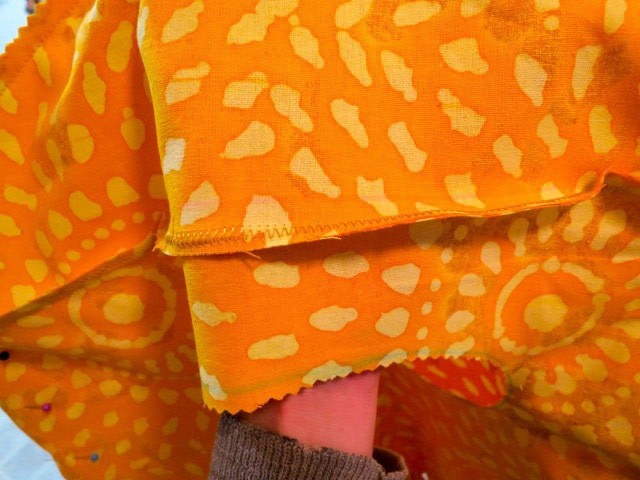
 Step 24
So when you're done sewing, it should start to look something like this. Inside out.
-
 Step 25
Now flip it right side out through that hole you cut out and thread your hanger through. (see that hole was handy)
-
 Step 26
And you're done! Hang your bag, and stuff it with....whatever you want.


Comments

 1
Home Accessories »
Diy Jewelry Box
1
Home Accessories »
Diy Jewelry Box
