

About
String Craft
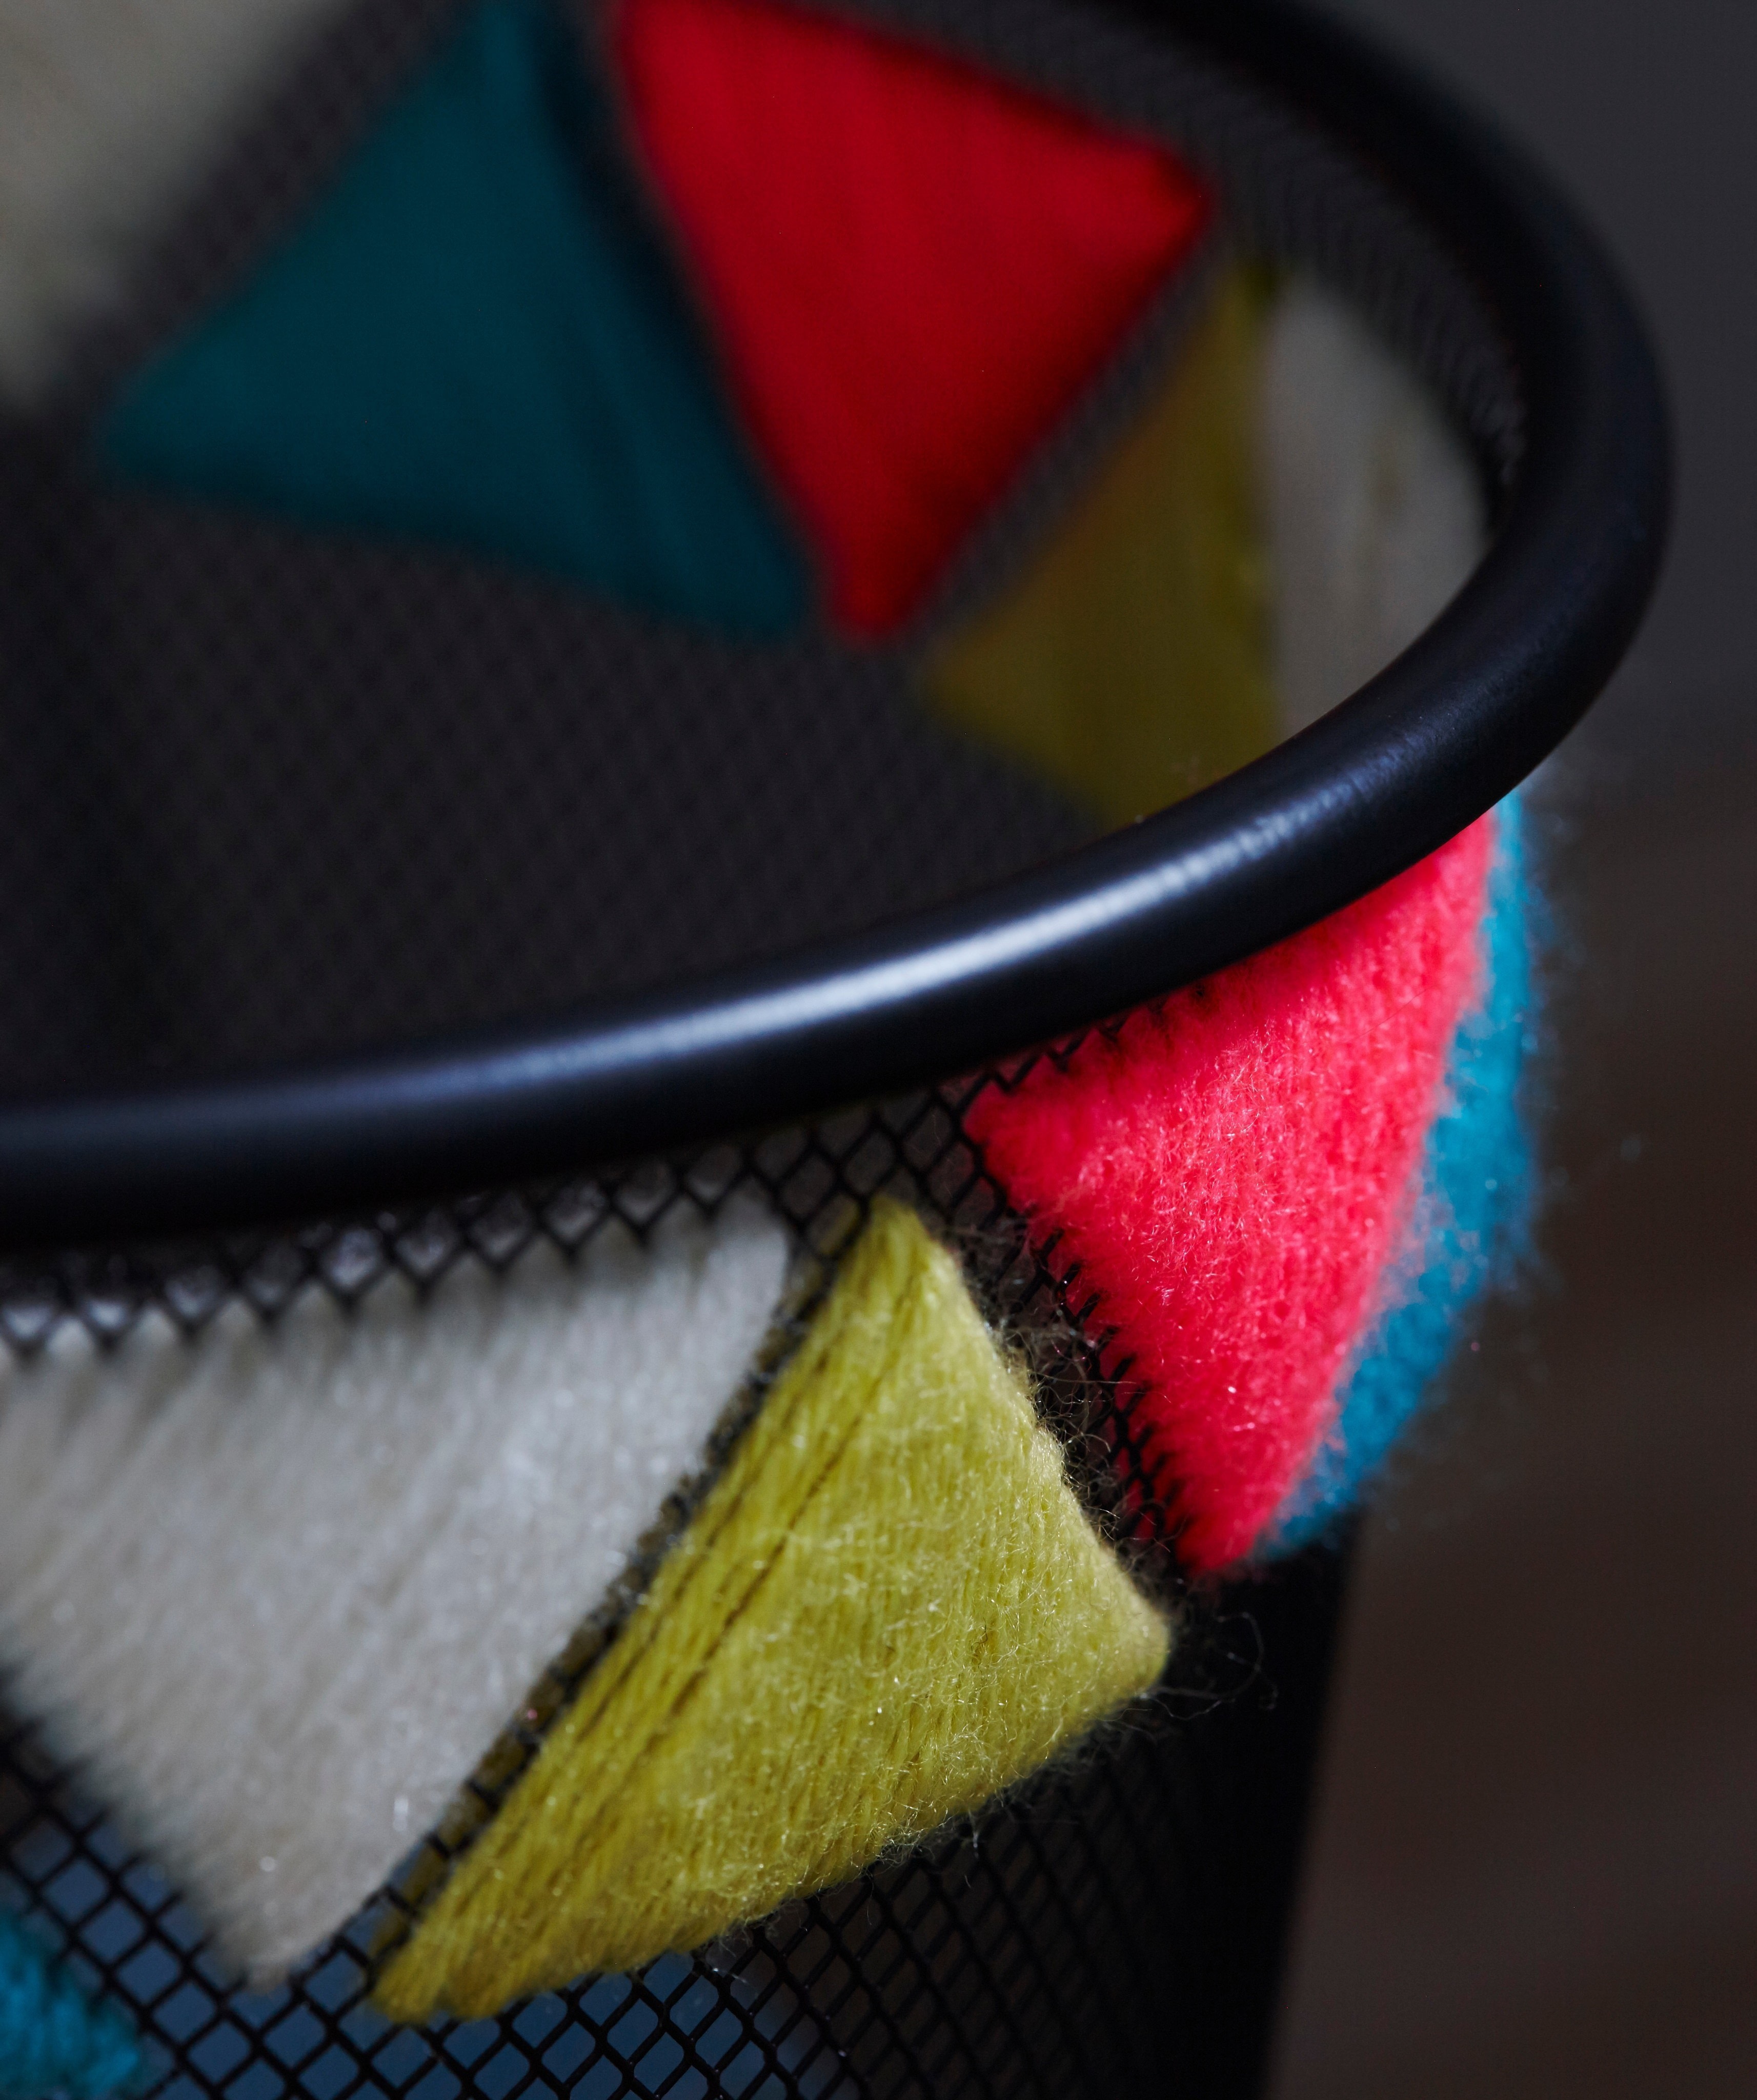
Upcycle a wire bin with two borders of stitched neon triangles. Stylish and funky, this would also be a great receptacle to store your wrapping papers and craft materials.
-
 jenny y. favorited Funky Wastepaper Bin
26 Nov 00:12
jenny y. favorited Funky Wastepaper Bin
26 Nov 00:12
-
 Elin H. favorited Funky Wastepaper Bin
18 Dec 12:43
Elin H. favorited Funky Wastepaper Bin
18 Dec 12:43
-
 Crafterella featured Funky Wastepaper Bin
07 Sep 23:00
Crafterella featured Funky Wastepaper Bin
07 Sep 23:00
-
 heather r. added Funky Wastepaper Bin to To-make list
05 Sep 04:18
heather r. added Funky Wastepaper Bin to To-make list
05 Sep 04:18
-
 Pam favorited Funky Wastepaper Bin
01 Sep 03:30
Pam favorited Funky Wastepaper Bin
01 Sep 03:30
-
 Ryland Peters & Small published his project Funky Wastepaper Bin
28 Aug 11:09
Ryland Peters & Small published his project Funky Wastepaper Bin
28 Aug 11:09
-
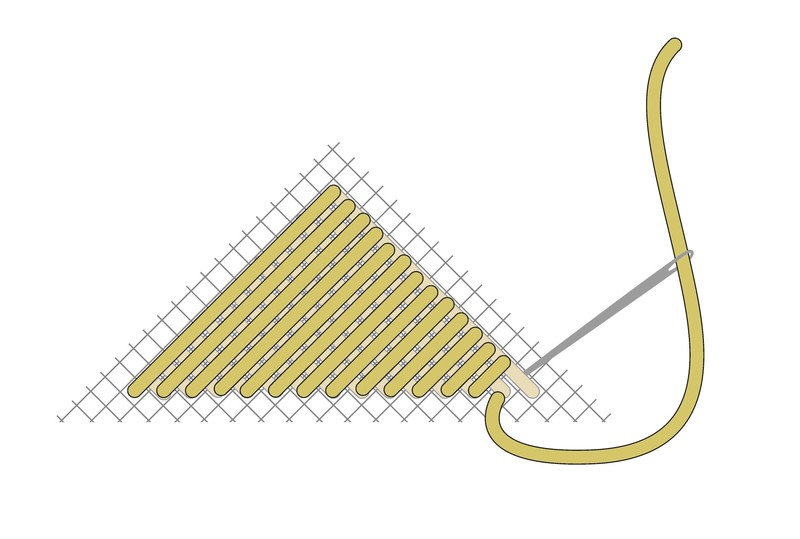
Step 1
Each triangle is 15 squares wide by 15 squares high, and there should be two holes between them all, so count the number of holes going round your bin and divide by 17. Ideally this should also be a number that divides into four, so that there will be the same number of triangles in each color. You may need to adjust the number of holes here and there between the triangles to make the calculations work!
-
 Step 2
Cut a piece of neon green yarn and double up to thread it onto the needle. Starting three holes from the top edge of the bin, work a diagonal stitch that is 15 holes long. Make another stitch next to it 14 holes long and so on, until you have 14 stitches, with the last stitch being made between two adjoining holes.
-
 Step 3
Then work 14 diagonal stitches going in the other direction over the top of the first set, beginning the first stitch in the hole immediately after the last stitch of the first triangle.
-
Step 4
Change to turquoise yarn. Starting two holes (or according to your calculations in step 1, if this means you need more or fewer holes between each triangle) to the left of the fi rst triangle, repeat the stitching in steps 2 and 3. Continue alternating green and turquoise triangles all around the bin.
-
 Step 5
Now change to cream and pink yarn and work the triangles upside down in the spaces between the green and turquoise ones. They should be two squares up from the fi rst set, again depending on your calculations in step 1.
-
 Step 6
Repeat the triangles, beginning three holes up from the bottom of the bin to create the bottom border.
Tip
You will probably need to rework your calculations for the bottom of the bin because it is a smaller circumference than at the top, so there will be fewer holes around.