


About
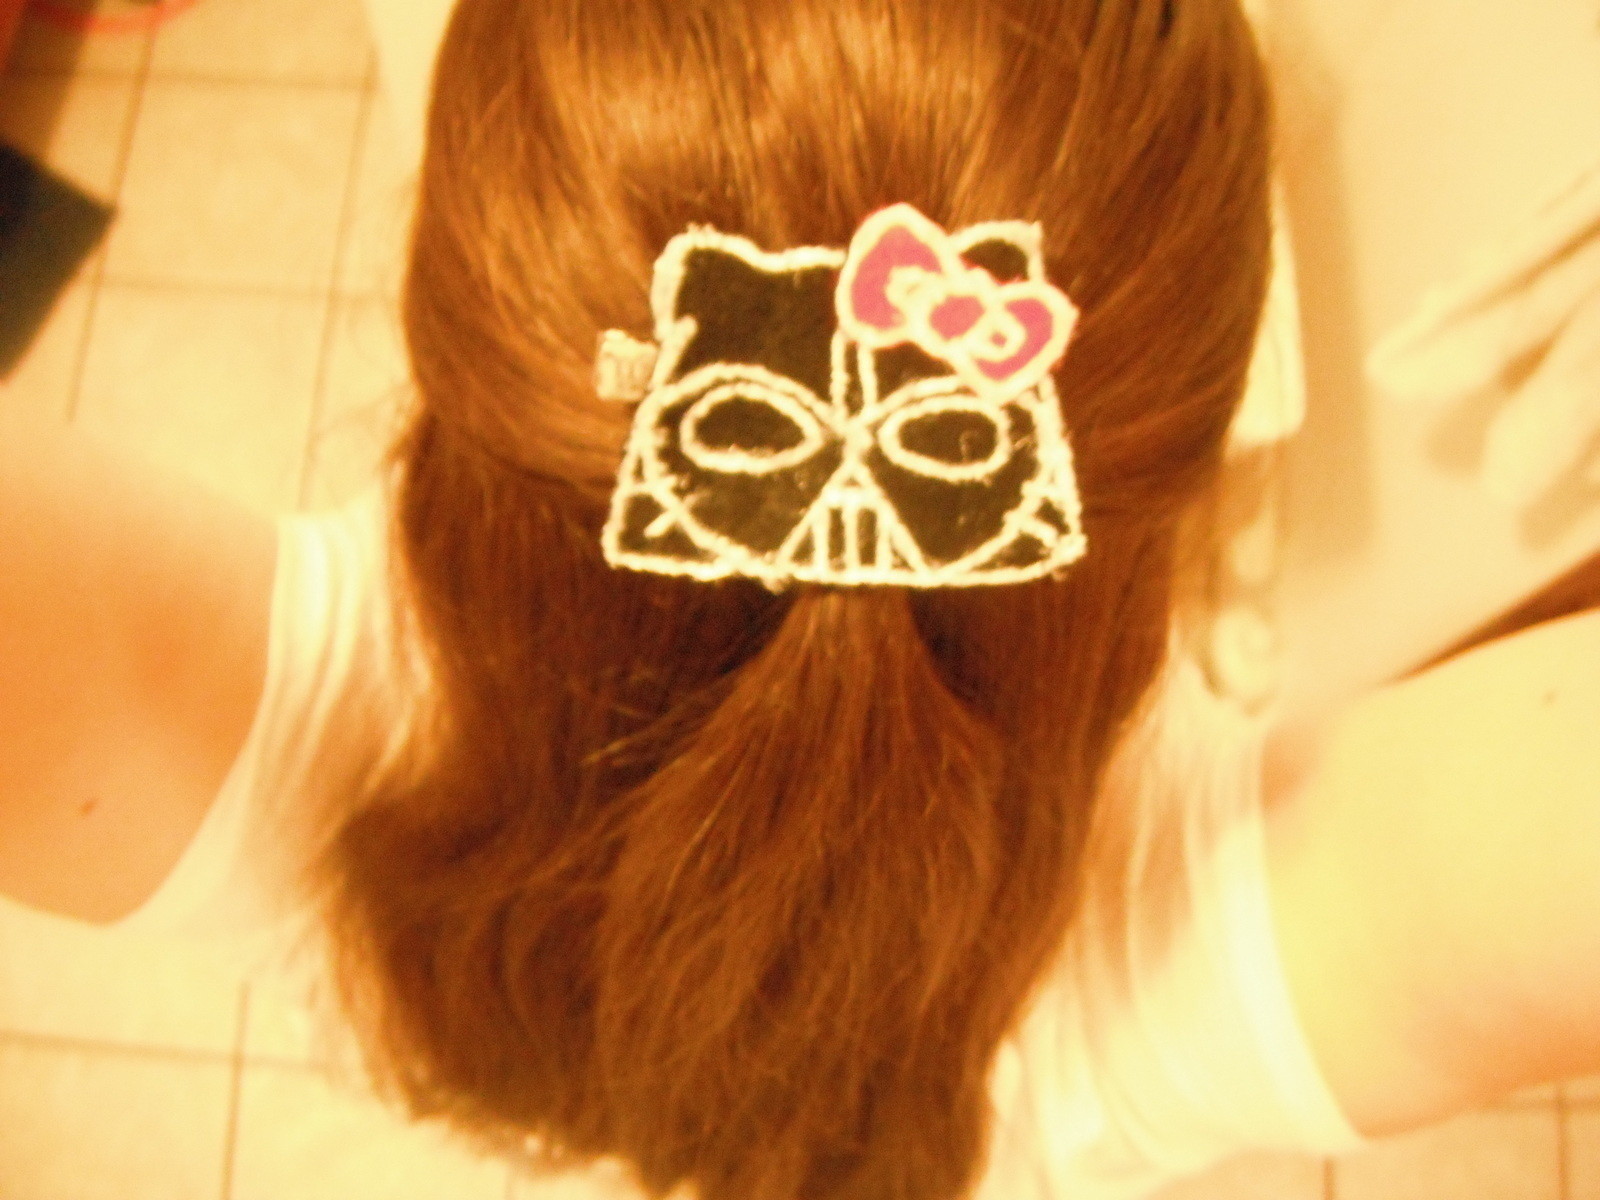
Easy (Enough) felt hair clippie! Go Hello Kitty Darth Vader!
I really wanted to make a Darth Vader hair clippie, but I didn't know where to start to find an image I could mimic. I tried sketching a simple version from pictures from the movie with no avail. Then, I remembered seeing a Hello Kitty Darth Vader a while back. So I worked up a plan on how to make it, and suddenly, a no-sew felt hair clippie was born. Enjoy! ^_^ =^.^=
Tags
-
 Conner W. added Felt Hair Clippie to gift ideas
05 Aug 22:51
Conner W. added Felt Hair Clippie to gift ideas
05 Aug 22:51
-
Conner W. added Felt Hair Clippie to craft ideas
05 Aug 22:51
-
Conner W. added Felt Hair Clippie to fashion
05 Aug 22:51
-
 FrankieStein favorited Felt Hair Clippie
12 Nov 05:43
FrankieStein favorited Felt Hair Clippie
12 Nov 05:43
-
 Jennifer favorited Felt Hair Clippie
10 Feb 03:10
Jennifer favorited Felt Hair Clippie
10 Feb 03:10
-
 Axolotus favorited Felt Hair Clippie
08 Feb 06:59
Axolotus favorited Felt Hair Clippie
08 Feb 06:59
-
 Mai added Felt Hair Clippie to jewelry and hair stuff
20 Jan 05:17
Mai added Felt Hair Clippie to jewelry and hair stuff
20 Jan 05:17
-
 Cherryboberry favorited Felt Hair Clippie
19 Oct 18:54
Cherryboberry favorited Felt Hair Clippie
19 Oct 18:54
-
 catarina n. favorited Felt Hair Clippie
13 Sep 15:31
catarina n. favorited Felt Hair Clippie
13 Sep 15:31
-
 Jessica favorited Felt Hair Clippie
25 Jun 17:21
Jessica favorited Felt Hair Clippie
25 Jun 17:21
You Will Need
-
 Step 1
What you'll need for this project, my lovelies:
*An image, either 2 copies, or use the same one for a pattern and "stamp", if needed. (I chose Hello Kitty Darth Vader.)*Straight pins. (For holding the pattern onto the felt.)
*Felt in colors you need.(I needed red and black.)
* A Craft Knife or Utility Cutter.(For small parts in your "stamp", if that's what you want to do.)
*Scissors. (Of course for cutting.)
*A Hair Barrette, Bobby Pin, Clippie, or whatever. (Although I wouldn't recommend a hair band.)
*Nail Polish or Paint, and a small brush if your polish doesn't have one. (If you are going to paint on it.)
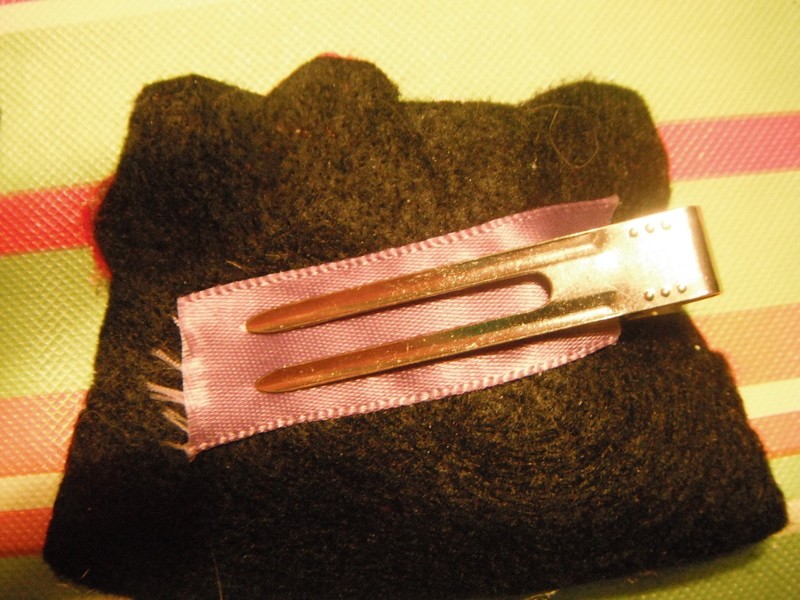
*Ribbon. (For making a little holder for your clip, if you can't glue it on. ie, bobby pin, etc.)
-
 Step 2
First of all, you need an image to make out of felt. Choose one that you could easily make. I found this one: http://www.flickr.com/photos/idoru45/79795524/in/set-172195/
I cropped the head and inverted the color on my computer, partly so I would have a black line to follow and partly so I would use less black ink. Then, print small enough to use as a barrette. I printed out a wallet size picture.
If you need a "stamp" like I did for the white parts, you can either print two, or use the same one twice.
-
 Step 3
Now, cut out the ENTIRE outline of your pattern on your main piece of felt by pinning it and using your scissors. I cut out the outline of her head in black and the bow by itself in red.
-
 Step 4
Then, you need to make your "stamp", if needed. You need to carefully cut out the lines and use tape if you accidentally tear some of your paper. You might need your craft knife or utility cutter.
This is probably what takes the longest.
-
 Step 5
Now, using your nail polish or paint and small brush, and paint one section at a time.
Press the small section onto the felt, and gently press on it or roll a marker over it to make sure the paint gets applied.
Continue, lining the image up accordingly. Make sure the last section on the stamp is dry enough not to smear.
You can leave it like it is for a stamped look, or use it as a guide and paint over it.
-
 Step 6
After the paint is dry, you can glue on the extra pieces.
-
 Step 7
Now, you can either glue on your barrette, or make a little holder out of ribbon by gluing along the top and bottom enough for the barrette to slip in.
-
 Step 8
After it is all dry, tah-dah! Your barrette is now finished! Congratulations!


Comments

