

About
Fluffy felt chocolate cake
A yummy felt chocolate cake I made for a friend who's on a diet :b
I got the idea from here: http://cottoncandy33.deviantart.com/art/Double-Chocolate-Cake-Felt-Plush-273869916
Tags
-
 Ms Dorito added Felt Chocolate Cake to Plushie
12 Jun 17:45
Ms Dorito added Felt Chocolate Cake to Plushie
12 Jun 17:45
-
 Key West Witch favorited Felt Chocolate Cake
23 Aug 00:15
Key West Witch favorited Felt Chocolate Cake
23 Aug 00:15
-
 Sabrina Dee Berry favorited Felt Chocolate Cake
06 Sep 11:48
Sabrina Dee Berry favorited Felt Chocolate Cake
06 Sep 11:48
-
 Amber R. favorited Felt Chocolate Cake
25 May 10:37
Amber R. favorited Felt Chocolate Cake
25 May 10:37
-
 Liza W. added Felt Chocolate Cake to Plushie Ideas
14 Dec 14:55
Liza W. added Felt Chocolate Cake to Plushie Ideas
14 Dec 14:55
-
 Neko-San K. favorited Felt Chocolate Cake
31 May 20:49
Neko-San K. favorited Felt Chocolate Cake
31 May 20:49
-
 Tierra T. favorited Felt Chocolate Cake
26 Oct 19:14
Tierra T. favorited Felt Chocolate Cake
26 Oct 19:14
-
Lucie G. favorited Felt Chocolate Cake
04 Oct 18:27
-
Roxy R. favorited Felt Chocolate Cake
12 Sep 11:08
-
chelsea g. favorited Felt Chocolate Cake
27 Aug 07:57
You Will Need
-
 Step 1
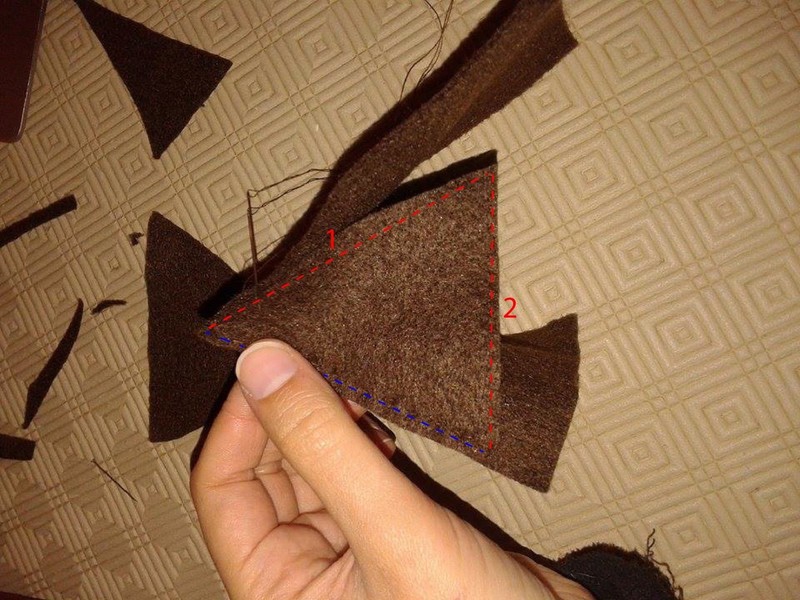
First of all, cut a rectangular and a triangular piece (as shown), and sew them together along the blue line (red line is only to indicate the approximate shape of the triangle). It is important that the bigger sizes of the triangle together are a bit smaller than the rectangle's length.
-
 Step 2
After sewing the blue part, the next step is to sew red line no. 1 to the corresponding part of the rectangle.
-
 Step 3
In the end, it should like this. Notice the small space left on each side of the rectangle.
-
 Step 4
Now you have to sew a rectangular piece of felt (as shown) to the third side of the triangle (red 2, in previous pic).
-
 Step 5
Now you will have to cut a new triangular piece of felt (try to make it as similar as possible to the first one), and pin it to the bottom of your cake, as shown. You should now sew along the 2 green lines, making sure the whole thing is nicely symmetrical. All the other edges that I did not mention, leave open, since you now need to turn it inside out.
-
 Step 6
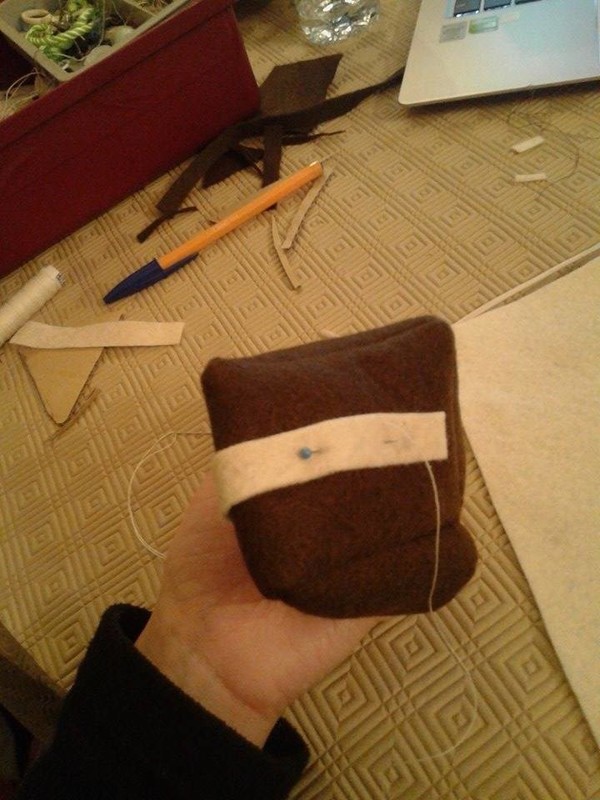
Next step is to cut some white felt: a thin piece with such a length as to go from one side of the cake to the other (as seen in main pic). Pin it, and sew.
-
 Step 7
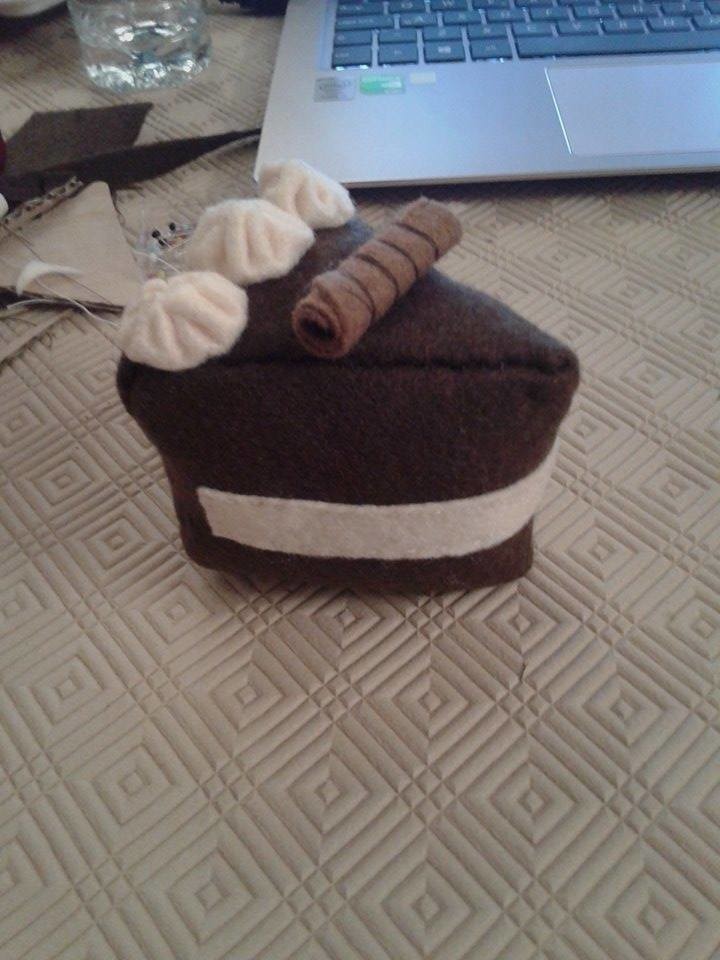
For the little meringues on top, cut a circular piece of white felt, sew it as seen here, and in the end pull the thread until it looks something like the one in the main pic. I put no stuffing in these, because I thought they looked small and yummy enough without it :)
I have no pictures of the making of the cinnamon roll, but it's basically just creating a roll with light brown felt and sewing both around and inside, so that it looks like the one shown. -
 Step 8
The next thing to do is to sew these little pieces on the main body of the cake, as shown (don't forget the cinnamon roll!).
-
 Step 9
Finally, stuff it nicely, and close it (with invisible stitch).
Hint: since I find it difficult at times to get everything right with invisible stitch (mine always ends up sideways and asymmetrical), I turned the cake "outside in", sewed all the edges but one (with regular stitch), and then turned it "the right way" again. Finally, I used invisible stitch to sew this remaining edge (as shown).
Et voilà! A nice, delicious-looking chocolate cake :)