


About
fabric covered buttons (no kits)!
This is a super easy and inexpensive project. It is excelent to use those ugly loose buttons and scraps of fabric.
You will end up with nice buttons ready to use for your crafts and sewing projects, and the best part is that you won't have to be looking for those expensive kits to cover buttons.
-
 Kimya J. favorited Fabric Covered Buttons
25 May 23:44
Kimya J. favorited Fabric Covered Buttons
25 May 23:44
-
 Cyn B. added Fabric Covered Buttons to Basic Crafts
28 Aug 01:00
Cyn B. added Fabric Covered Buttons to Basic Crafts
28 Aug 01:00
-
 marilyn.steckly favorited Fabric Covered Buttons
24 Apr 03:38
marilyn.steckly favorited Fabric Covered Buttons
24 Apr 03:38
-
 ?? added Fabric Covered Buttons to Inspiration
23 Feb 19:53
?? added Fabric Covered Buttons to Inspiration
23 Feb 19:53
-
 Kathryn S. added Fabric Covered Buttons to To-make list
11 Nov 04:50
Kathryn S. added Fabric Covered Buttons to To-make list
11 Nov 04:50
-
Suella P. favorited Fabric Covered Buttons
10 Nov 12:40
-
 zoegirl221 favorited Fabric Covered Buttons
21 Sep 18:17
zoegirl221 favorited Fabric Covered Buttons
21 Sep 18:17
-
 Grace O. favorited Fabric Covered Buttons
22 Aug 22:39
Grace O. favorited Fabric Covered Buttons
22 Aug 22:39
-
Penny S. favorited Fabric Covered Buttons
20 Jun 15:08
-
distel d. favorited Fabric Covered Buttons
18 May 13:29
-
 Step 1
Materials:
1. Scrap of fabric (enough to cover the button that you will be using)
2. A button with a shank. (Button with a loop on the back. No holes)
3. Scisors
4. Embroidery thread (just 3 ends)
5. Fine needle
6. Ruler
7. Ball point pen -
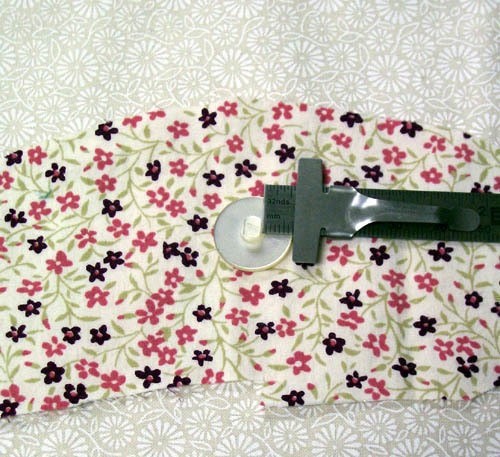
 Step 2
With the ruler measure the distance between the shank and the edge of the button.
-
 Step 3
With the pen and from the edge of the button, mark onto the fabric the distance that you obtained from measuring the inside of the button.
-
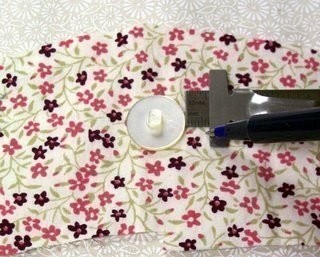
 Step 4
With the button on the fabric and upside down trace around the button the circumference of the piece of fabric needed to cover the button. Put the button aside and cut the circle.
-
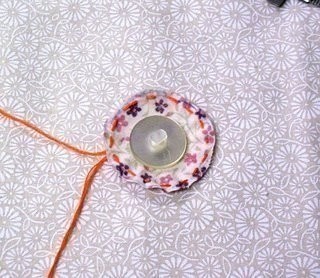
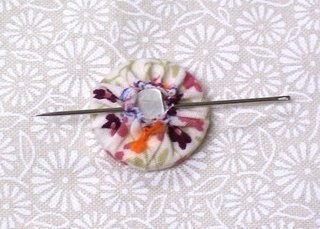
 Step 5
With the needle and the embroidery thread, stitch a running stitch along the edge of the fabric circle. Make sure to leave a tail of thread long enough to make a couple knots.
-
 Step 6
Place the button up side down right in the middle of the stitched round piece of fabric.
-
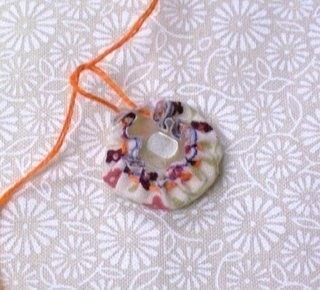
 Step 7
Pull both ends of thread until the fabric snuggles the button.
-
 Step 8
Make a couple knots making sure the fabric is tight around the shank of the button.
-
 Step 9
It should look like this.
-
 Step 10
There should not be any fabric or thread blocking the button's shank so you can sew your button to your projects.


Versions


Comments


 1
Home Accessories »
Diy Jewelry Box
1
Home Accessories »
Diy Jewelry Box
