
About
Hand Embroidered Patchwork Postcard
Isn't there something so lovely about receiving a handwritten postcard? This is a hand embroidered postcard with patchwork and embroidered embellishments that is sure to make the recipient smile for days, maybe even weeks!
-
 Ms Dorito added Embroidered Post Card to sew craft
12 Jun 19:08
Ms Dorito added Embroidered Post Card to sew craft
12 Jun 19:08
-
 bmcbrien1 favorited Embroidered Post Card
26 Oct 18:31
bmcbrien1 favorited Embroidered Post Card
26 Oct 18:31
-
 bkind2me08501 favorited Embroidered Post Card
27 Jul 14:59
bkind2me08501 favorited Embroidered Post Card
27 Jul 14:59
-
 Chudames added Embroidered Post Card to Needlework
07 May 00:07
Chudames added Embroidered Post Card to Needlework
07 May 00:07
-
Chudames favorited Embroidered Post Card
07 May 00:07
-
 Suzi T. favorited Embroidered Post Card
28 Mar 18:19
Suzi T. favorited Embroidered Post Card
28 Mar 18:19
-
 mariatsi favorited Embroidered Post Card
24 Mar 10:35
mariatsi favorited Embroidered Post Card
24 Mar 10:35
-
 banu added Embroidered Post Card to Sewing fun
23 Mar 09:18
banu added Embroidered Post Card to Sewing fun
23 Mar 09:18
-
Mary K. favorited Embroidered Post Card
21 Mar 13:31
-
 Kristen V. published her project Embroidered Post Card
27 Feb 20:28
Kristen V. published her project Embroidered Post Card
27 Feb 20:28
-
 Step 1
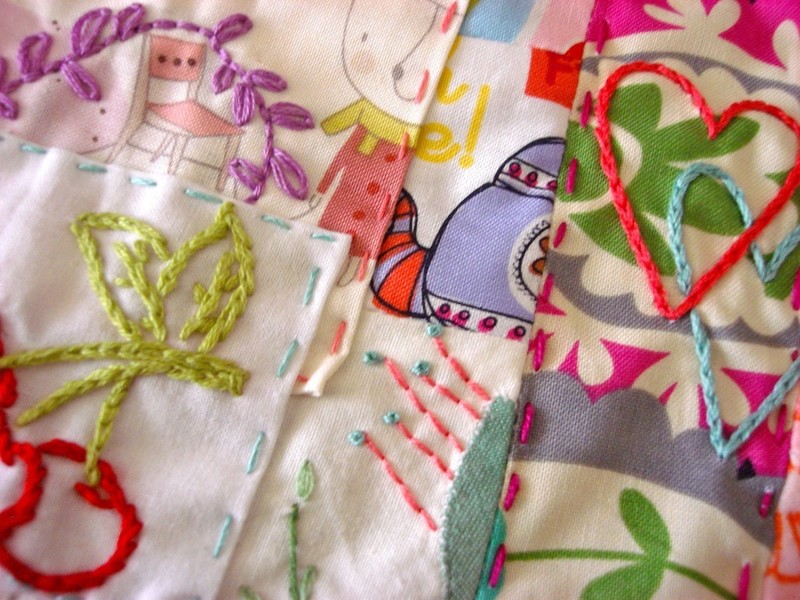
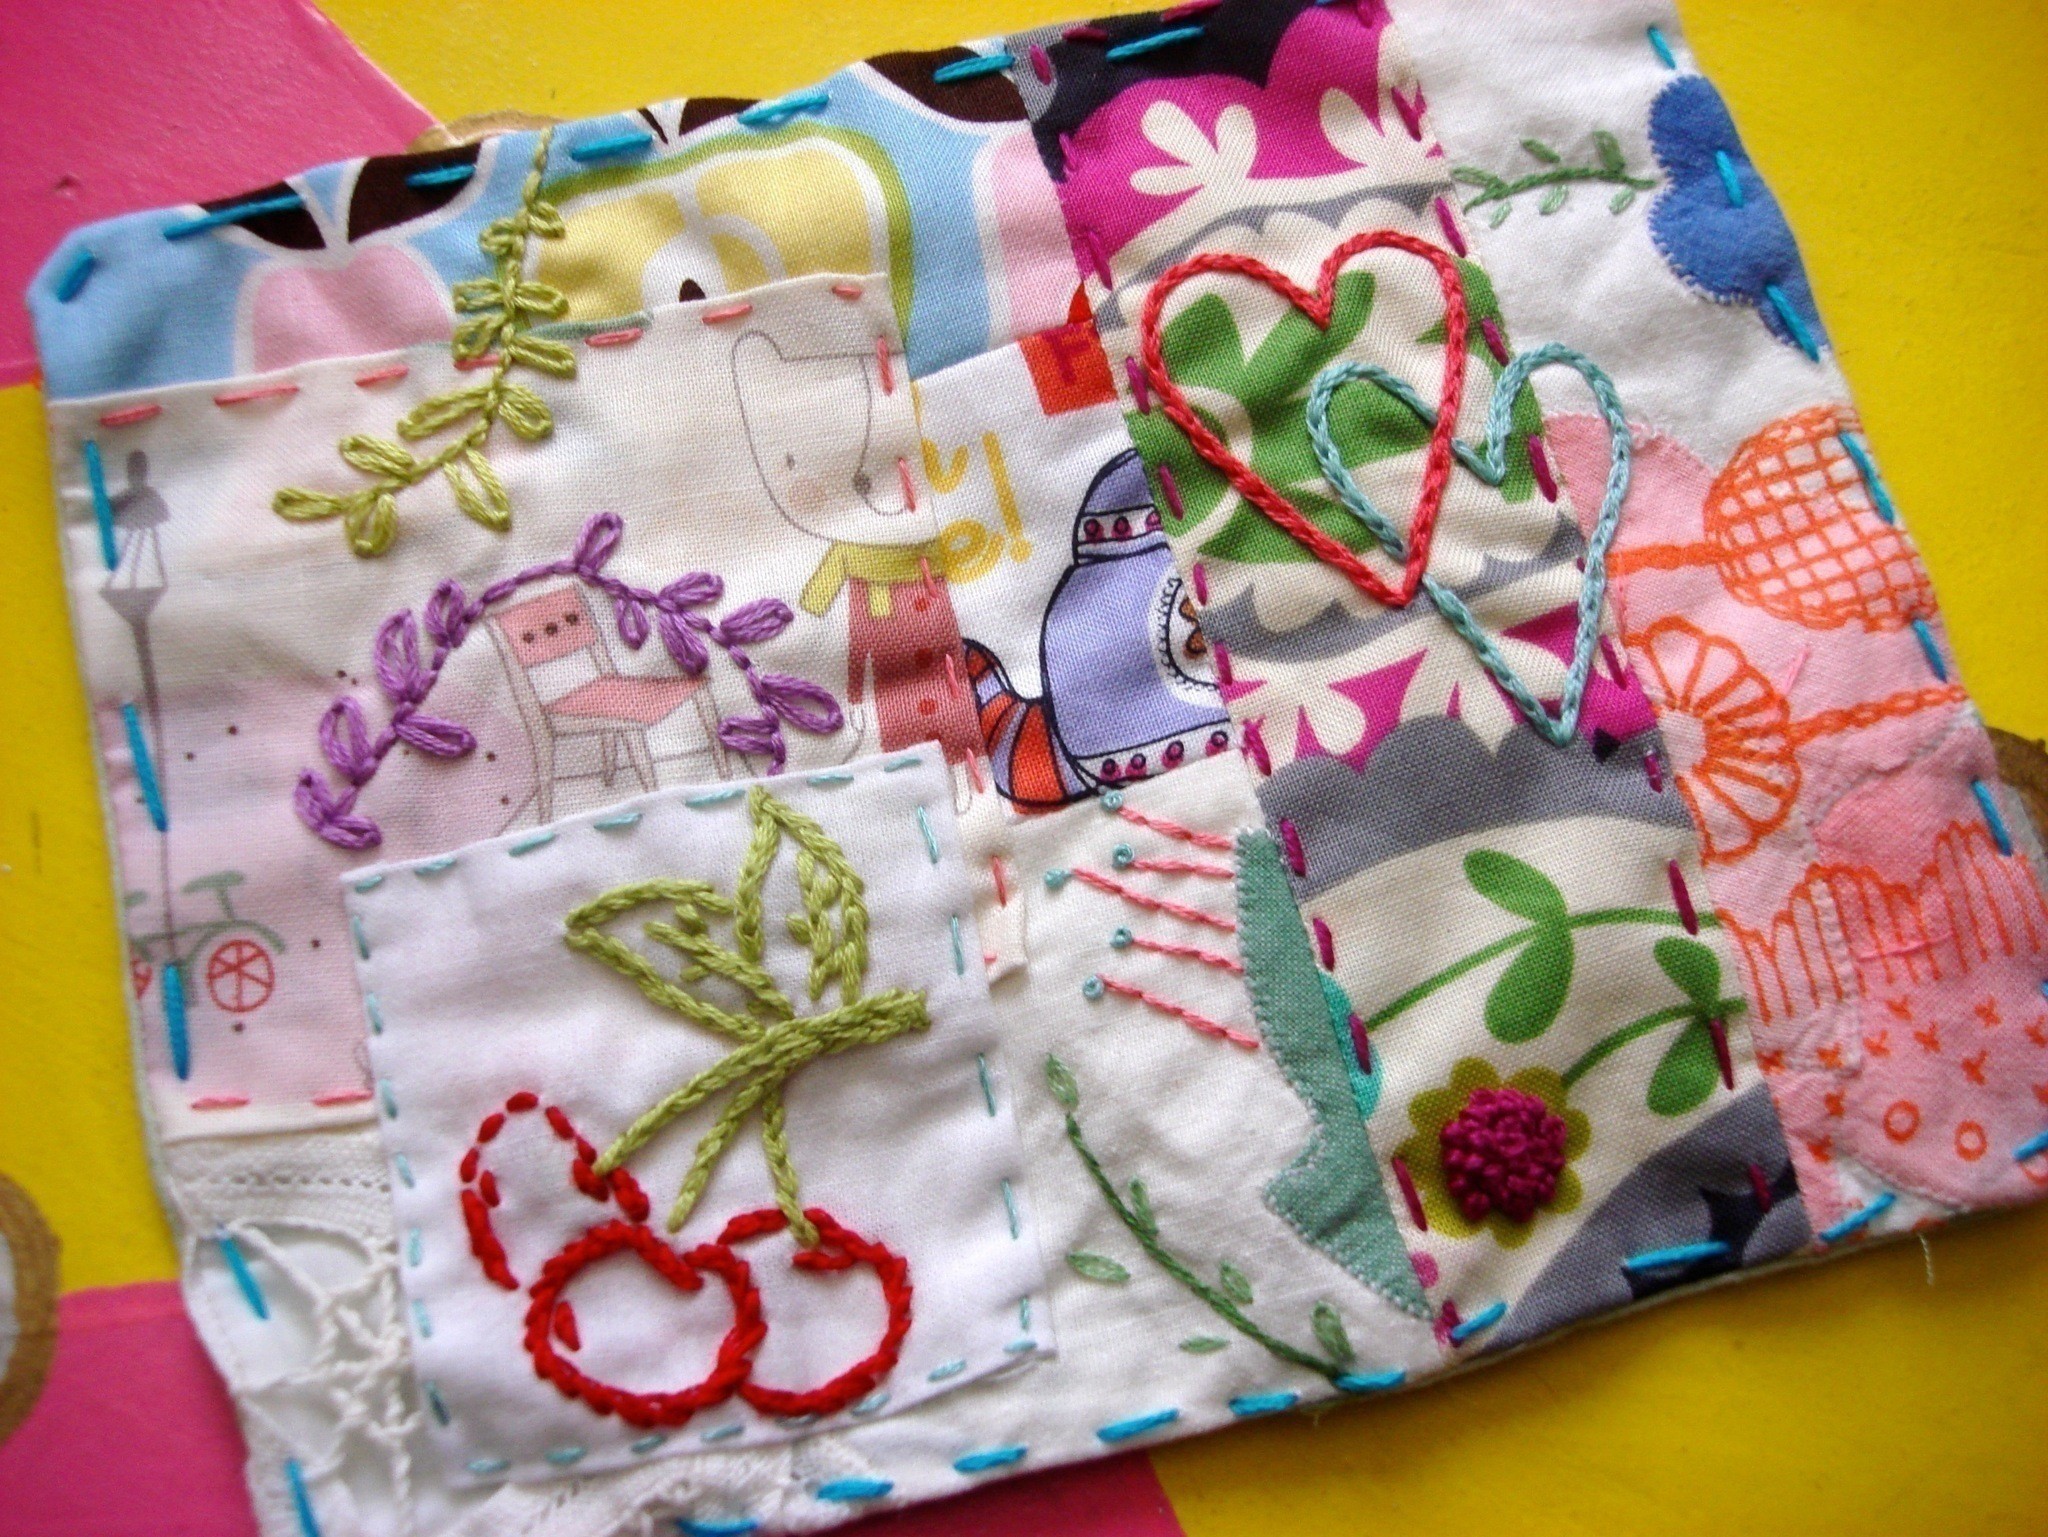
Sift through your fabric scraps in order to piece together the front panel of the postcard. I used a piece of paper cut to 8 inches wide by 6.5 inches tall and placed the fabric scraps on it until I found a placement I liked. If you prefer, you can use one piece of fabric instead of scraps or multiple pieces.
-
 Step 2
Stitch the fabric together in order to make a rectangle that fits the 8x6.5 dimensions. I used smaller pieces of fabric as patches, I pressed under the raw egdes and stitched them directly onto the fabric I had pieced together. The cherry embroidery was a test stitch I made using a pattern from a Sublime Stitching starter kit. The kit I used is no longer in print, but you can find some new wonderful ones at sublimestitching.com
-
 Step 3
This is the fun part! Once the piece of fabric is ready, it can be embellished with as many stitches as you like in order to create the embroidery collage. You can add patterns or allow the stitches to come to you organically.
-
 Step 4
Once this front panel is finished. It needs a little stability. I used one piece of very lightweight interfacing and basted it to the back of the panel using my sewing machine.
-
 Step 5
Now it is time to work on the back panel. I decided to make this look as much like a postcard as I could. I used a pencil and lightly wrote what I wanted the back to say and stitched it up.
-
 Step 6
Now it is time to attach the front and back panel in order to complete the postcard. Place the front and back panels right sides together. Stitch around the edge using a 1/4 inch seam. Leave a small space unstitched so you can flip the postcard. Clip the corners.
-
 Step 7
Flip the postcard so the right sides face out and press. In order to close up the small space used to flip the postcard, use a running stitch around the entire piece. I made sure to hide my knotted ends in between the front and back panels where I flipped the postcard.
-
 Step 8
Gift to Recipient!