


About
For a special child in your life.
Tags
-
 nina.b added Drawstring Backpack to Interesting
13 Apr 16:50
nina.b added Drawstring Backpack to Interesting
13 Apr 16:50
-
 Kim.Marie favorited Drawstring Backpack
13 Aug 05:45
Kim.Marie favorited Drawstring Backpack
13 Aug 05:45
-
 miraenna favorited Drawstring Backpack
01 Jul 16:48
miraenna favorited Drawstring Backpack
01 Jul 16:48
-
 fu.book.3 favorited Drawstring Backpack
17 Nov 23:25
fu.book.3 favorited Drawstring Backpack
17 Nov 23:25
-
 CraftyPunk C. added Drawstring Backpack to Gift Ideas
25 Apr 00:29
CraftyPunk C. added Drawstring Backpack to Gift Ideas
25 Apr 00:29
-
 toawesome favorited Drawstring Backpack
27 Jan 00:23
toawesome favorited Drawstring Backpack
27 Jan 00:23
-
 Cdub25 commented on Drawstring Backpack
13 Jan 17:53
Cdub25 commented on Drawstring Backpack
13 Jan 17:53
-
 Lashanda P. favorited Drawstring Backpack
30 Nov 07:08
Lashanda P. favorited Drawstring Backpack
30 Nov 07:08
-
George S. favorited Drawstring Backpack
26 Jul 02:57
-
 Step 1
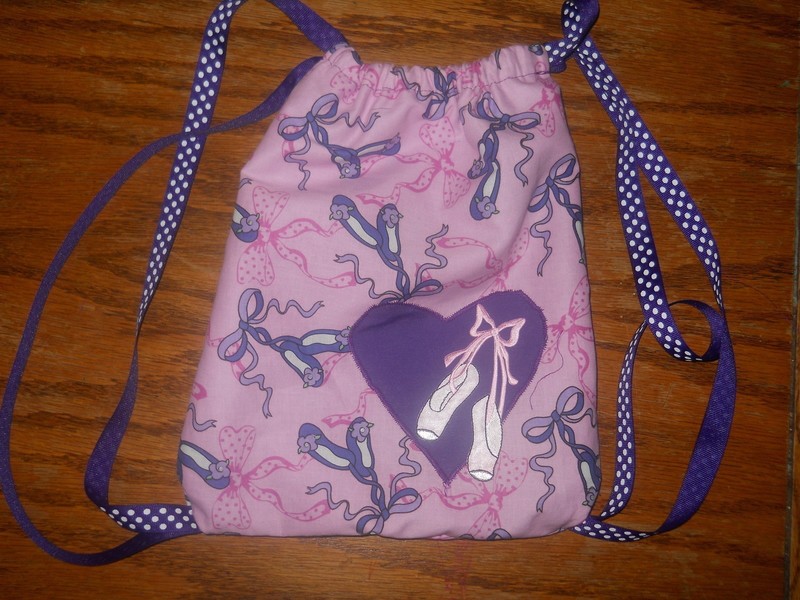
To begin with cut 2 pieces of your lining fabric and 2 pieces of your fashion fabric 13'' by 15''. If you want applique whatever you want to the front piece of your fashion fabric.
-
 Step 2
Fuse your interfacing to the wrong sides of both of your lining fabrics.
-
 Step 3
Pin and hem a 1/4'' hem along the long sides of all of your fabric pieces.
-
 Step 4
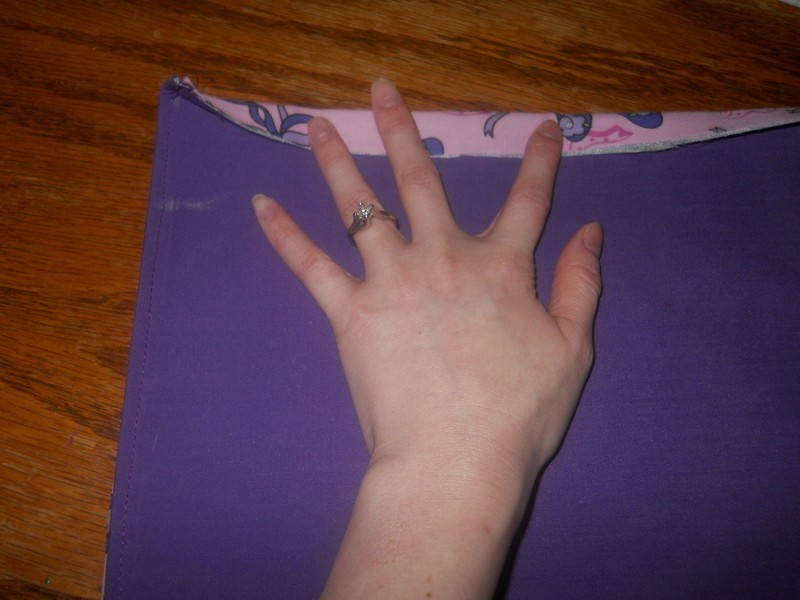
Place the wrong sides of your fashion and lining fabric together. Mark with chalk .5'' and 2.5'' down from the top.
-
 Step 5
Fold once along the first line. You can press this down if you want.
-
 Step 6
Fold that fold over again so it meets up with your 2.5'' mark. Pin/press and sew. (It's important to get these messurments correct or else your drawstring back will look wonky) Also because you'll be going through more fabric and fabric with interfacing, you may need to lengthen your stitch length on your machine from here on out.
-
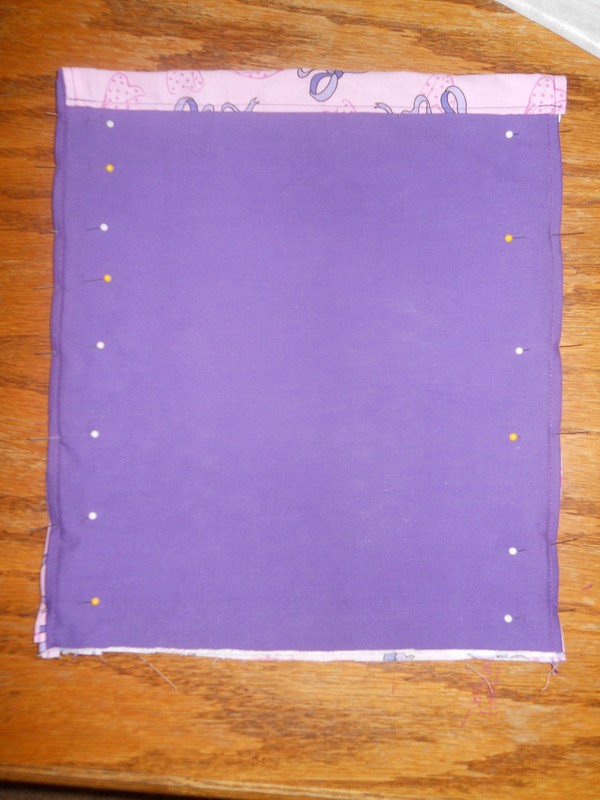
 Step 7
Pin along your sides and sew at a 5/8 seam allowance. Important! Do NOT sew the top part as that is the casing for your draw strings.
-
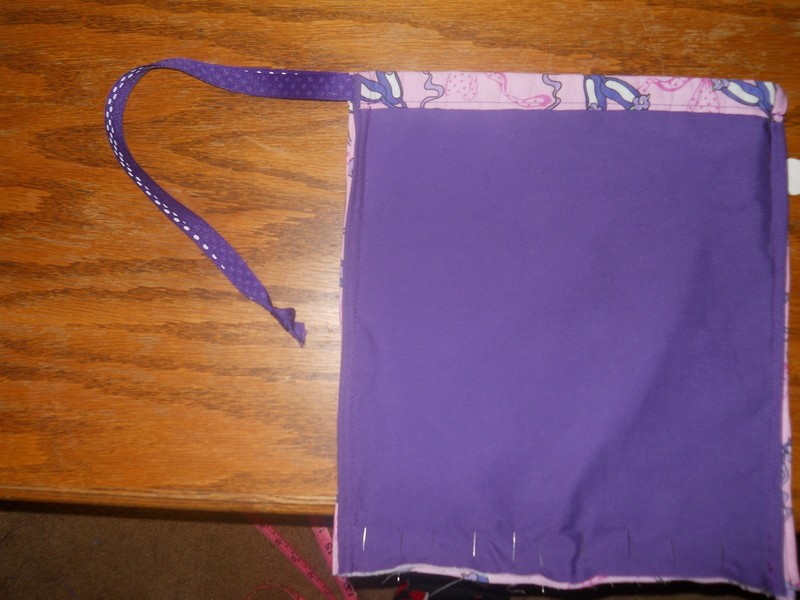
 Step 8
Cut your ribbon or cord so you have two 58'' pieces. Run one through both sides of casing.
-
 Step 9
Repeat with the second ribbon or cord so that it comes out of the other side.
(Note: If you are using ribbon like me it may take some adjustments to get them to lay correctly so that the ouside of the ribbon will be on the outside once you sew it in and turn your pack rightside out.) -
 Step 10
Tuck your ribbon or cord through the opening of your pack and run it to the bottom of your back. Pin it along the bottom of pack and sew.
-
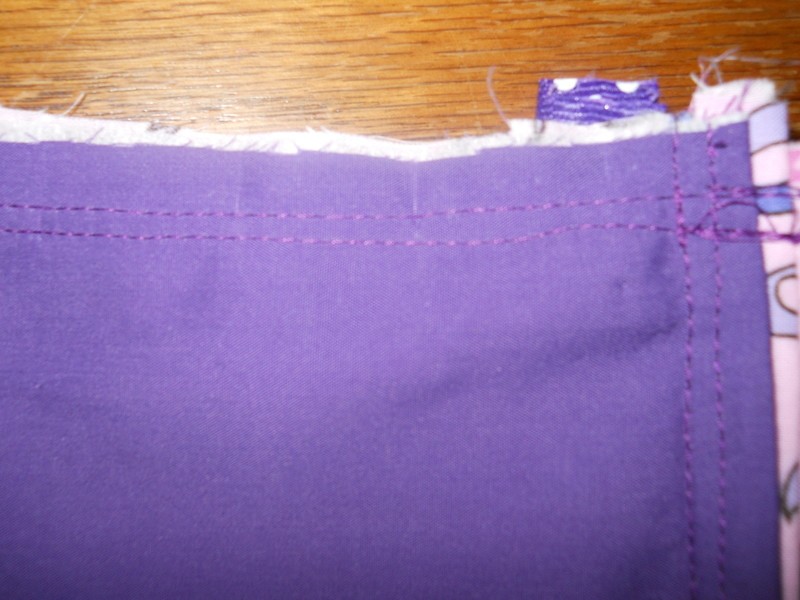
 Step 11
To make sure your pack is super secure you will want to sew a double line across the bottom.
-
 Step 12
Cut off excess fabric and overlock your end by using a zig-zag stitch. I went over mine twice. I also clipped the corners of my pack and went over that with a zig-zag stitch.
-
 Step 13
Turn your pack right side out and you're done!


Comments


 1
Home Accessories »
Diy Jewelry Box
1
Home Accessories »
Diy Jewelry Box
