


About
A customized sweater using bleach stencils and fabric paint!
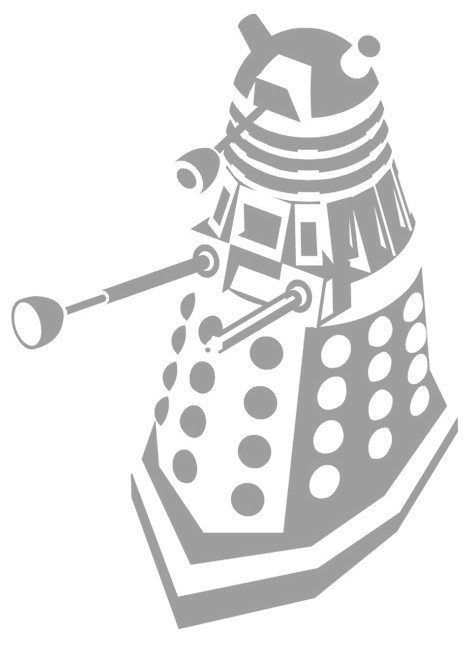
This was a christmas present for my boyfriend. The Doctor on the front and the Dalek on the sleeve are bleach stenciled, and the rest are done with fabric paints. All the stencils are made from contact paper.
I worked on this while he was at work over the course of a few weeks; the fabric paint is time consuming because you need it to dry between layers, so I prefer the bleach!
-
 VillainousNinja added Dr. Who Sweater Stenciled And Bleached to Inspiration
31 Jul 02:16
VillainousNinja added Dr. Who Sweater Stenciled And Bleached to Inspiration
31 Jul 02:16
-
VillainousNinja favorited Dr. Who Sweater Stenciled And Bleached
31 Jul 02:15
-
 matthew t. favorited Dr. Who Sweater Stenciled And Bleached
04 Dec 04:16
matthew t. favorited Dr. Who Sweater Stenciled And Bleached
04 Dec 04:16
-
 Tierra T. favorited Dr. Who Sweater Stenciled And Bleached
16 Nov 19:17
Tierra T. favorited Dr. Who Sweater Stenciled And Bleached
16 Nov 19:17
-
 C T. added Dr. Who Sweater Stenciled And Bleached to Clothes! x
27 Jul 01:05
C T. added Dr. Who Sweater Stenciled And Bleached to Clothes! x
27 Jul 01:05
-
Veronica R. added Dr. Who Sweater Stenciled And Bleached to veronica r.
21 Jul 16:09
-
 Liza B. added Dr. Who Sweater Stenciled And Bleached to Kids
13 Jul 13:14
Liza B. added Dr. Who Sweater Stenciled And Bleached to Kids
13 Jul 13:14
-
 Mary C. favorited Dr. Who Sweater Stenciled And Bleached
11 Jul 22:55
Mary C. favorited Dr. Who Sweater Stenciled And Bleached
11 Jul 22:55
-
 LizzyLovesSatan commented on her project Dr. Who Sweater Stenciled And Bleached
10 Jul 00:07
LizzyLovesSatan commented on her project Dr. Who Sweater Stenciled And Bleached
10 Jul 00:07
-
 Yvonne R. favorited Dr. Who Sweater Stenciled And Bleached
09 Jul 04:25
Yvonne R. favorited Dr. Who Sweater Stenciled And Bleached
09 Jul 04:25
You Will Need
-
Step 1
First, find or create an image to use. For this method, make sure it is a proper stencil with bridges so that you are not left with free floating pieces in the design.
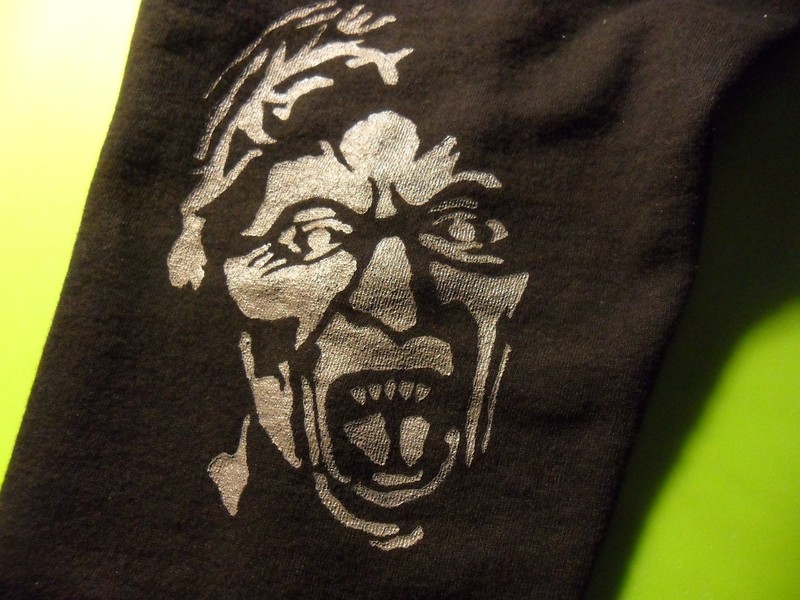
For this weeping angel face, it was small enough to print on one sheet of paper. -
Step 2
Next, cut a piece of contact paper big enough to fit your image on it, plus extra so that you don't risk painting on the sweater!
Then you need to trace the image onto the clear side of the contact paper. I prefer to use a fine point permanent marker for this. No need to be SUPER exact; the cutting is what really matters here! -
Step 3
Once your design is traced, use an x-acto knife to cut out the design, being careful not to cut any of your bridges off. Also be careful to cut out all the parts completely. It sucks to get done cutting only to found out a few tiny corners are still attached and you need to go back in with the knife!
-
 Step 4
Then just carefully peel the clear side of the contact paper off the paper side, and position it on the item you are going to stencil.
Make sure everything is nice and flat, and that all the edges of the contact paper have made solid contact with your fabric. -
 Step 5
Now, start painting!
If your fabric is at all thin, put something behind the layer you are stenciling so that you won't risk paint bleeding through.
Make sure to cover the image totally.
I like to do between two and four layers of paint, depending on the fabric. Use your judgement!**Be sure to let each layer dry completely before you start another layer!
-
 Step 6
Do not do TOO MANY layers though: if fabric paint is too thick, it will start lifting off and crack easily. Again, use your best judgement.
Once all the paint is totally dry, gently lift the stencil off.
** I can tell that I have used TOO MUCH paint if I have to run along the edges of the print with a knife to get the stencil off. I tend to use too much a lot :P
-
 Step 7
Here's another in-progress of the logo on the front. I mixed glow in the dark paint with this one :)
** If your fabric paint requires ironing, the time to do it is once you have the stencil off. Follow the instructions for your paint!
-
 Step 8
I used this image for the back of the sweater. To get it big enough to cover the whole back, I used the program Posterazor (very basic program that works super well!).
-
 Step 9
The back - finished. This one also glows in the dark!!
-
 Step 10
BLEACH STENCILS ~
These are basically the same as the fabric paint, the design is just reversed so that the image to be used is one solid piece, and the bleach goes all around it.
Stick your stencil to the hoodie. Put a bit of bleach into a small spray bottle, and gently spray the area with bleach. Dab with a paper towel to get rid of excess bleach, and repeat the process as needed until the fabric reaches your desired lightness. This happens pretty quickly, so be prepared to work fast!
-
 Step 11
When working with bleach, always work in a ventilated area and wear gloves!
For style, I like to set the spray bottle so that I can spritz very gentle and get a nice drizzle of bleach drops all over the design. This gives it a nice organic, drippy look!


 1
Home Accessories »
Diy Jewelry Box
1
Home Accessories »
Diy Jewelry Box

Definitely give it a go! I am no expert in this stuff, but it really is quite easy to do well