


About
Fabulous Felt
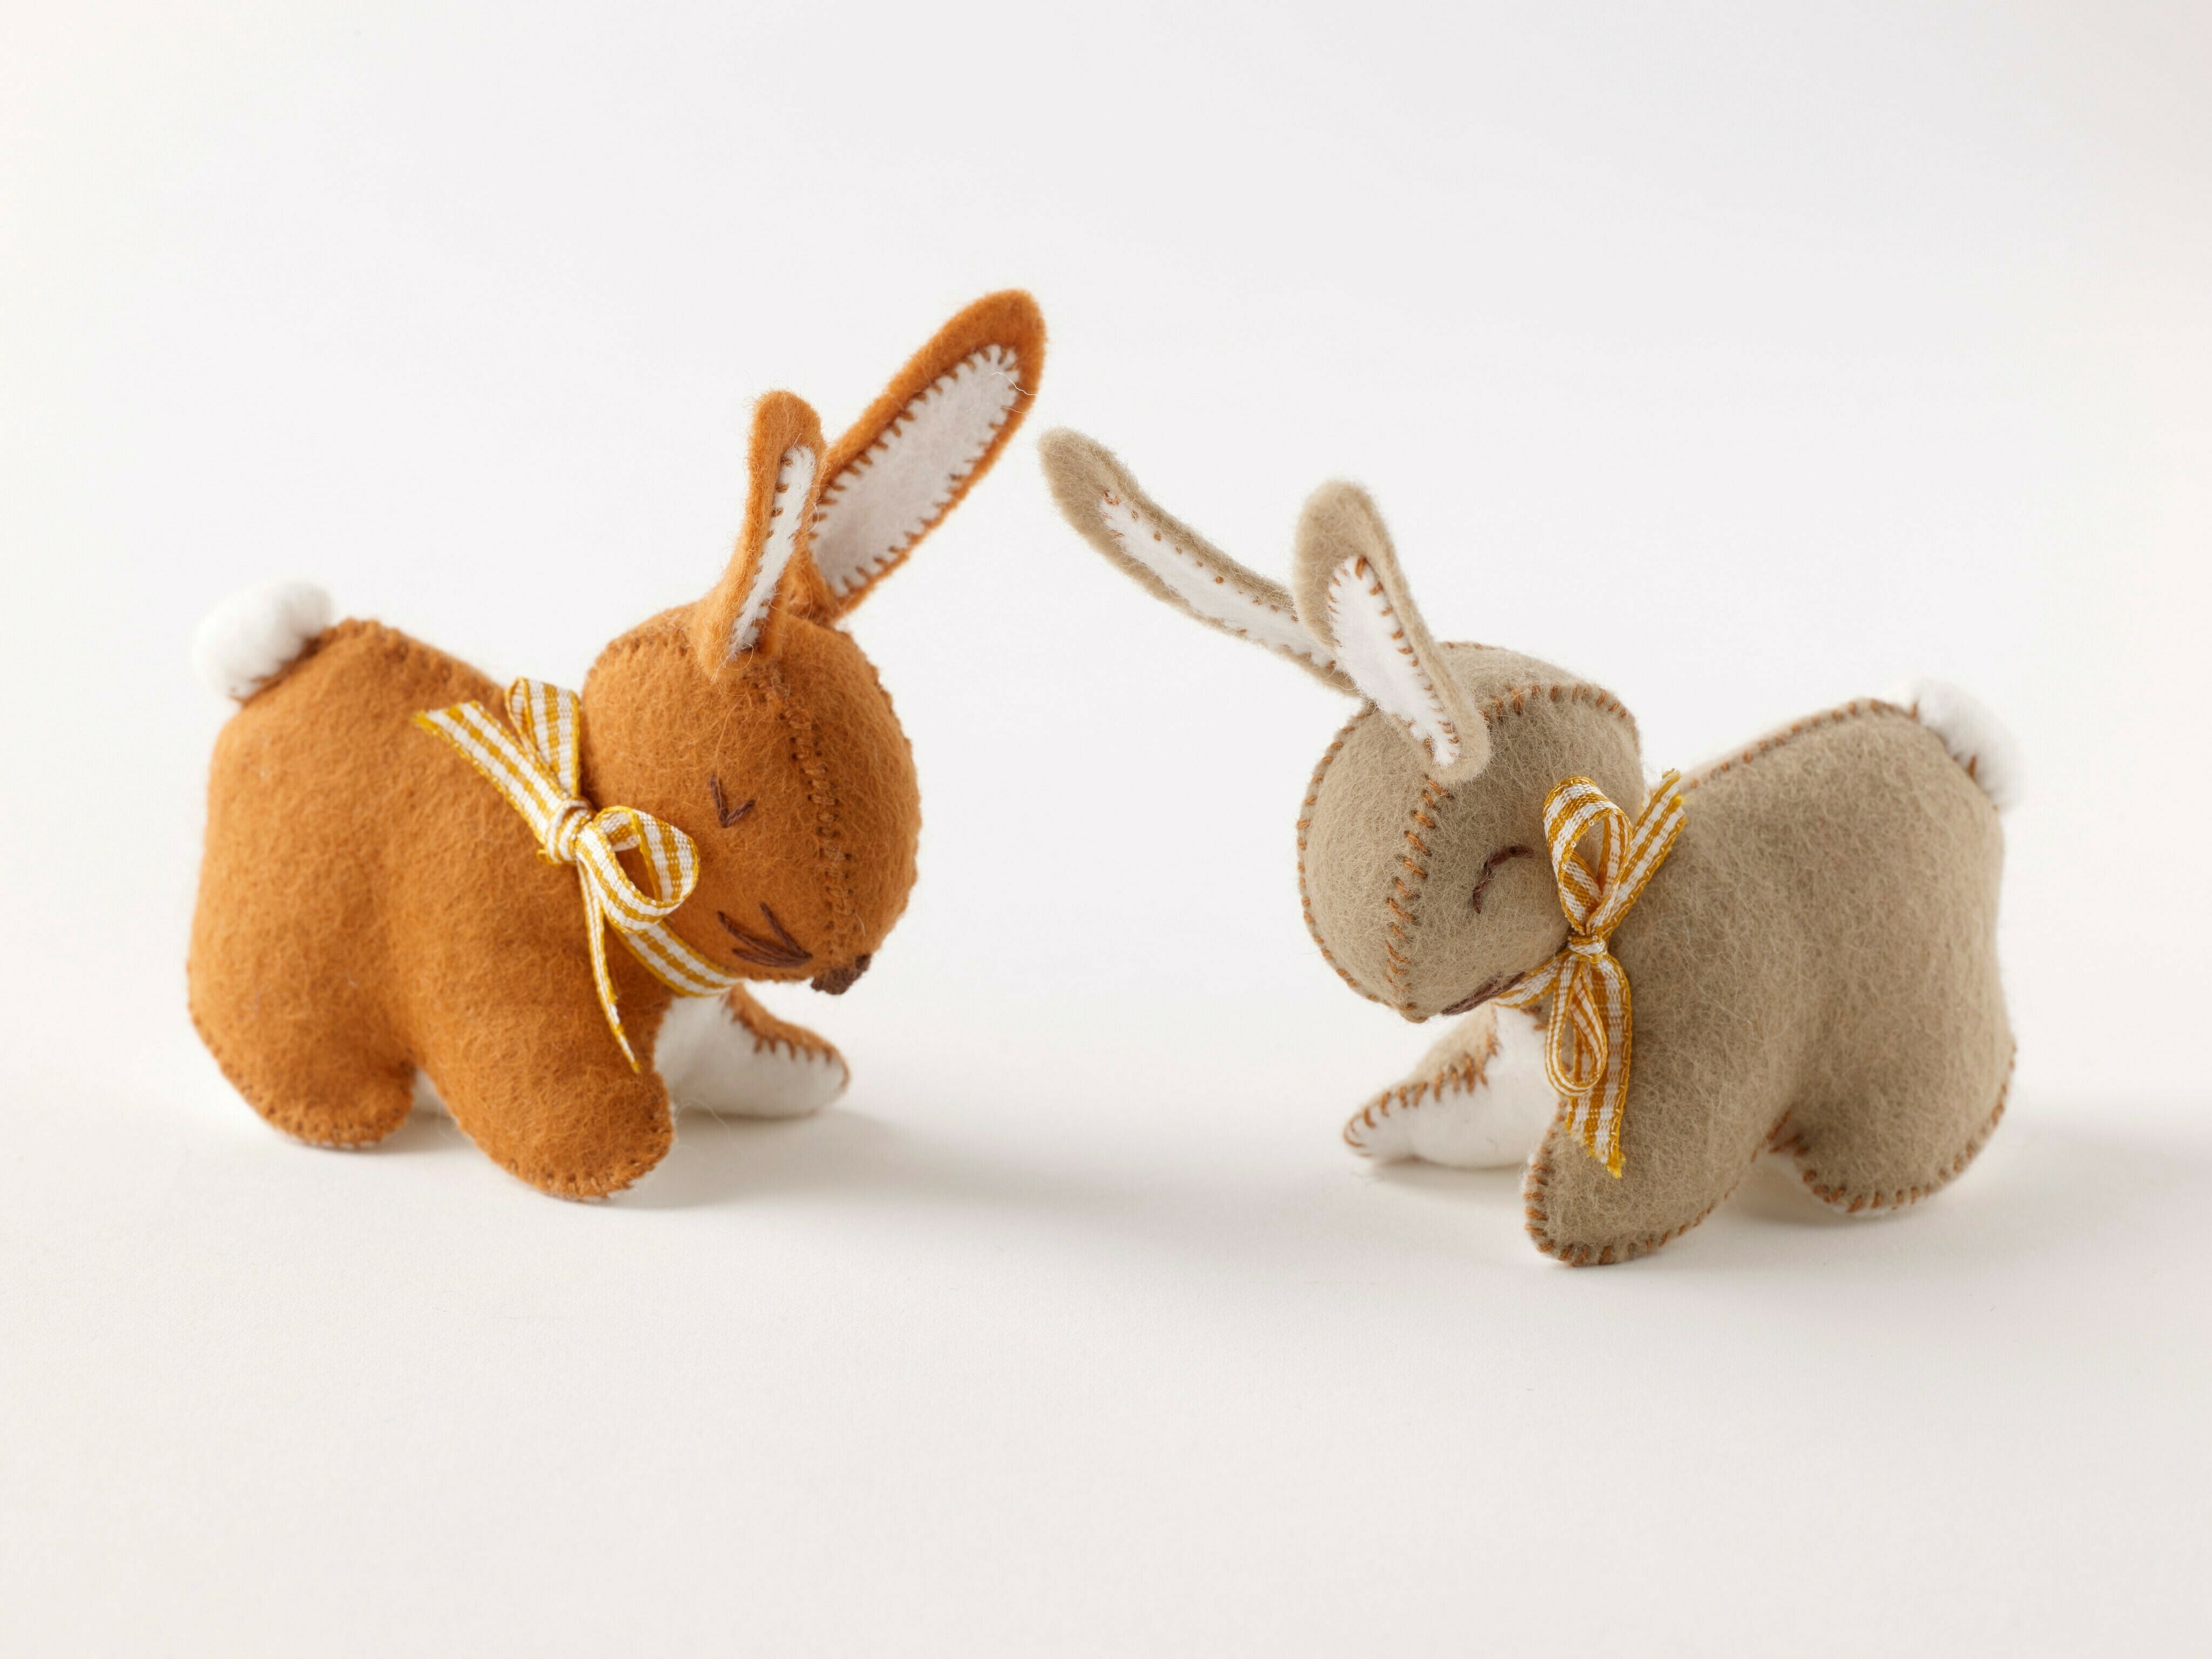
These little bunnies are adorable and will look great as a group. Place them on a shelf, the mantelpiece or your Easter table for a cute spring touch. I was inspired when at the local farm with my children and we saw a group of rabbits eating grass. They looked like they were having a little chat and a giggle!
Tags
Downloads
- 2021-03-01-141554-Fabulous+Felt_copyright+rp5.pdf 473 KB [ Download ]
-
 Bryan S. favorited Decorative Rabbits
28 Aug 08:02
Bryan S. favorited Decorative Rabbits
28 Aug 08:02
-
 lynn.wagner.501 favorited Decorative Rabbits
13 Jul 08:24
lynn.wagner.501 favorited Decorative Rabbits
13 Jul 08:24
-
 RareJewel favorited Decorative Rabbits
23 Mar 21:33
RareJewel favorited Decorative Rabbits
23 Mar 21:33
-
 Lacquered Lawyer favorited Decorative Rabbits
16 Mar 04:01
Lacquered Lawyer favorited Decorative Rabbits
16 Mar 04:01
-
 Sarah W. favorited Decorative Rabbits
12 Mar 09:45
Sarah W. favorited Decorative Rabbits
12 Mar 09:45
-
 Bonnie P. favorited Decorative Rabbits
09 Mar 04:50
Bonnie P. favorited Decorative Rabbits
09 Mar 04:50
-
 Suzanne D. commented on Decorative Rabbits
06 Mar 20:37
Suzanne D. commented on Decorative Rabbits
06 Mar 20:37
-
 Deb E. commented on Decorative Rabbits
01 Mar 05:17
Deb E. commented on Decorative Rabbits
01 Mar 05:17
-
Deb E. replied to a comment on Decorative Rabbits
01 Mar 05:16
-
Deb E. favorited Decorative Rabbits
01 Mar 05:14
You Will Need
-
Step 1
Cut out the templates and transfer to the felt. You will need two bodies, one head piece and two ears in the fur-coloured felt and one tummy, two inner ears and one tail in the white felt. Cut the felt.
For best results, I would advise splitting your thread and using only two or three strands as all the stitches will need to be small and delicate. -
Step 2
Embroider the eyes and the whiskers on each side, using backstitch or simple long stitches.
-
 Step 3
Place the white inner ear on top of the coloured ear and stitch with small overhand stitches. Fold the base in half to give it a bit of depth and sew small overhand stitches along the base.
-
 Step 4
Place the top of the head piece onto one side of the body and start sewing with an overhand stitch from the nose point D, going up towards the top of the head.
When you reach the place for the ears, simply insert them with the white facing forward and carry on stitching through the side layer, the ear and the top of the head. Sew all the way to point C.
-
Step 5
Position the other side of the body, matching points C and D and stitch from C to D. Do not forget to insert the other ear!
Sew the two body sides together at the chin from D to B. -
Step 6
Place a few straight stitches close together on the point of the nose. This will keep the end tidy and make a cute nose
-
 Step 7
Add the tummy piece, matching the front and back legs to the body pieces. Stitch from point B and sew all the way to A on one side and then back to B on the other side.
Fill your bunny with the toy stuffing, making sure it goes into the nose and legs to give them a nice shape. Close the body completely by sewing from A to C and adding a bit more toy stuffing if necessary.
-
 Step 8
To make the tail, close to the edge of the circle with a loose running stitch and don’t cut the thread. Pull gently on the thread to gather the felt and form a ball shape. Place a small amount of toy stuffing inside and knot the ends of the thread. Attach the tail to the bunny’s behind with small stitches all the way round. Finally, tie the ribbon around the bunny’s neck and finish with a bow.


Comments


