Colorful Name Tags
Extract from Digital Hand Lettering and Modern Calligraphy • By Kim, Shelly • Published by Quarry Books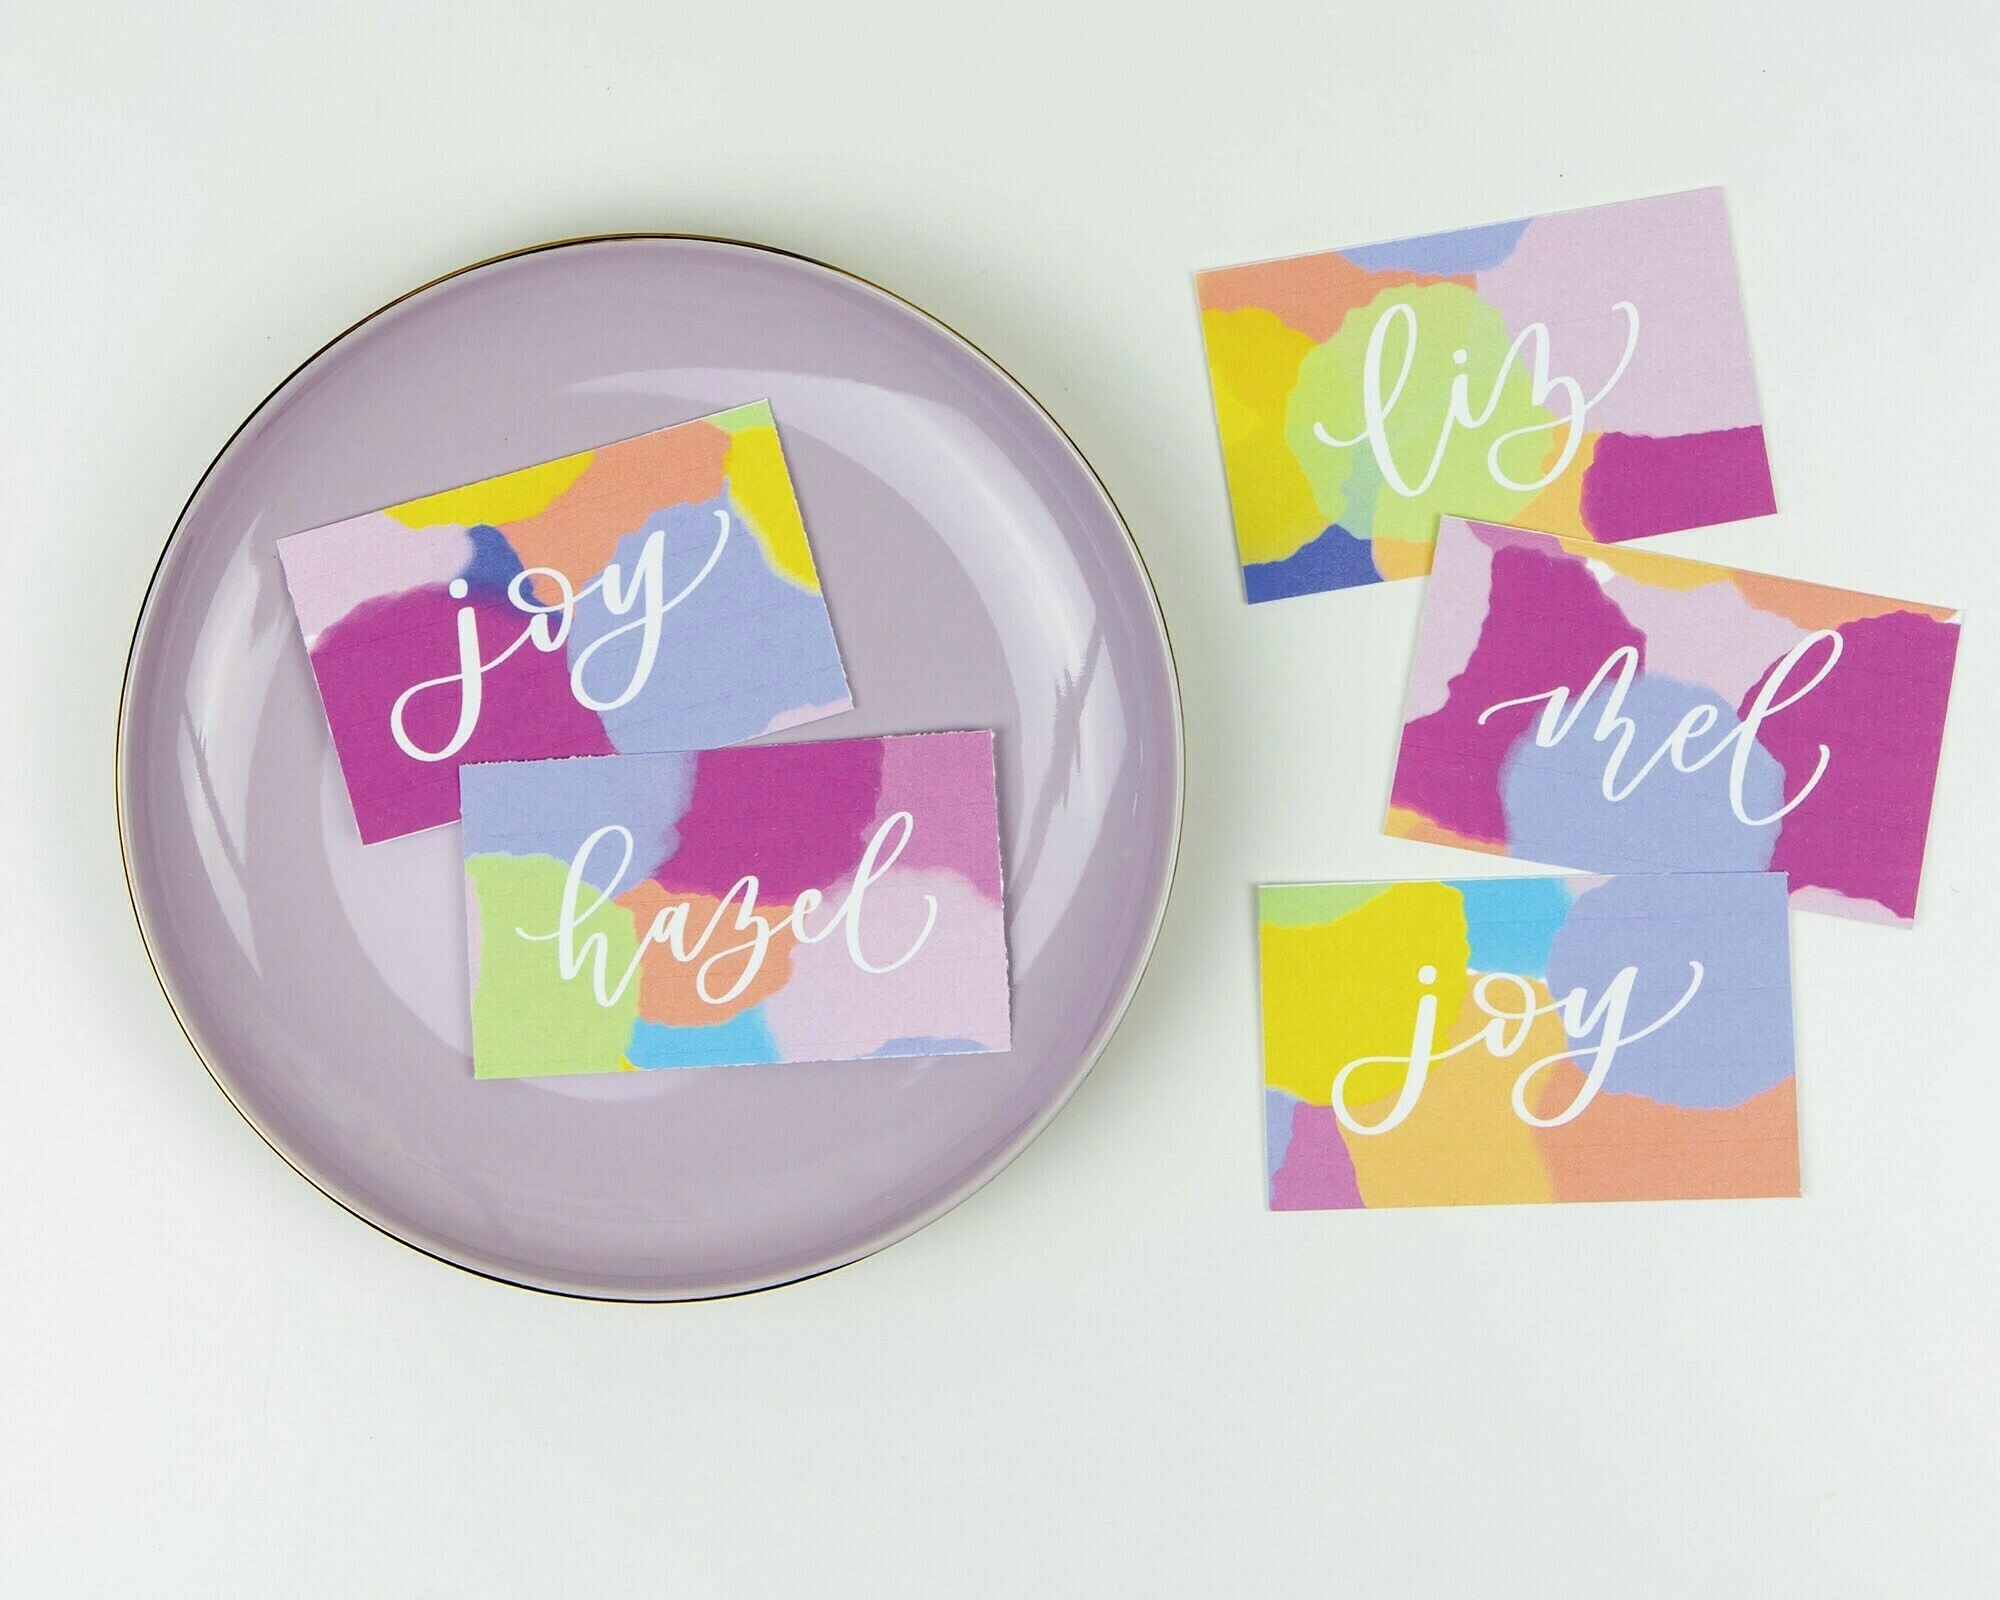


About
Digital Hand Lettering and Modern Calligraphy
This project focuses on creating a watercolor background on Adobe Sketch and then creating name tag templates on Procreate to print out for any occasion. Because I love this technique and the process of creating them, I create these name tags often for my workshops and family parties!
-
 Aurum Press published her project Colorful Name Tags
11 Jan 09:00
Aurum Press published her project Colorful Name Tags
11 Jan 09:00
You Will Need
-
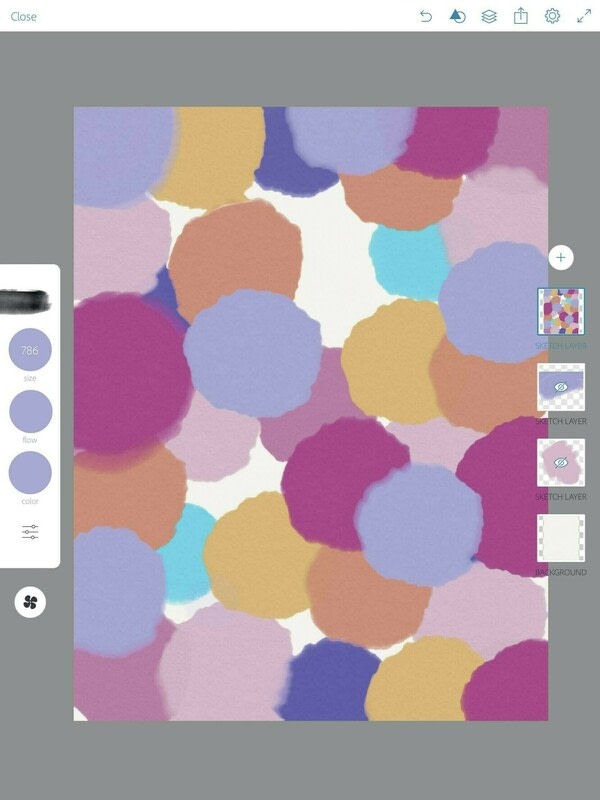
 Step 1
Using Adobe Sketch, open a new canvas and select the Water brush. I am using an 8.5 x 11 inches (21.6 x 28 cm) canvas size. Select any color and draw a few circles in the upper-left and bottom-right corners.
-
 Step 2
Continue this process and increase and decrease the brush size for each color chosen.
-
 Step 3
The goal is to have a mixture of circles all over the canvas in different sizes.
-
 Step 4
Continue to fill the entire canvas with a variation of colors. Once you’re happy with the artwork piece, double-tap the background and save the image.
-
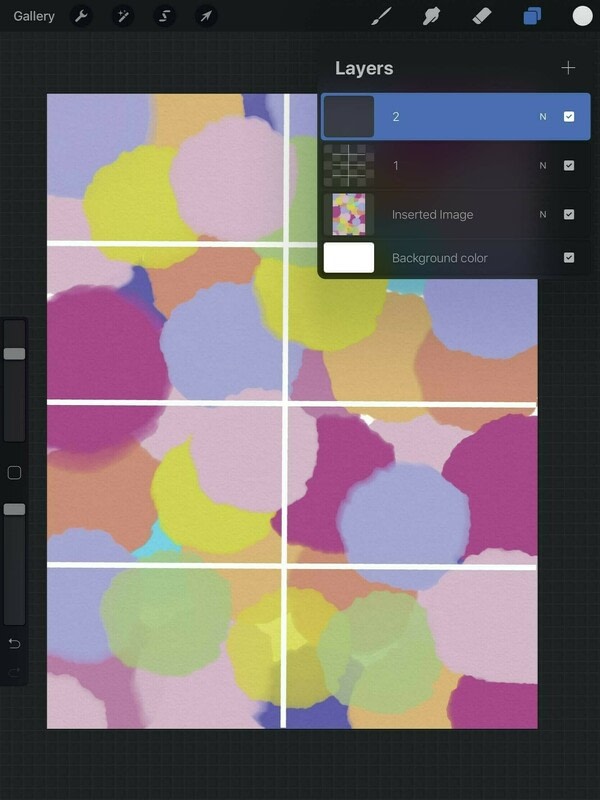
 Step 5
Next, open a new canvas (same dimensions as in Adobe Sketch, 8.5 x 11 inches [21.6 x 28 cm]) on Procreate and select Insert a photo to import the watercolor piece you just created in Adobe Sketch.
• Open a new layer to create guidelines for the name tag and deselect the layer with the background piece for the layer to remain “hidden.”
• Using the Monoline brush, draw a vertical line in the center of the canvas. Make sure to use the Transform tool to center and rotate if needed.
• Next, start drawing horizontal lines beginning about one third from the top.
• Continue to draw more lines until the boxes are all even.TIP If you draw a rough straight line and keep the Apple Pencil on the screen, the line will
perfect itself and straighten out. The lines can also be drawn on individual layers, making it
easier to move them around if needed. -
 Step 6
Now turn the background layer (Inserted image) back on by checking the box.
-
 Step 7
Select the layer with the lines (Layer 1) by tapping and selecting Alpha lock and then fill the layer (recolor to the color white). Note: The recoloring process to the color white has made it easier for the printing/cutting process and saves you black ink.
-
 Step 8
On a new layer, start lettering the names you’d like to use on the tags. In my example, I’ll be making two name tags per person.
-
 Step 9
Once you’re done lettering the names and are happy with the results, save the image and print and cut the name tags, using the grid lines to help you cut evenly. Perfect for any occasion, these name tags can use any color theme or pattern!
-
 Step 10
Here’s another version of the name tags. The same template was used, but the background pattern is different.