


About
How to create your own opulent Christmas Crackers in a riot of colours and textures...
Be on trend this Christmas and celebrate a clash of different cultures, epochs and art movements by creating your own Christmas Fusion Crackers - with seals made from glue sticks in red, blue, yellow and green. Decorate them with animal skin patterned paper and materials such as velvet, embossed leather, feathers and wooden beads. Each one is unique and personalised...
You can check out more fantastic projects on the Dremel website.
Tags
-
 Desiree commented on Christmas Crackers
03 Nov 14:42
Desiree commented on Christmas Crackers
03 Nov 14:42
-
 kimberleyann.black.3 favorited Christmas Crackers
26 Dec 12:35
kimberleyann.black.3 favorited Christmas Crackers
26 Dec 12:35
-
 Ruby T. added Christmas Crackers to Things I like
15 Dec 14:18
Ruby T. added Christmas Crackers to Things I like
15 Dec 14:18
-
 Lynnie C. favorited Christmas Crackers
27 Nov 19:47
Lynnie C. favorited Christmas Crackers
27 Nov 19:47
-
 Rosie H. favorited Christmas Crackers
15 Sep 18:24
Rosie H. favorited Christmas Crackers
15 Sep 18:24
You Will Need
-
 Step 1
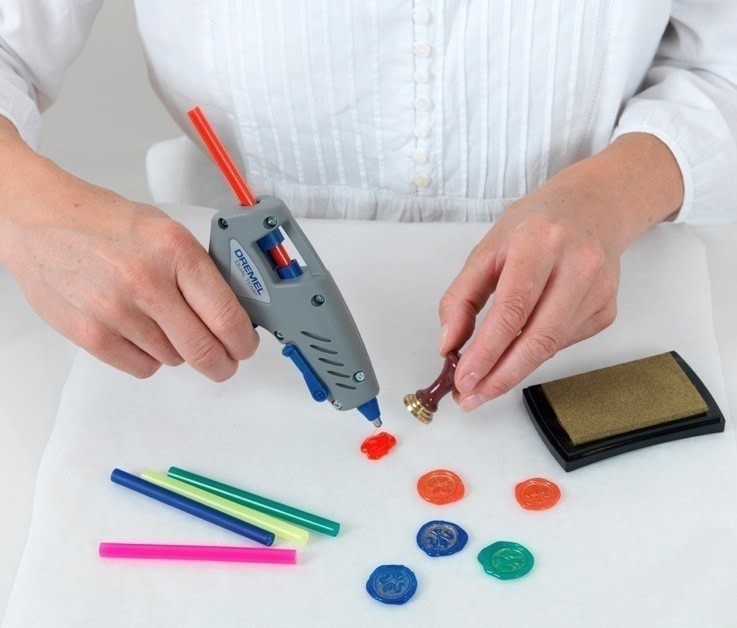
To make the decorative seals fit the Dremel Glue Gun with a coloured glue stick. Dispense a large bead of glue onto the baking parchment and working quite quickly so that the glue remains flexible, press the seal to the surface of the ink pad and then onto the bead of warm glue. Repeat to make more seals. When cool, peel baking parchment from the back of the seals. Practice to establish how much glue to dispense to suit your particular seal.
-
 Step 2
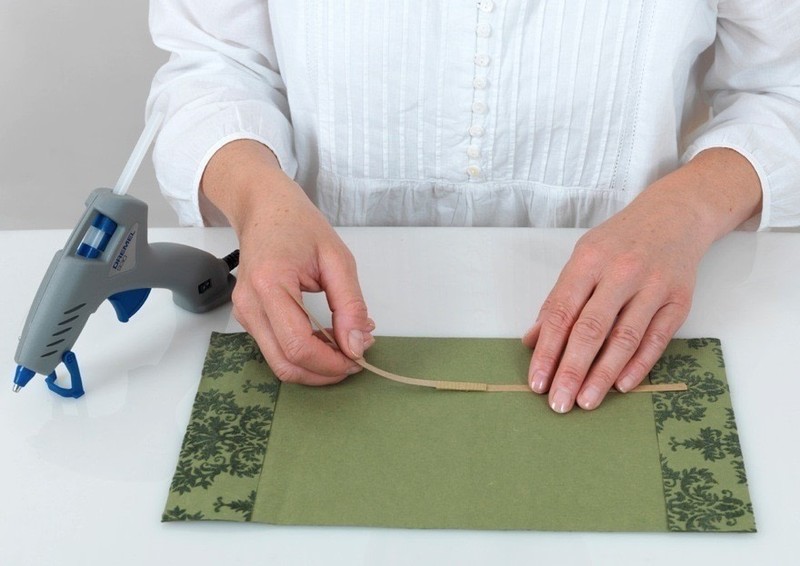
Cut decorative paper to measure 43 x 18cm. Place face down and score lines 10cm in from each short end, then fold the along the lines and glue the flaps down using the Glue Gun and clear glue. This will strengthen the ends of the finished cracker. Use a small bead of glue to secure the cracker snap to the covering lengthways.
-
 Step 3
Place three cardboard tubes end to end on the paper and begin to roll the covering tightly around them. Use the Glue Gun with clear glue to run a thin line of glue along the edge, and continue rolling to adhere the paper around the tubes.
-
 Step 4
Pull one of the end tubes slightly away from the central tube and tie ribbon between the two tubes, gently manipulating the paper to create a 'waist' and tying a secure knot. Insert a small gift and some sequin confetti before repeating at the opposite end of the cracker. Leave the cardboard tubes in the ends while you decorate your cracker. This will help to prevent the ends from getting creased while you work and provide a firmer support if you wish to glue decorations around them.
-
 Step 5
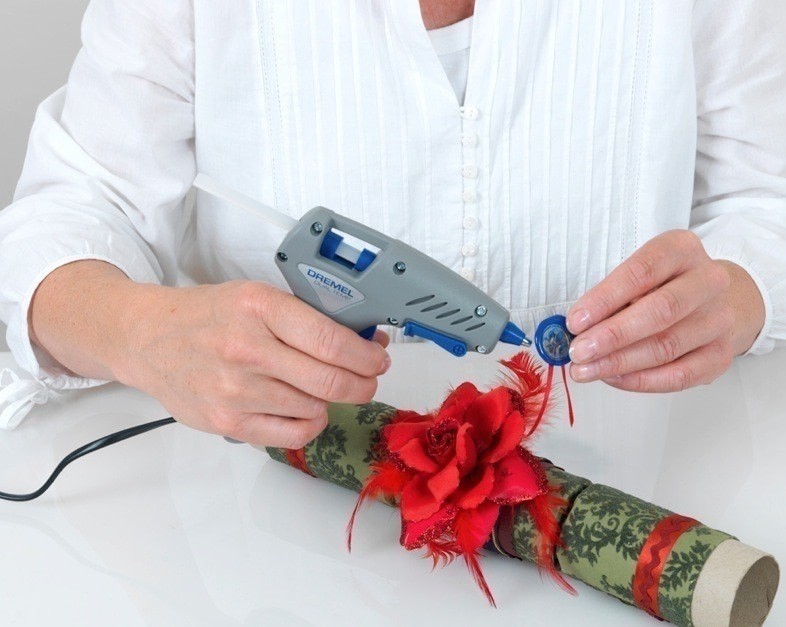
Using the finished shot as a guide, decorate the cracker with layered paper, ribbons, trimmings and embellishments as desired. To finish, use your Glue Gun fitted with a clear glue stick to glue short lengths of ribbon to the back of a prepared seal, then glue the seal in place on the finished cracker. Carefully remove the cardboard tubes from each end of the cracker.


Comments


