


About
Put fabric scraps to good use with simple to make mini pouches
I got the idea for this project after I created some pillows using the same technique. Its a perfect way to bust that ever growing stash of fabric scraps and create some fun little gift bags at the same time.
-
 Rebecca C. commented on Buttoned Embellished Bags
18 Aug 05:13
Rebecca C. commented on Buttoned Embellished Bags
18 Aug 05:13
-
Rebecca C. favorited Buttoned Embellished Bags
18 Aug 05:08
-
 Susana F. added Buttoned Embellished Bags to like to try
20 Aug 23:22
Susana F. added Buttoned Embellished Bags to like to try
20 Aug 23:22
-
 pandanomz added Buttoned Embellished Bags to my list
08 Sep 14:33
pandanomz added Buttoned Embellished Bags to my list
08 Sep 14:33
-
 RustyFish favorited Buttoned Embellished Bags
07 Jun 21:32
RustyFish favorited Buttoned Embellished Bags
07 Jun 21:32
-
 Riya K. favorited Buttoned Embellished Bags
03 Jun 05:05
Riya K. favorited Buttoned Embellished Bags
03 Jun 05:05
-
 Jo S. favorited Buttoned Embellished Bags
02 Jun 19:26
Jo S. favorited Buttoned Embellished Bags
02 Jun 19:26
-
 Karen D. favorited Buttoned Embellished Bags
02 Jun 14:12
Karen D. favorited Buttoned Embellished Bags
02 Jun 14:12
-
 Nancy! favorited Buttoned Embellished Bags
31 May 18:10
Nancy! favorited Buttoned Embellished Bags
31 May 18:10
You Will Need
-
 Step 1
Who doesn't love a good fabric stash buster/scrap project? I am forever on the lookout for great
projects that will use up my fabric scraps. I also love to create tiny totes. They are very handy for giving small gifts such as gift cards, candies, soaps, art gifts, etc. -
 Step 2
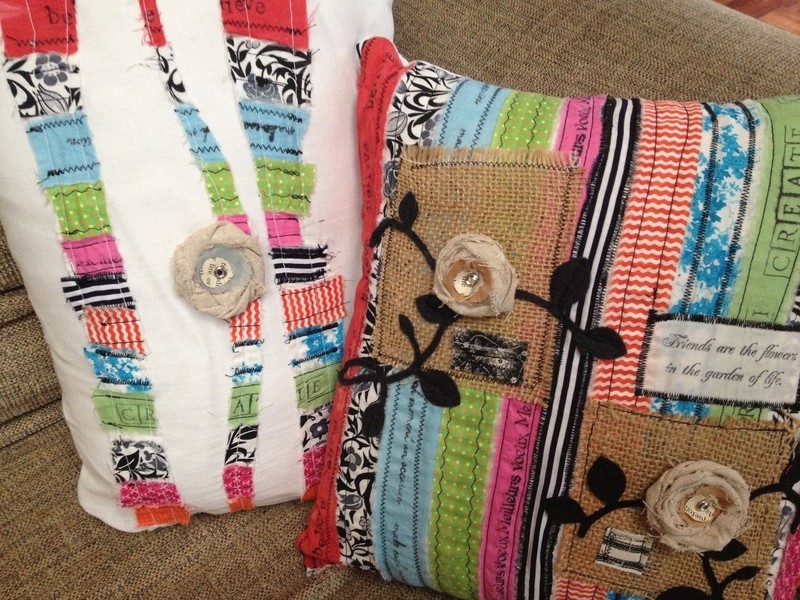
I recently had the idea to use some of my larger scraps to create these pillows, exploding with color. I tore strips of fabric in a mix and match color theme and pattern selection. The way that I assembled the pillow on the right is the same way that I assembled these cute little tiny totes, embellished with buttons.
-
 Step 3
I simply pinned together two of the strips and used my sewing machine and some black thread to sew the pieces together.
-
 Step 4
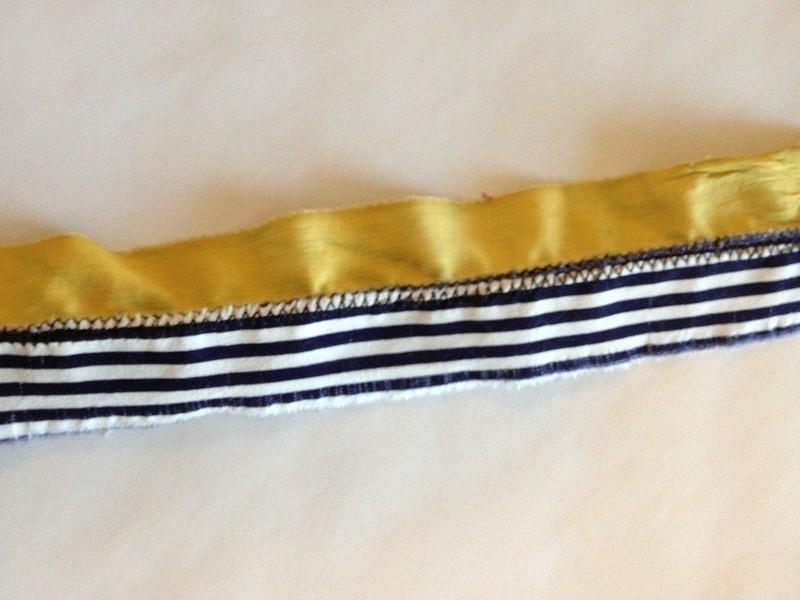
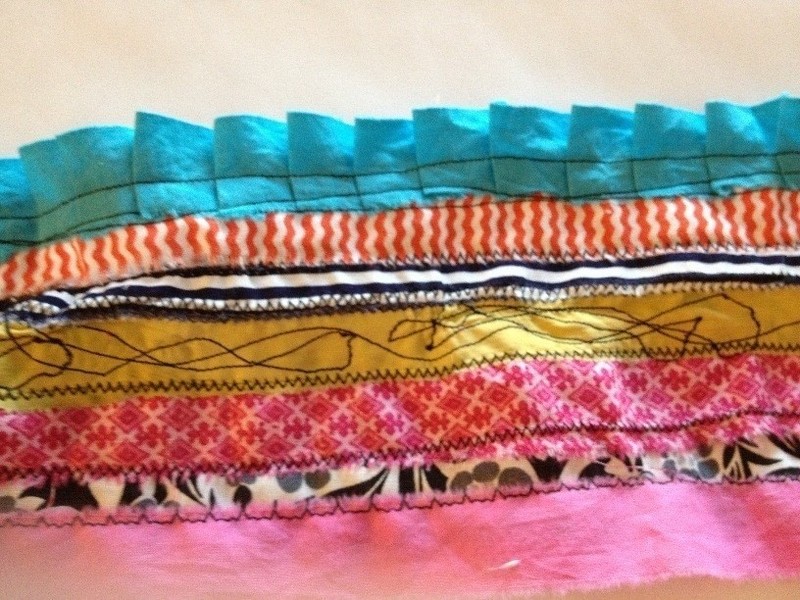
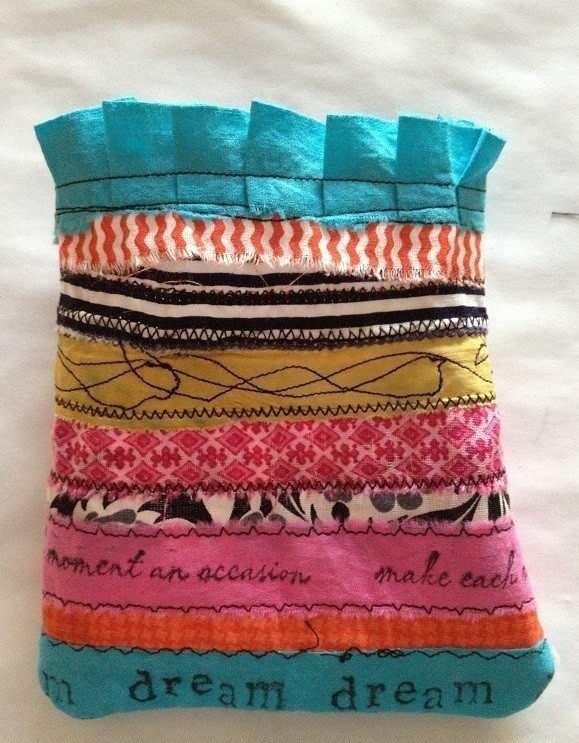
.Continue in the same fashion until your strips make one nice sized piece of fabric that can be cut to form the front and back of the little tote. Notice how I used the various stitches found on my machine to join the pieces together, which adds some fun elements to the tote bag. I also used some free form stitching (see the yellow strip) to add a little whimsy. Some of these fabrics were purchased patterns leftover from previous projects and some were strips of hand dyed muslin I use to make my hand dyed and stamped ribbons. The idea is to have fun using up strips from your stash.
-
 Step 5
I couldn't resist adding a stamped sentiment to some of the strips that were solids. Text type details make things so interesting. I used solvent ink and set it with my iron on a medium setting (no steam).
-
 Step 6
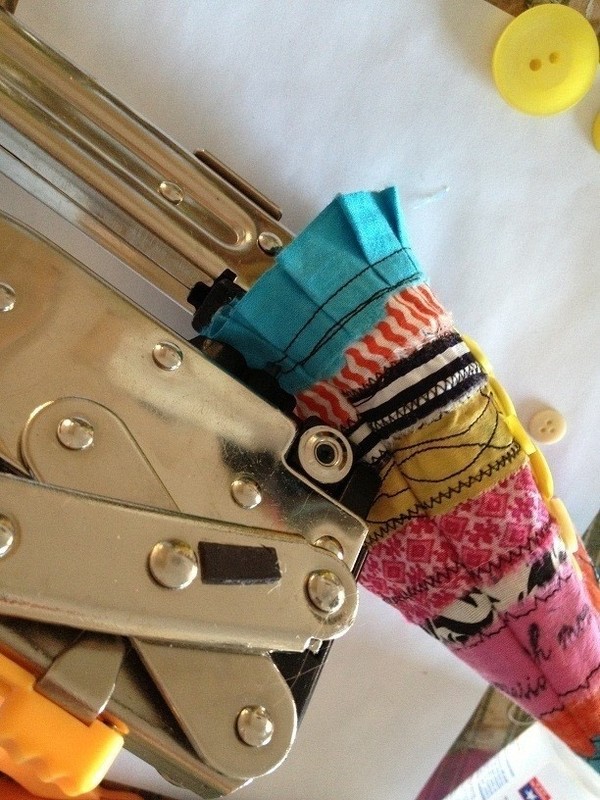
Determine the desired size of your finished totes and add a 1/2" seam allowance on all sides. So if you want your tote to be, say, 5 1/2" x 7", cut your pieces to 6 1/2" by 8" using a self healing cutting mat and rotary cutter. Join the pieces together, wrong sides out. I was left with an uneven edge on one side since my strips were not exactly evenly torn. I cut off that edge and set it aside so that the edges were even. This makes it much easier to sew even seams.
-
 Step 7
Once my bag was sewn, I used the iron to steam the seams open and turned it right side out. Note that I used a knife pleated piece of hand dyed ribbon for the top of the tiny tote, which makes a nice embellished finish on the top edge.
-
 Step 8
Now for the part that's even more fun than putting the strips together. Embellishing it with BUTTONS. I fell in love with these hand dyed buttons by designer Laura Kelly for Buttons Galore and More that I received in my design team package.I laid out a little "design" and used Beacon Adhesives Fabri-Tac to glue everything in place.
-
 Step 9
One of my favorite parts of this tiny tote is the button handle created by threading the buttons onto
a piece of wire. -
 Step 10
I attached the handle by punching holes with a heavy duty hole punch, punching right through the fabric layers.
-
 Step 11
I used round nosed beading pliers to curl the sharp edges inward and secure the handle.
-
 Step 12
Even before joining the design team at Buttons Galore and More, I was fascinated by these little pieces of smooth plastic pieces they call "Start-Ups." They handle ink beautifully. I used chalk ink by ClearSnap to ink the piece in an uneven manner. I did have to use my heat gun to get the ink to set quickly though. I'm impatient that way.
-
 Step 13
I stamped a fleur de lis motif in the center with the solvent ink.
-
 Step 14
I had so much fun making this little button embellished tote that I had to make another one. I mean, I had all these torn fabric strips just laying around, right?
-
 Step 15
Remember the scrap I cut off of the uneven edge of the joined strip fabric piece?
-
 Step 16
It didn't go to waste either! It seems scrap fabric projects lead to more scrap fabric projects!
-
 Step 17
Live, Life Creatively,


Comments


