


About
A Simple Kindle Fire Slip Case Tutorial using fat quarters and flannel.
Last year, I received a Kindle Fire for Christmas, it was the perfect present for me, both unexpected and practical. I read that Amazon sold at least 4 million of these for the holidays – so there’s a good chance you got one, too. Besides reading books and magazines on the go, Kindles can play on the Internet. If you’re in the middle of a great book and find yourself with time to kill during your busy day you’ll want to take it with you. And if it’s leaving the house, you probably should put it in a pretty carrying case. I certainly shouldn’t mention that I knew I needed a case when all I had was a size 4 “pull-up” to put the kindle in. It survived unscathed but humiliated.
Kindle slip cases require only fat quarters or scraps and a few other notions to complete. It’s a quick and economical project. Two fat quarters will yield two cases.
-
 Becci A. added A Simple Kindle Fire Slip Case to Stuff
10 Aug 22:45
Becci A. added A Simple Kindle Fire Slip Case to Stuff
10 Aug 22:45
-
Becci A. favorited A Simple Kindle Fire Slip Case
10 Aug 22:45
-
 tarvie commented on A Simple Kindle Fire Slip Case
21 Jul 22:32
tarvie commented on A Simple Kindle Fire Slip Case
21 Jul 22:32
-
tarvie favorited A Simple Kindle Fire Slip Case
21 Jul 22:31
-
 Carrie Alice added A Simple Kindle Fire Slip Case to Crafty
12 Aug 07:06
Carrie Alice added A Simple Kindle Fire Slip Case to Crafty
12 Aug 07:06
-
 Meg S. commented on A Simple Kindle Fire Slip Case
15 Jul 13:19
Meg S. commented on A Simple Kindle Fire Slip Case
15 Jul 13:19
-
 Priscilla S. favorited A Simple Kindle Fire Slip Case
05 May 02:00
Priscilla S. favorited A Simple Kindle Fire Slip Case
05 May 02:00
-
 james w. favorited A Simple Kindle Fire Slip Case
06 Aug 04:48
james w. favorited A Simple Kindle Fire Slip Case
06 Aug 04:48
-
 Annelie S. favorited A Simple Kindle Fire Slip Case
12 Feb 19:10
Annelie S. favorited A Simple Kindle Fire Slip Case
12 Feb 19:10
-
 Yamila D. favorited A Simple Kindle Fire Slip Case
30 Jan 12:18
Yamila D. favorited A Simple Kindle Fire Slip Case
30 Jan 12:18
You Will Need
-
 Step 1
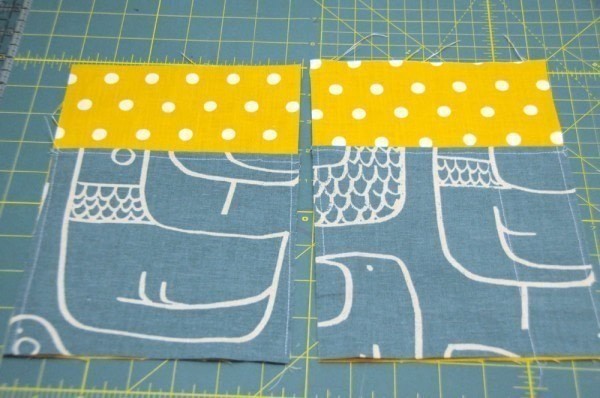
2 pieces of outer fabric cut to 6 & 5/8″ wide x 9 & 1/4″ tall2 pieces of pocket panels cut to 6 & 5/8″ wide x 6.5″ tall2 pieces flannel or other soft, non scratchy lining cut to 6 & 5/8″ wide x 9 & 1/4″ tallElastic, about 4-5″ long (we used 5″)Button
Seam allowances are approximately 3/8″; Finished dimensions approximately 6″ wide x 8.5 inches tall. For reference, Kindle Fire measures: 4.7″ x 7.5″ x 0.45″
Identify top of the pocket flap, fold over 1/8″ to wrong side and press, fold over one more time to wrong side and press. Edge stitch in place.
-
 Step 2
Identify top of the pocket flap, fold over 1/8″ to wrong side and press, fold over one more time to wrong side and press. Edge stitch in place.
-
 Step 3
Lay the envelope flap on top of the exterior fabric right sides up. Sew along the two long edges so the pocket flap is secured and does not shift. If you would like to divide the pockets into sections do so now
-
 Step 4
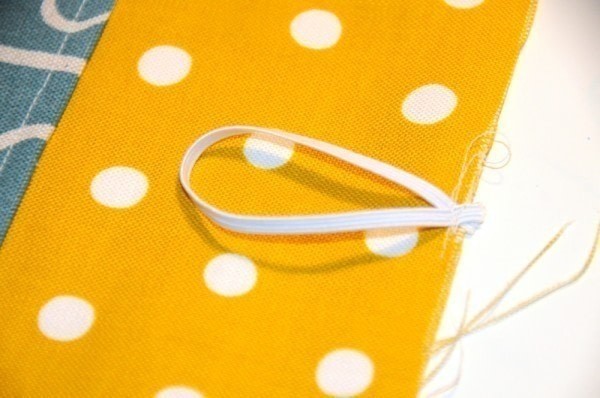
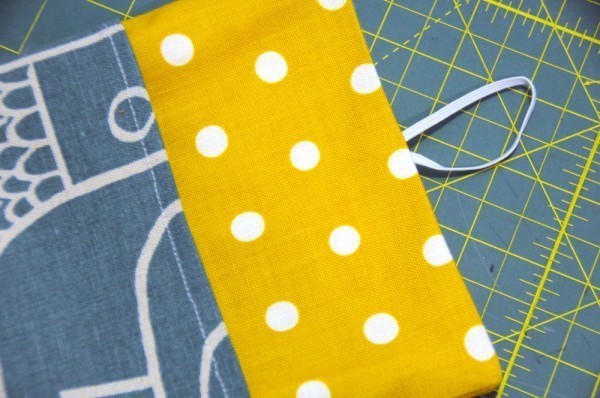
Using your elastic or other button loop identify the top center point of one of the panels (make sure the size of the elastic will allow you to sew a button in place; it should easily slip over but also secure the case opening. Fold the button loop in half and secure the raw ends to the raw edge of the fabric, and backstitch to secure in place.
-
 Step 5
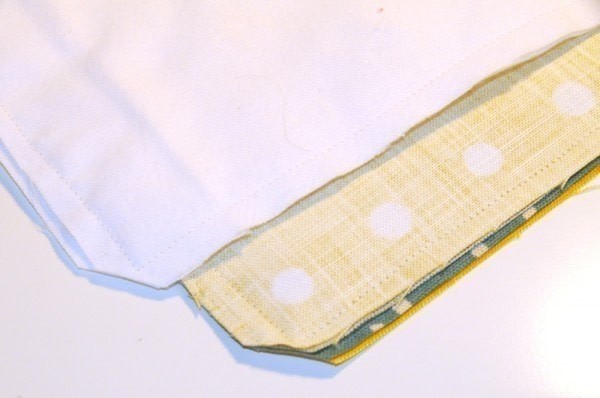
Next place your flannel on top of main panel (right sides together), sew the top edges together. Press seam allowance toward flannel.
-
 Step 6
Line up the two long pieces with right sides together. Try to match up the lining and exterior fabric joints. Pin around the edges.
-
 Step 7
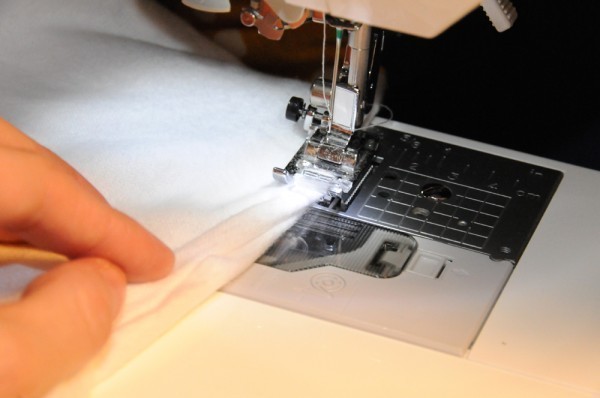
Sew along edges of this long panel. I began mid-way along one side of the lining fabric (flannel) and stopped about three inches short of closing the seam. You’ll need to leave this area open to turn the piece right side out.
Clip corners.
-
Step 8
Turn right side out. Use a chopstick or knitting needle to gently push the corners out.
-
 Step 9
Now stitch the opening shut. You could hand stitch this or use the machine as I did.
-
 Step 10
Push the lining into the slip case and press around the top edge.
-
 Step 11
Roll the top inward so the flannel is less visible.
-
 Step 12
Stitch around the mouth of the slip case so the lining doesn’t flop around.
-
 Step 13
Sew the button in a sensible location so your button loop can easily slip over it.


 1
Books & Journals »
Locking Box And Journal
1
Books & Journals »
Locking Box And Journal
 2
Babies & Kids »
A Toy Kitchen For A Child
2
Babies & Kids »
A Toy Kitchen For A Child
 3
Origami Flowers »
Origami Orchid
3
Origami Flowers »
Origami Orchid
 4
Office »
Pretty Sketchbooks
4
Office »
Pretty Sketchbooks
 5
Charms & Keyrings »
Shugo Chara Inspired Pop It
5
Charms & Keyrings »
Shugo Chara Inspired Pop It

Was I suppose to use the 2nd to line it?
Thanks for your help!
Meg