


About
Easy way to start machine patchworking!
This is quite an easy first project to get you started machine patchworking. I prefer the 'homemade' quality of items so I don't meticulously measure and cut the fabric but if you want to it would be best to make a paper template and cut out the fabric with a craft knife but it's totally personal preference. Also colour schemes are a personal thing, you could match it to the room it's going in or just use scraps that you've got available; I went for green fabrics and yellows but a good guide is use the same thread for everything and if the thread looks really out of place on one bit of fabric, it probably isn't working in the colour scheme but that's also up to you how you choose your colours. :)
Tags
-
 Gemma P. favorited 16 Patch Cushion
15 Feb 22:43
Gemma P. favorited 16 Patch Cushion
15 Feb 22:43
-
 silentband favorited 16 Patch Cushion
04 Aug 13:16
silentband favorited 16 Patch Cushion
04 Aug 13:16
-
 lange.hannalea favorited 16 Patch Cushion
26 Feb 17:29
lange.hannalea favorited 16 Patch Cushion
26 Feb 17:29
-
 rheabird favorited 16 Patch Cushion
21 Jan 16:20
rheabird favorited 16 Patch Cushion
21 Jan 16:20
-
 Youghurt Jaja favorited 16 Patch Cushion
27 Oct 19:21
Youghurt Jaja favorited 16 Patch Cushion
27 Oct 19:21
-
 Len favorited 16 Patch Cushion
07 Aug 17:53
Len favorited 16 Patch Cushion
07 Aug 17:53
You Will Need
-
 Step 1
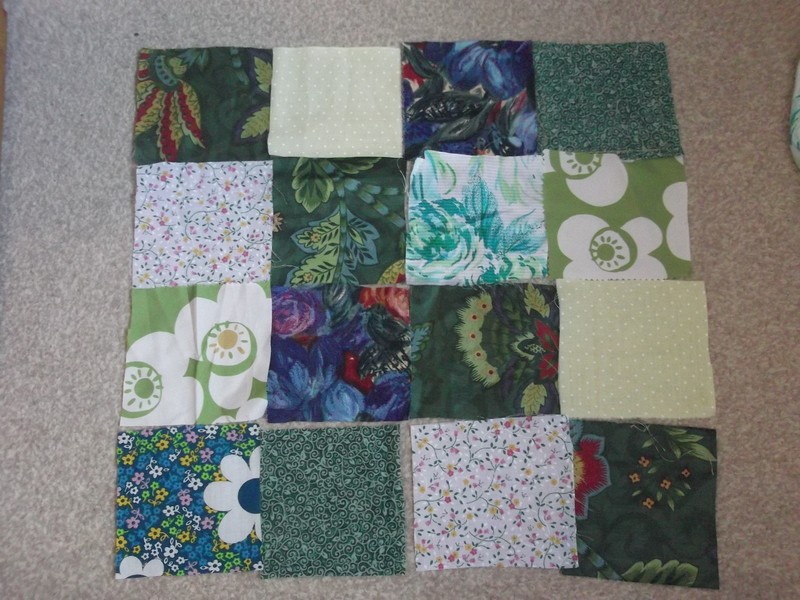
Firstly, you'll need to measure your chosen cushion and decide how many patches to make; for me I thought it was easy to measure 4 rows of 4 but you can do any number of patches :) then cut them out and work out the positioning of the final piece.
-
 Step 2
To join the patches first join the rows, when cutting the patches out allow a seam allowance and then draw round the template of your final patch size on the wrong side of the fabric- I used a pencil but you could use tailor's chalk
-
 Step 3
Line up the patches right sides together and pin in place
-
 Step 4
Sew down the line that you drew earlier on the wrong side of the fabric; this prevents any raw edges. This is why you can draw in pencil because it gets covered by thread later on.
-
 Step 5
When you've joined a row of patches, it should look like this
-
 Step 6
When you've done all the rows, press them either with an iron or because it's a small project I used GHD straighteners
-
 Step 7
Join the rows in the same way you joined the original patches; then add a ribbon trimming or other decorative features to your taste
-
 Step 8
Cut a piece of backing fabric to the same size as your finished patchwork square; then hem it and pin the 2 pieces together right sides together and sew up 3 of the sides
-
 Step 9
Add a fastening; I used velcro but you could use snap fasteners or buttons or you could add the cushion and sew up all sides
-
 Step 10
Turn your cushion cover right way out and add your cushion. Step back and enjoy! xx


 1
Home Accessories »
Diy Jewelry Box
1
Home Accessories »
Diy Jewelry Box
