


About
yumm
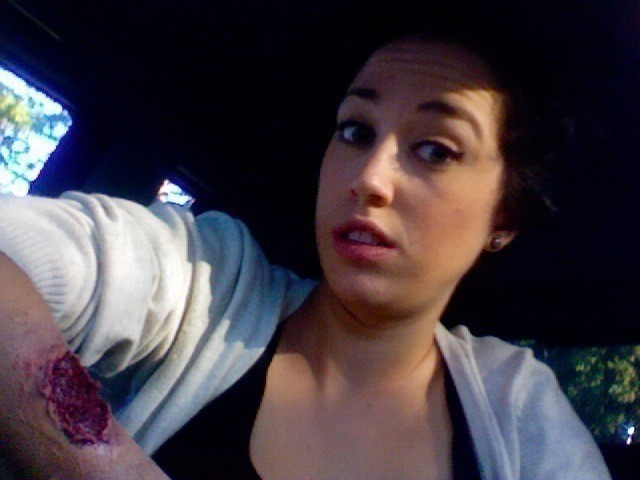
Basic open wound- technique can be applied to any desirable area to show exposed flesh/tissue. I chose to make it appear as a zombie bite just 'cuz.
I used Ben Nye's bruise and abrasion wheel for the bruising makeup but any creme, rich purples or reds will do. And the Creme makeup just refers to foundation that matches your skin tone on the application area.
I apologize for the lack of photos to match the step-by-steps. I'll post some when I get some spare time and can re-create it.
Tags
-
 Peggals <3 added Zombie Bite to Zombie Bride
08 Aug 09:17
Peggals <3 added Zombie Bite to Zombie Bride
08 Aug 09:17
-
 Izzy B. favorited Zombie Bite
21 Jun 17:23
Izzy B. favorited Zombie Bite
21 Jun 17:23
-
Step 1
Begin by applying your reds and purples to the injured area. Keep it kind of splotchy (don't overblend). The point is to keep some dimension to the woundy flesh underneath. After you have a solid area of color, apply a layer of spirit gum and let dry. Once the gum becomes tacky, smush some cotton balls on there, and peel away the bulk so some cotton hair remains. Repeat the makeup-gum-cotton process until you have a nice buildup going thats thick and fleshy looking. It sounds a bit confusing, so I'll post some pics of this when I can, but theres really no wrong way. You just keep building on it until you like the way it looks. You can pick at it, and pull at the little cotton hairs until you like its appearance.
-
Step 2
Ok, so assuming you're happy with this raw wound, we're going to move onto the torn skin. Build up the area surrounding the cotton area with scar wax. (Note: this wax can get frustrating and may stick to your fingers, so a helpful bit was to put a little cold cream or castor oil on your finger tips) I used Ben Nye's nose and scar wax, but I doubt it makes much of a difference. Blend it into your skin, but keep the bits near the 'wound' torn and ruff. I made little wax "snakes" and rolled them around the wounded area, blended them to my arm, but textured the top parts. Like I said earlier, this stuff is kind of hard to explain without pics, so I'll try and post some soon!
-
Step 3
Now, take the liquid latex and blob it around the scar wax, and around your arm, or wherever its being applied. Make sure to blend outward than your wound is, blending it into the surround skin. Let dry, and add a few more layers. You can also put some onto the actual wound, and tear it up later, but I found that it stuck to the cotton, so next time I would probably put a little oil on the cotton before applying the latex to it. Just a thought...
-
Step 4
Once you're happy with the latex, and its dry, add a bit of castor oil to it and wipe off the excess with a cotton ball or tissue. This makes the foundation application blend better.
-
 Step 5
Now you can take your foundation and cover the latex thats surrounding the wound. Blend the foundation across the latex and extending it over your natural skin, to create as flawless of an application as you can. You don't want this to look like the wound was just slapped on.
-
 Step 6
Yay! Bring out the corn syrup and food coloring! Or any stage or fake blood you've got. The thicker and darker the better. Take a makeup brush and smush that blood into the crevices and folds of the cotton part of the wound to add some 'freshness' to the gash. You can always go back over it with a sponge and really get some in there. I first had a lot on and was pretty happy with it, but then I blotted some of the blood off and liked it even better, so just play around with it until you're happy.
Bingo! you have now created a very cheap and easy flesh wound.


 1
Home Accessories »
Diy Jewelry Box
1
Home Accessories »
Diy Jewelry Box
