


About
a little decorative tree made of wire and beads
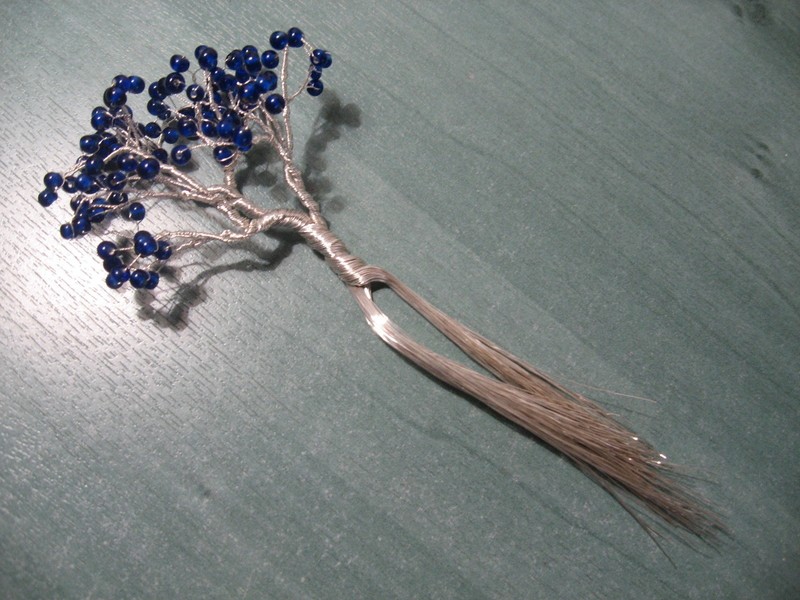
This is a relativery easy project, especially for the people that they are into using wire for jewelry making. Personally, I don't have much experience on these things. The tree of the photo is the first one that I have made, but it don't look bad anyway, just a little bit dusty hehe :P
I hope that you can understand my english.
UPDATE: Photos of the last steps are lost long time ago, I'm sorry for that. I would try to fix it somehow. Thanks for looking!
Tags
-
 Sharon C. favorited Wire Tree
19 Jun 15:13
Sharon C. favorited Wire Tree
19 Jun 15:13
-
 Jessica H. favorited Wire Tree
15 Feb 06:28
Jessica H. favorited Wire Tree
15 Feb 06:28
-
 joy.mardon.1 added Wire Tree to Wirework
28 Jan 21:52
joy.mardon.1 added Wire Tree to Wirework
28 Jan 21:52
-
joy.mardon.1 favorited Wire Tree
28 Jan 21:51
-
 Sarah B. added Wire Tree to Cool
01 Oct 12:53
Sarah B. added Wire Tree to Cool
01 Oct 12:53
-
 Key West Witch favorited Wire Tree
06 Sep 14:31
Key West Witch favorited Wire Tree
06 Sep 14:31
-
 sprouseam favorited Wire Tree
24 Dec 01:05
sprouseam favorited Wire Tree
24 Dec 01:05
-
 Coreen M. favorited Wire Tree
29 Sep 13:35
Coreen M. favorited Wire Tree
29 Sep 13:35
-
 Hoverboard Pro favorited Wire Tree
02 Sep 15:54
Hoverboard Pro favorited Wire Tree
02 Sep 15:54
-
 Lesie W. added Wire Tree to list
11 Jul 14:29
Lesie W. added Wire Tree to list
11 Jul 14:29
You Will Need
-
 Step 1
Take around 50 meters (160 feet) of wire - 26 to 32 gauge is preferable (0,2-0,4 milimeters diameter) - of the color of your choice.
-
 Step 2
Using the pliers, cut the wire into strands of 35-40 centimetres (14-16 inches) long each.
The lenght of the strands is depended of the gauge of the wire that you are using; more thick -> more long
(If the wire is thin you can cut it with a scissors)
-
 Step 3
Then pass a bead through each strand until the middle of its length.
-
 Step 4
Now twist the wire some times for secure the bead into place.
Alternatively, you can use more small beads, like seed beads. In this case, you can put 2-3 beads per strand.
-
 Step 5
Do the same for about 110-120 strands of wire.
*BE CAREFUL TO TWIST ALWAYS THE SAME DIRECTION*
(APPLY ALSO IN THE NEXT STEPS) -
 Step 6
The next step is to make a "branch"; take 2 strands and twist them toghether.
To make more realistic your tree, you can put to some "branches" a third strand.
-
 Step 7
You make bigger branches by twisting 2 or 3 small ones toghether.
-
 Step 8
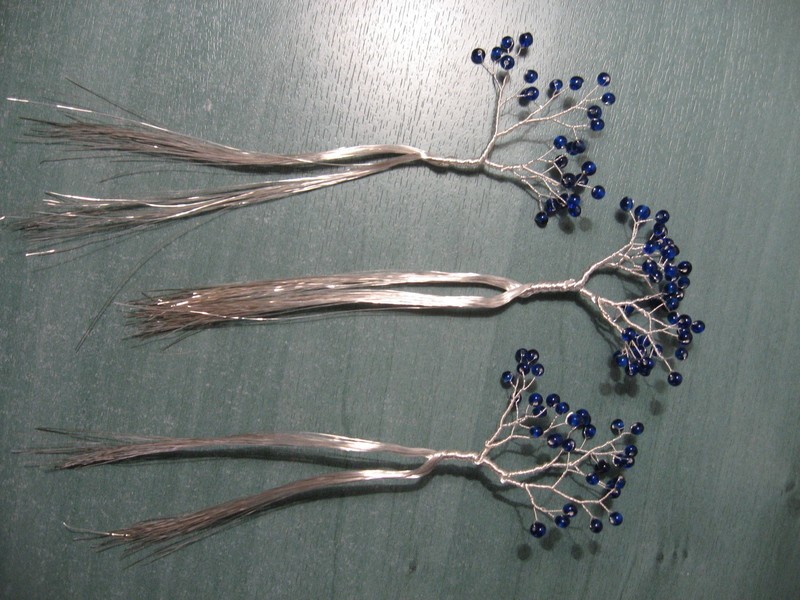
Continue this way of twisting toghether 2 or 3 smaller branches to bigger ones until all your wire have form the three basic big branches of the tree.
Again, for more realistic results, it would be good that they are not exactly of the same size.
-
 Step 9
Twist the three big branches together to form the trunk. If the wire is thick you will probably need the pliers for do this.
-
 Step 10
Don't twist until the end. Left about 7-10 centimeters (3-4 inches) untwisted for make the roots.
-
 Step 11
Separate the untwisted part of the strands into 3 big groups.
-
 Step 12
Now divide each group to two parts of about the same amount of strands. Twist the two parts toghether. Left again some wire untwisted.
Do the same for all the groups.
-
Step 13
Now -for each group- put again the two parts toghether and then separate it randomly at two or three different parts of strands. Each of these two parts you will handle like the "group" of the previous step. Remember... as above so below. The roots are like the branches but you work the the opposite way; then you fused, now you divide.
Again, avoid symmetry for more realistic results.
So continue the same proccess of separating, dividing and twisting to make the root branches as needed or until you use all the wire left.
-
Step 14
Finishing touches; twist the trunk a little bit harder if needed, cut the extra wire that don't fit in the roots and fix the position of the branches.
-
Step 15
Your tree is ready!
-
 Step 16
*Optional*
You can use something to attach your tree to. A single stone is a good choice. You can use some glue if the roots don't help. You can also put your tree in a bowl with smaller stones or inside a jar. You can even make a little garden or forest. By using different materials and colors, you can create more elegant, spooky, colourful or bonsai-like trees. The possibilities are endless.
I'm looking forward to see your versions :)


Versions
See all 46 »


Comments


