


About
Fun Valentines Accessories!
Cute fun way to use vintage papers, old valentines cards, pictures from magazines for a fashionable and fun brooch for Valentines day for yourself or to give as gifts.
Tags
-
 Sveta favorited Valentines Badges
21 Dec 19:43
Sveta favorited Valentines Badges
21 Dec 19:43
-
 Marjorie D. favorited Valentines Badges
15 Jun 18:03
Marjorie D. favorited Valentines Badges
15 Jun 18:03
-
 Stephanie F. favorited Valentines Badges
20 Jan 03:04
Stephanie F. favorited Valentines Badges
20 Jan 03:04
-
 arina m. favorited Valentines Badges
09 Jan 02:20
arina m. favorited Valentines Badges
09 Jan 02:20
-
Isis N. favorited Valentines Badges
03 Oct 00:35
-
 Hecate_Love favorited Valentines Badges
23 Aug 21:54
Hecate_Love favorited Valentines Badges
23 Aug 21:54
-
kathleen c. favorited Valentines Badges
22 Aug 01:33
-
 Youghurt Jaja favorited Valentines Badges
08 Aug 00:21
Youghurt Jaja favorited Valentines Badges
08 Aug 00:21
You Will Need
-
 Step 1
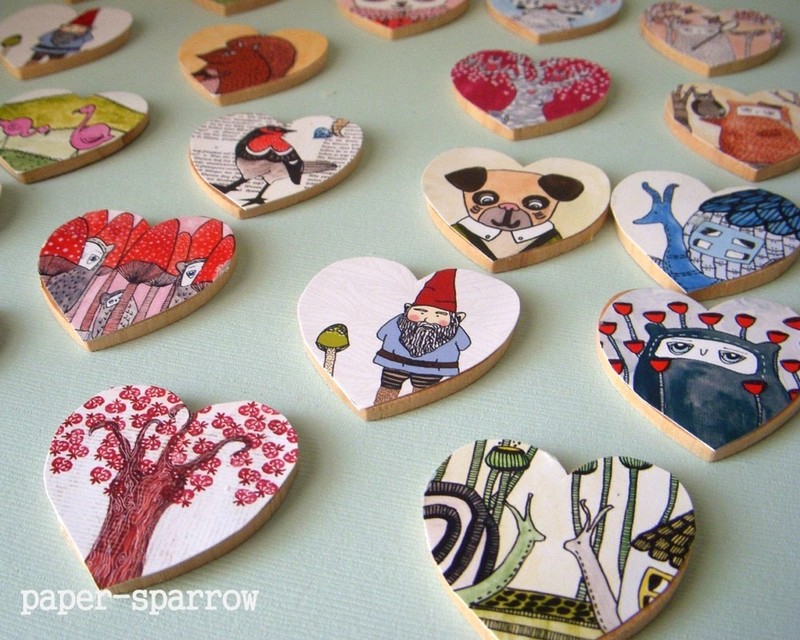
Find your images. I decided to use my own artwork and printed these from photoshop.
Since the badge is 1.5" I made my squares 1.65" so that I would have a little room to play around with.
-
 Step 2
Trace around the wooden heart onto your image, making sure everything you want is inside the heart.
-
 Step 3
Carefully cut out the heart shapes. Stay on the inside of your heart line so that it will not show on the badge.
Smooth around the edges as best as possible.
-
 Step 4
Using PVA or other glue intended for paper, glue your images to the wooden heart.
Cover the front entirely. If there is a little hanging over the edge, there will be an opportunity to trim this down later, but try and get your best fit.
-
 Step 5
Let your images dry for a few hours.
-
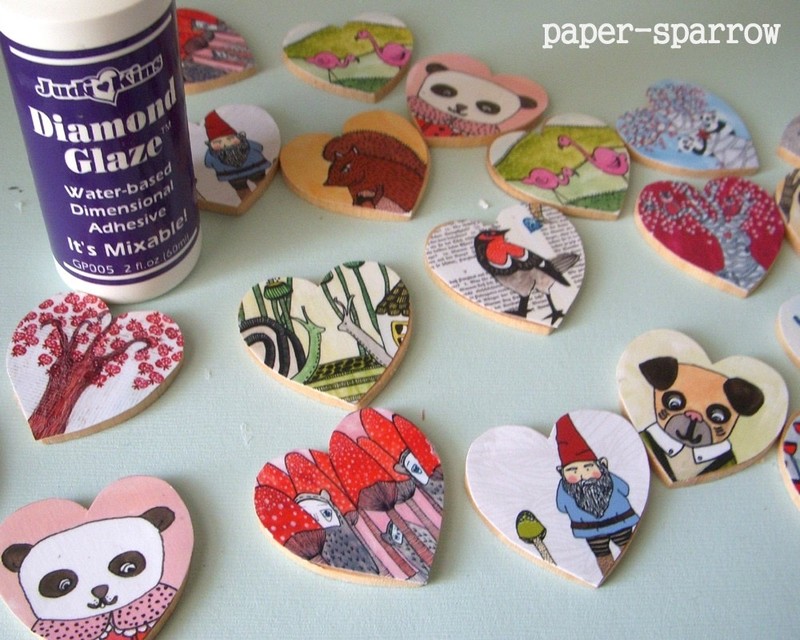
 Step 6
Using your Mod Podge, spread a thin even layer over the top of the image. This is important if you printed your image on an ink-jet printer, so that the ink won't bleed or run when you use a sealer.
It also hardens the paper and makes it easier to trim your edges once dry.
-
 Step 7
Using your nail file (or sandpaper), smooth any uneven edges of paper, especially around the curves.
-
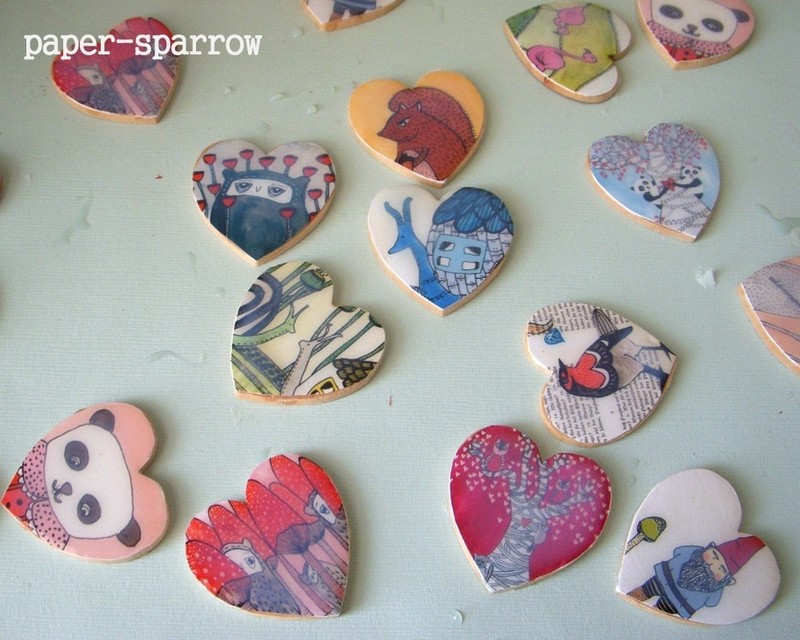
 Step 8
Using the Diamond Glaze, cover the image with an even layer, trying to avoid bubbles. (these can be popped with a toothpick or moved off the edge.)
Alternately, you could use a spray sealer, or resin if you prefer.
-
 Step 9
At first, they will be cloudy, you can adjust or add any diamond glaze as needed in the first few minutes but it is best not to touch the glaze for at least 12 hours - perhaps longer as finger prints will show.
Lay on a flat surface and let dry.
-
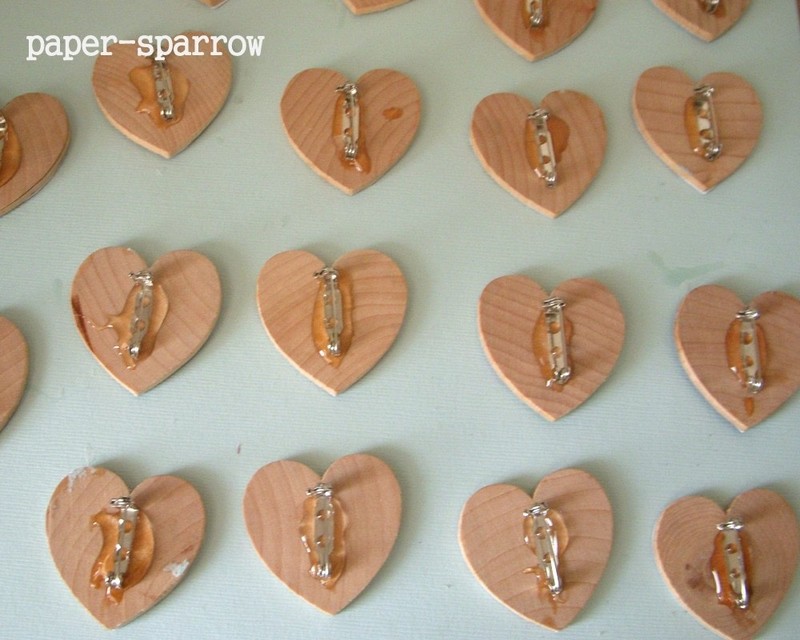
 Step 10
Once dry, use your E6000 glue to adhere the pin backs to the back of the badge.
I use a stick to dab just a little to the back of the badge and press the pin back securely into place.
Be sure to make sure the pin back works before you glue it to the badge, these packets tend to have 1 or 2 dud pins.
-
 Step 11
Be patient and let the backs dry for several hours.
-
 Step 12
Ta-Da!! You're done!
-
 Step 13
Wear your badges and/or give them as gifts!


 1
Home Accessories »
Diy Jewelry Box
1
Home Accessories »
Diy Jewelry Box

And your pictures are very cute too.