


About
Never get your head stuck again!
I love my boyfriend's hoodies because they're so warm in winter, but in spring and summer they're a bit bulky. But could I heck as find a nice zip up feminine hoody? Instead, I found a lovely non-zip hoody, and decided to get customising. (Apologies for it being black - not great for photos, but please just message me if you need anything clarifying.)
Tags
-
 Julia V. added Turn A Non Zip Hoody Into A Zipped Hoody to Sewing
26 Apr 00:00
Julia V. added Turn A Non Zip Hoody Into A Zipped Hoody to Sewing
26 Apr 00:00
-
 Steph. favorited Turn A Non Zip Hoody Into A Zipped Hoody
30 Apr 07:47
Steph. favorited Turn A Non Zip Hoody Into A Zipped Hoody
30 Apr 07:47
-
 d l. added Turn A Non Zip Hoody Into A Zipped Hoody to To-make list
08 Dec 23:18
d l. added Turn A Non Zip Hoody Into A Zipped Hoody to To-make list
08 Dec 23:18
-
Iris K. favorited Turn A Non Zip Hoody Into A Zipped Hoody
17 Nov 16:25
-
 Brandy L. favorited Turn A Non Zip Hoody Into A Zipped Hoody
17 May 11:59
Brandy L. favorited Turn A Non Zip Hoody Into A Zipped Hoody
17 May 11:59
-
Brandy L. commented on Turn A Non Zip Hoody Into A Zipped Hoody
17 May 11:59
-
 ArtGirlTC favorited Turn A Non Zip Hoody Into A Zipped Hoody
25 Apr 20:53
ArtGirlTC favorited Turn A Non Zip Hoody Into A Zipped Hoody
25 Apr 20:53
-
 Valerie L. favorited Turn A Non Zip Hoody Into A Zipped Hoody
17 Oct 20:16
Valerie L. favorited Turn A Non Zip Hoody Into A Zipped Hoody
17 Oct 20:16
-
 angel.hackney1978 favorited Turn A Non Zip Hoody Into A Zipped Hoody
12 Jul 15:41
angel.hackney1978 favorited Turn A Non Zip Hoody Into A Zipped Hoody
12 Jul 15:41
-
 Step 1
Firstly, make sure your zip runs from where the hoody joins to the bottom waist band. If you're an inch or so out that's fine, but if you want it to zip right up then you need the correct length. Mine is a UK size 8 hoody and a 22" zip worked fine.
-
 Step 2
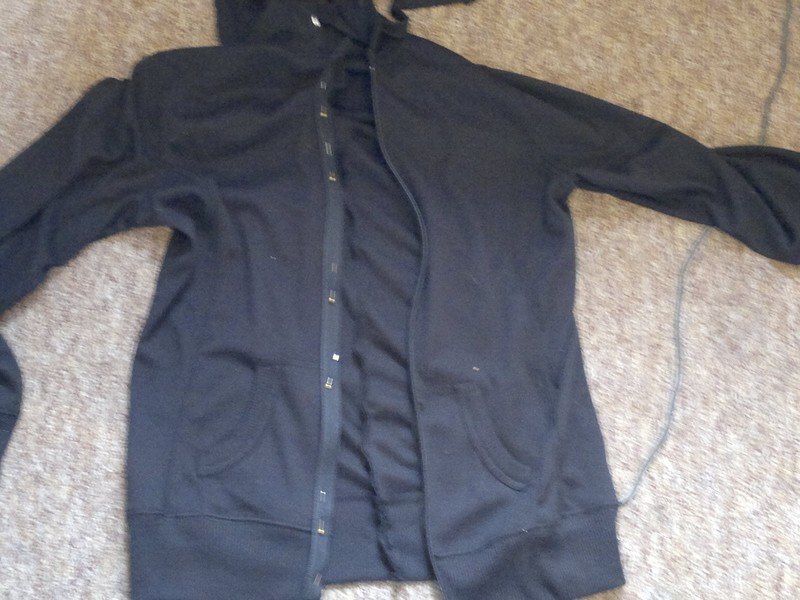
Cut your hoody right up the middle. Be careful not to cut the back too (I did because I didn't check, but it sewed back together easily enough and doesn't look out of place luckily, but it does adjust the fit slightly).
-
 Step 3
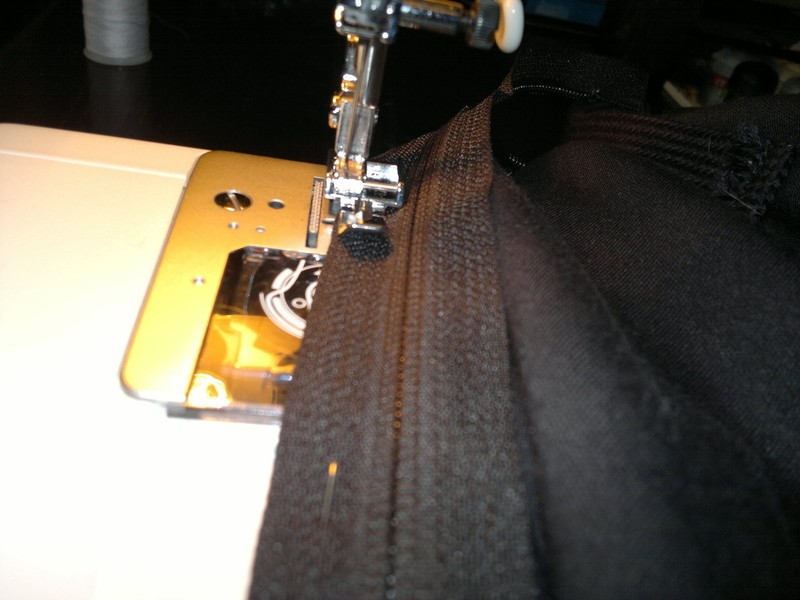
Take your zip and place it face down on the RIGHT hand flap of the hoody which is right side up. Line up the LEFT edge of the zip and pin in place (See photo - it'll make sense why we're doing this, I promise!). You can tack/ baste it too if you like but I never bother.
-
 Step 4
Pop your zipper foot on your machine and sew close to the edge using a zigzag stitch for strength.
-
 Step 5
Now, flip your zip over so you can see the right side (see why we put it in flipped now?). Roll your hoody material as close to the zip as you can without covering it and pin in place.
-
 Step 6
Sew using a straight stitch close to the zip.
That's one side done! -
 Step 7
Completely zip off the side of the zip you haven't sewn in place yet (this makes life MUCH easier than trying to do it closed!). Put it face down on the left side flap of your hoody, and pin in place, then sew down the edge using a zigzag stitch for strength (so the teeth are on the left and we're sewing on the right). As you did before, flip the zip so you can see the front, roll the material into place close to the teeth and sew down using a straight stitch. (Sorry, no photos - I got too excited when I was almost done! It's the same process as before though, just remember to shift the zipper foot over).
-
 Step 8
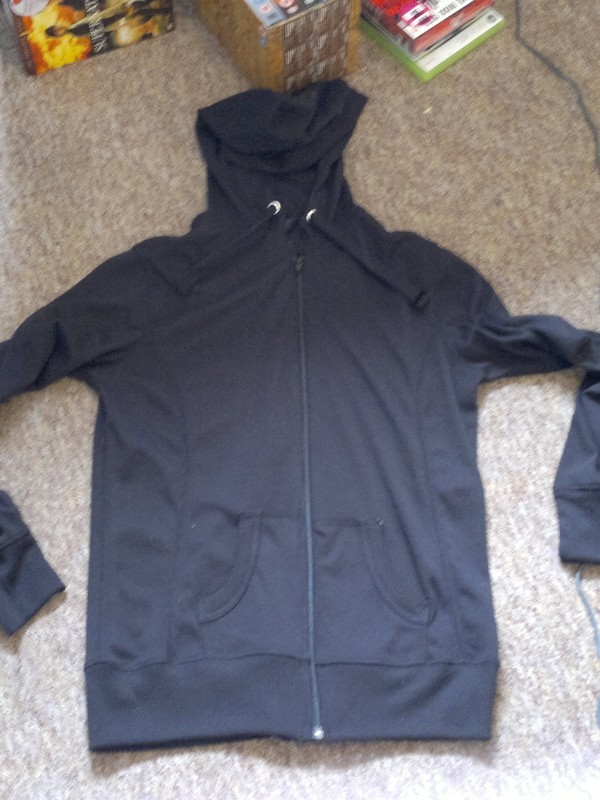
With that, you're done! One zippy hoody :)
Remember that if you're doing this on a hoody with a design then it may slightly distort it by removing about a cm from the middle.


Comments

