
About
Get your craft supplies organized and readily available!
It's always a good time to get organized and what better way than with recycled tin cans, scraps of fabric and a Lazy Susan!
-
 Key West Witch favorited Tin Can Caddy Tutorial
12 May 15:10
Key West Witch favorited Tin Can Caddy Tutorial
12 May 15:10
-
 Rebecca C. favorited Tin Can Caddy Tutorial
03 Nov 03:44
Rebecca C. favorited Tin Can Caddy Tutorial
03 Nov 03:44
-
Amanda V. favorited Tin Can Caddy Tutorial
24 Nov 23:57
-
 margaret b. favorited Tin Can Caddy Tutorial
04 Nov 23:21
margaret b. favorited Tin Can Caddy Tutorial
04 Nov 23:21
-
 cornelia.featherstone favorited Tin Can Caddy Tutorial
09 Mar 18:24
cornelia.featherstone favorited Tin Can Caddy Tutorial
09 Mar 18:24
-
 Leah. favorited Tin Can Caddy Tutorial
09 Feb 16:18
Leah. favorited Tin Can Caddy Tutorial
09 Feb 16:18
-
Cynthia S. published her project Tin Can Caddy Tutorial
06 Feb 09:00
-
 Step 1
Collect or gather 8 or so small to medium size tin cans and 1 large coffee can.
-
 Step 2
Measure the height and circumference of all the outer cans and cut coordinating fabric to these dimensions. Next, slather a coat of Mod Podge to the outside and wrap and adhere the fabric to the cans.
Paint the coffee tin white.
-
 Step 3
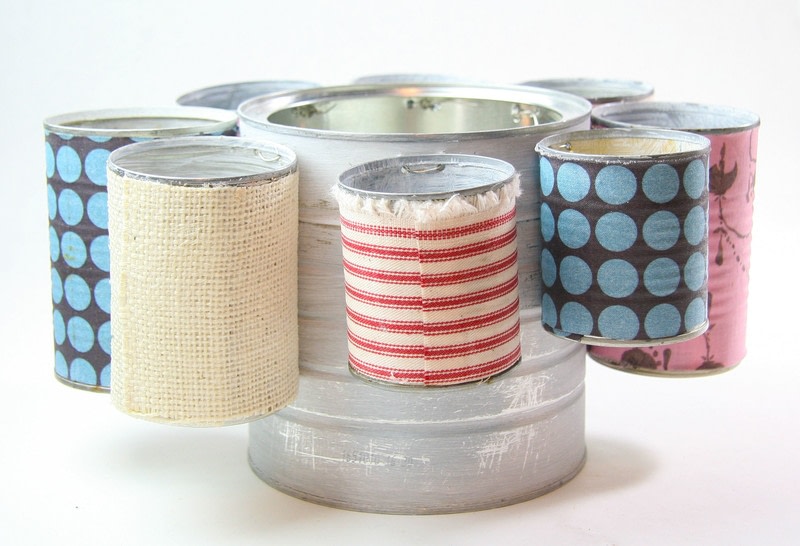
Arrange the small cans around the coffee can (looks super cute like this, but I knew I needed to have the cans up off the ground).
-
 Step 4
Mark the inside of the coffee can, where you want the small cans to hang.
-
 Step 5
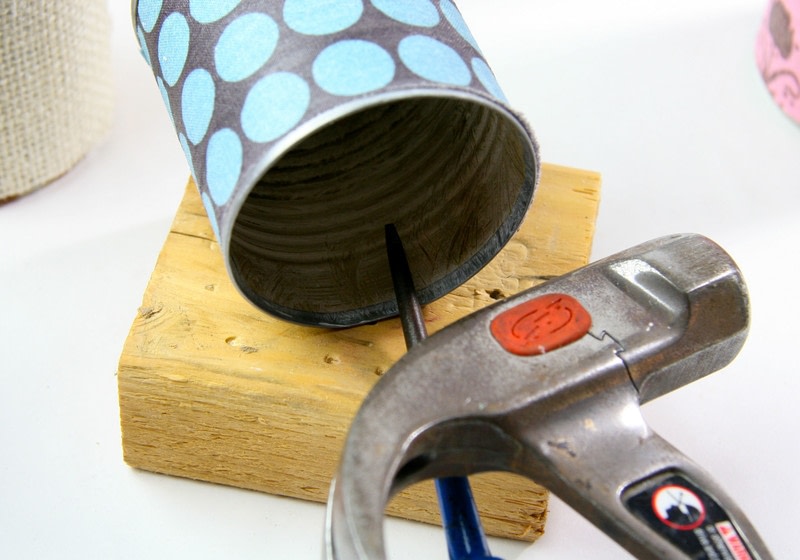
Using an awl and a hammer, punch 2 holes in the smaller cans, close to the top rim.
-
 Step 6
And then punch the marked holes in the coffee tin.
-
 Step 7
And with pliers, twist the wire on the inside to secure the small cans.
-
 Step 8
And ... you're done.
-
 Step 9
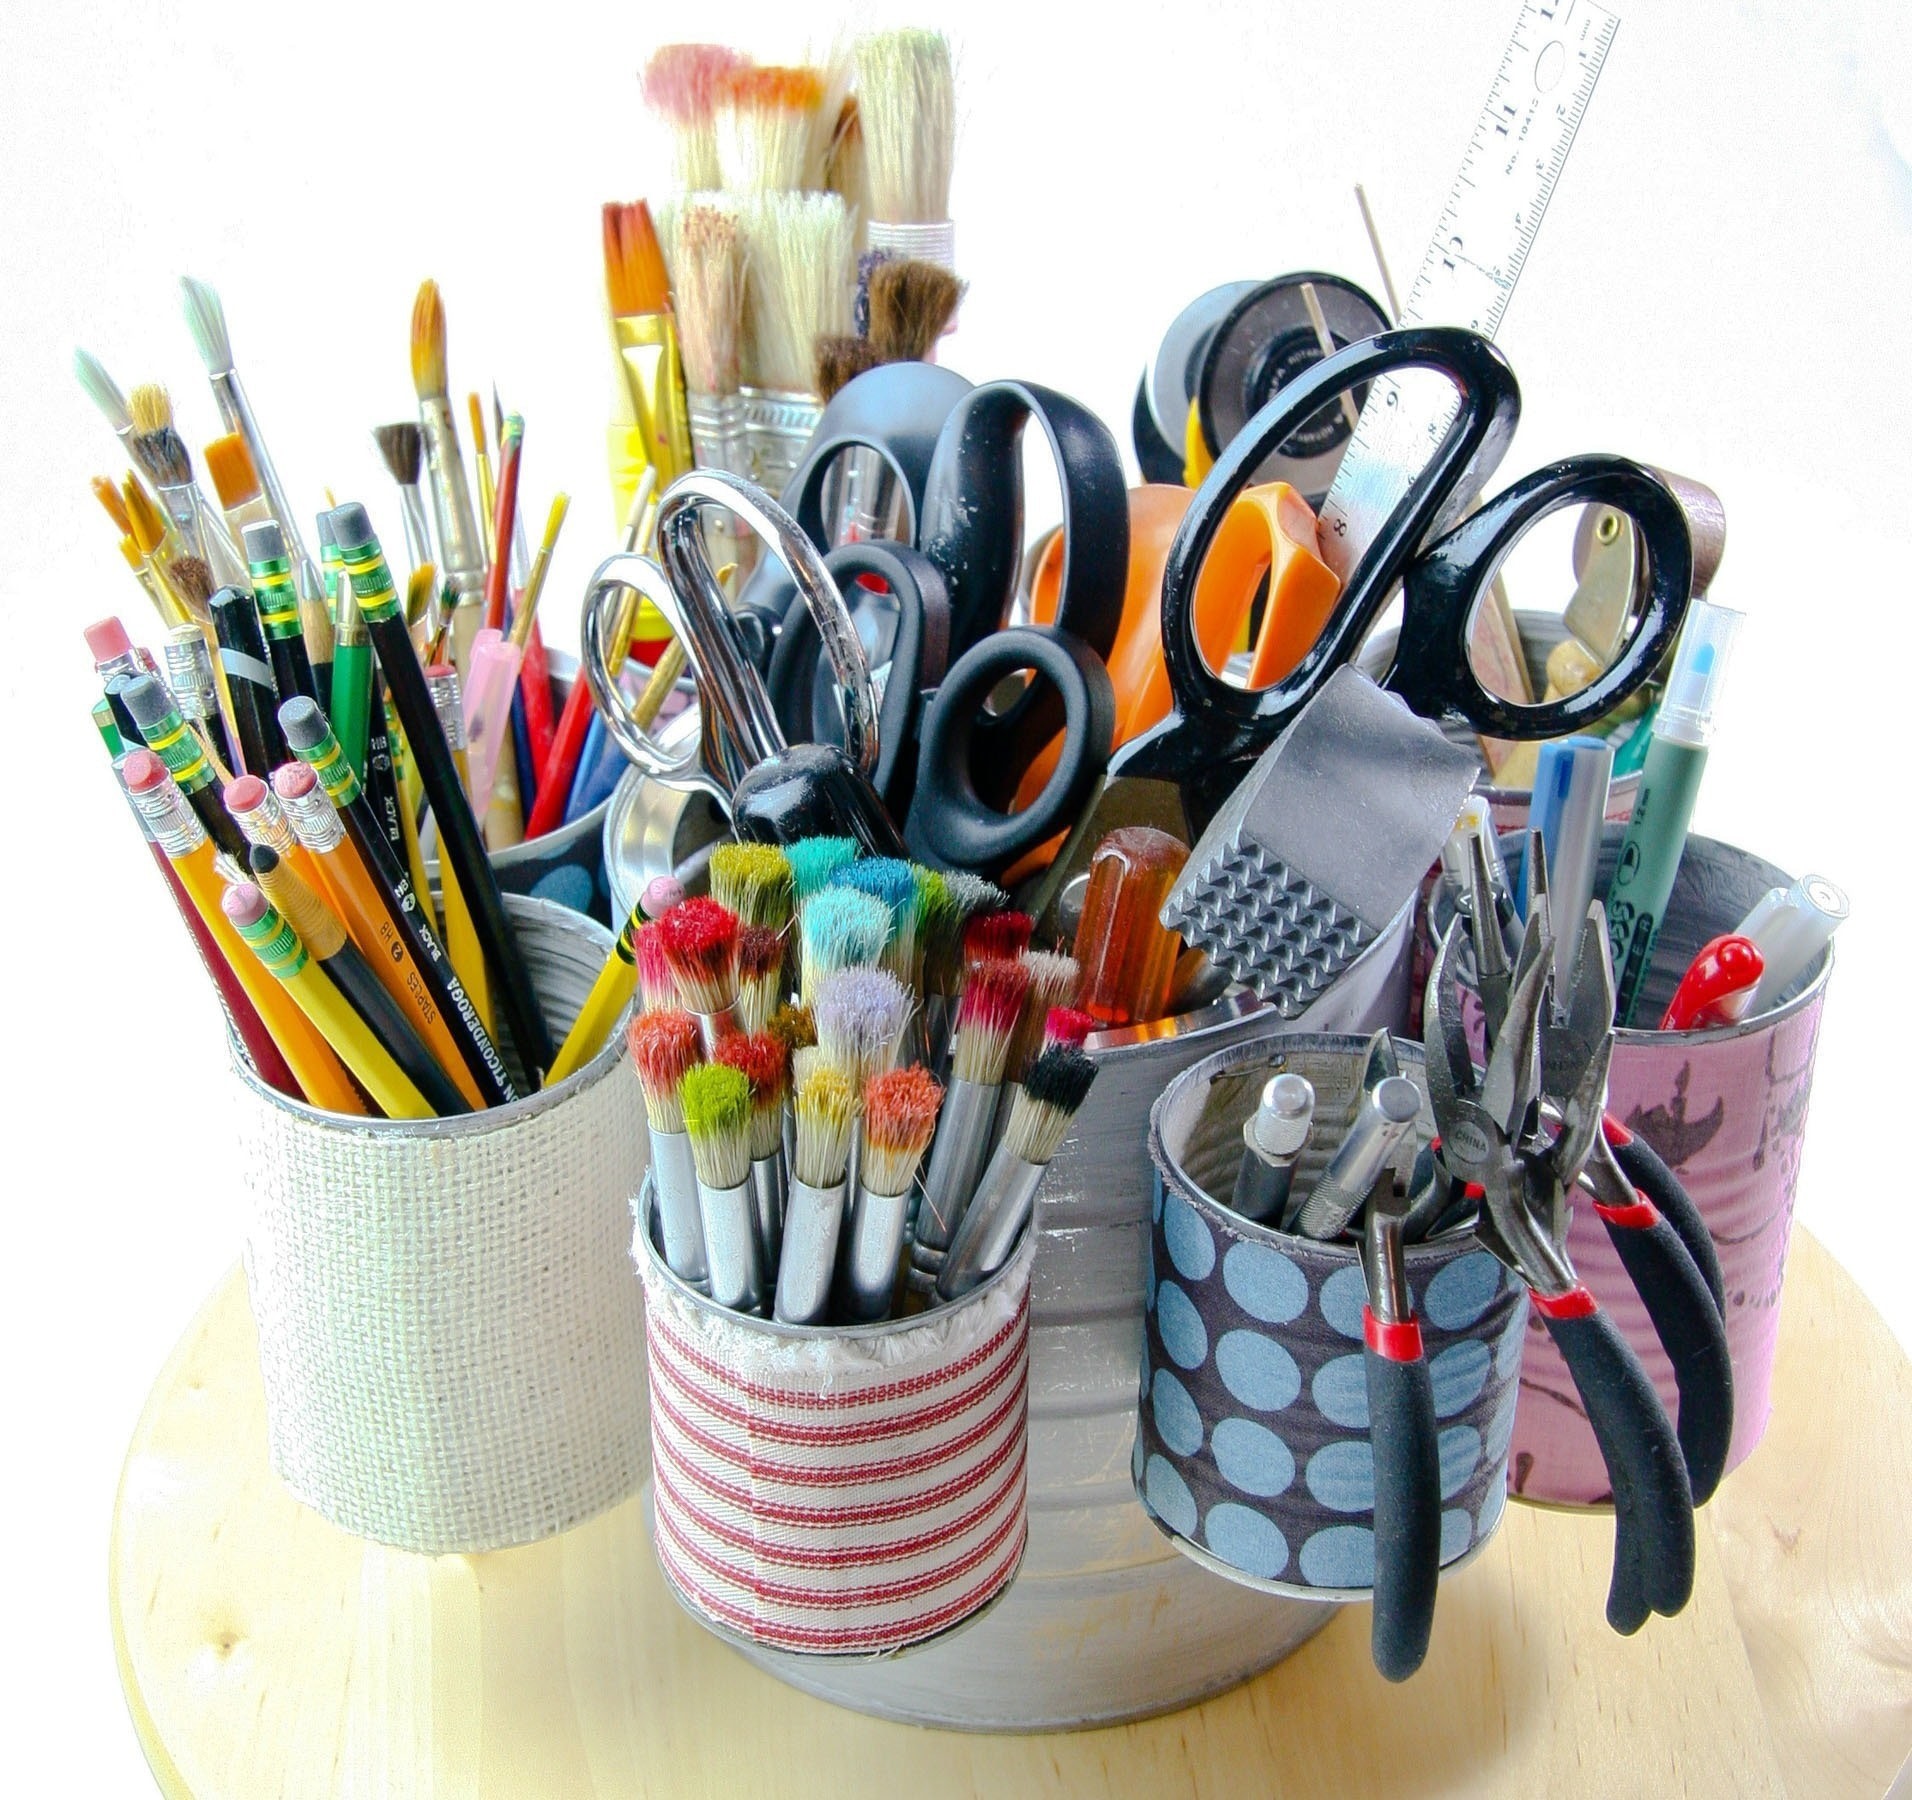
Fill the cans with your crafting suplies and then place the tin cans on a Lazy Susan so that you can spin the supplies around without reaching over the larger items that might be sticking up!