


About
Repurpose those plastic bags into a handwoven clutch!
Many a times, I had forgotten to BYOB (bring your own bag) when I went to the grocery store. I could just feel, Mother Earth shaking her head at my growing stockpile of plastic bags. I knew I had to do something about those plastics.
So, I was skimming through CO+Ks weaving projects and came across this simple how-to weave on a DIY loom (THANKS violetta!). Using this idea, I decided to repurpose those plastic bags into a clutch.
This project is mostly time, but you won't be disappointed about the results. Mother Earth certainly won't be.
-
 Jessica A. favorited The Clutch Cycle
19 Mar 22:36
Jessica A. favorited The Clutch Cycle
19 Mar 22:36
You Will Need
-
 Step 1
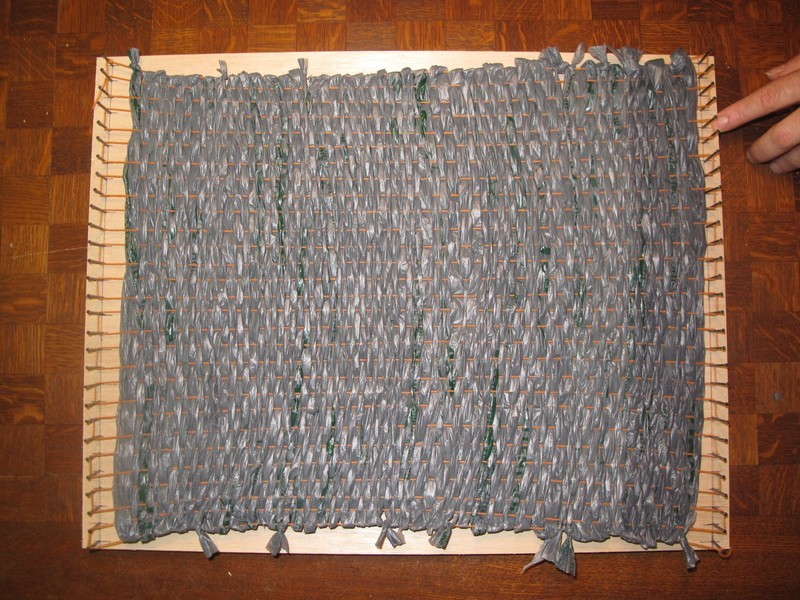
The first step is to decide on how big or small you want your clutch to be. Then create a DIY loom based on those measurements.
I strung up the loom using a carpet rug thread, but you can just use string with a lot of strength. Then choose the plastic bags that you want to make your clutch out of. I choose the grey plastic bags (because those were the bags that I had the most of).
Then weave the bags, according to the how-to weave on the DIY loom. Make sure that the weaves are tight. The tighter the weave, the stronger the clutch will be.
-
 Step 2
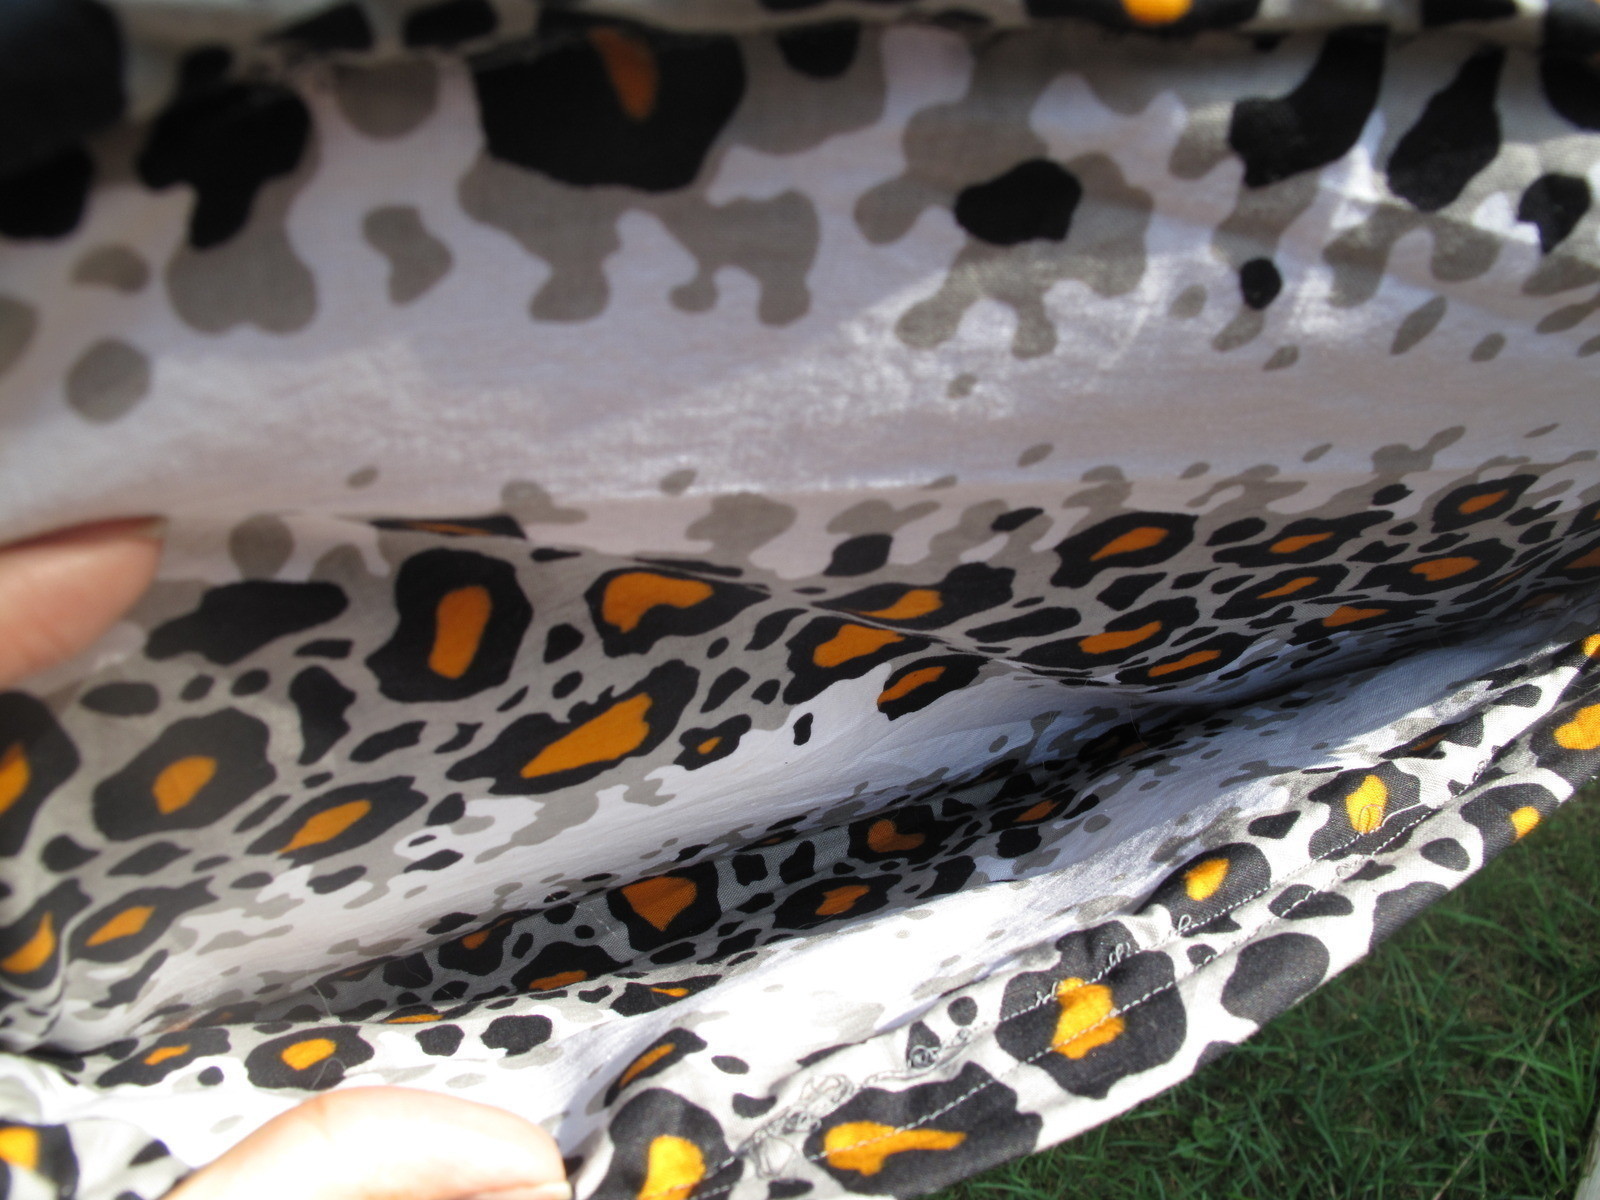
Decide on what fabric you want for the lining of your clutch. Cut the fabric so that there is about and 2 inch border around the plastic bag weave.
-
 Step 3
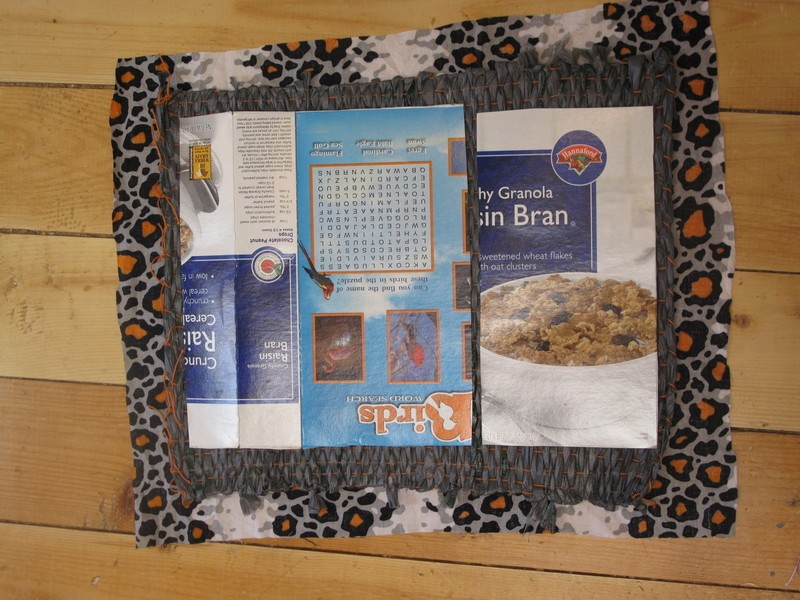
This next step involves the cereal box. The cereal boxes simply provide the clutch with some shape and stiffness. Cut out one piece that will be the front part of the clutch. Cut out another larger piece with a fold that will be back and flap of the clutch. Hopefully, the picture will help you decipher this step.
Note: Make sure the cereal box pieces leave about an inch to a half inch border, so that they are smaller than the plastic bag weave.
-
 Step 4
With all the pieces a go, you are going to set aside the cereal box pieces. Pick an end and sew the plastic weave to the fabric. This step is to just hold the weave in place, while you sew the edges. Keep in mind your 2 inch border.
-
 Step 5
Starting with the side of the clutch, fold the edge of the fabric to meet the edge of the plastic weave. Then fold the fabric again over the plastic weave, and sew. Repeat this step for the bottom of the weave, and other side of the weave. When you are finished, you should have an opening at the top that is NOT sewed yet.
-
 Step 6
Place your cereal box cut outs inside of the clutch, and fold the clutch to make sure it the right size that you want. You can trim the cereal boxes down or refold the flap depending on your preferred sizing.
Once those are set, sew up the open flap in the same way you sewed the other sides of the clutch.
-
 Step 7
Fold the clutch, sew up the folded over edges.
-
 Step 8
DONE!!! You can add lots of frilly stuff to it. A clip to close it or whatever's your treasure. Put it under your arm, and feel good about your part in reducing your carbon footprint.


Comments


