
About
DIY Furniture 2
sarah pease
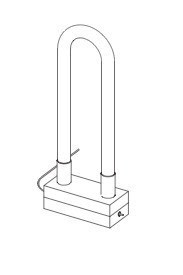
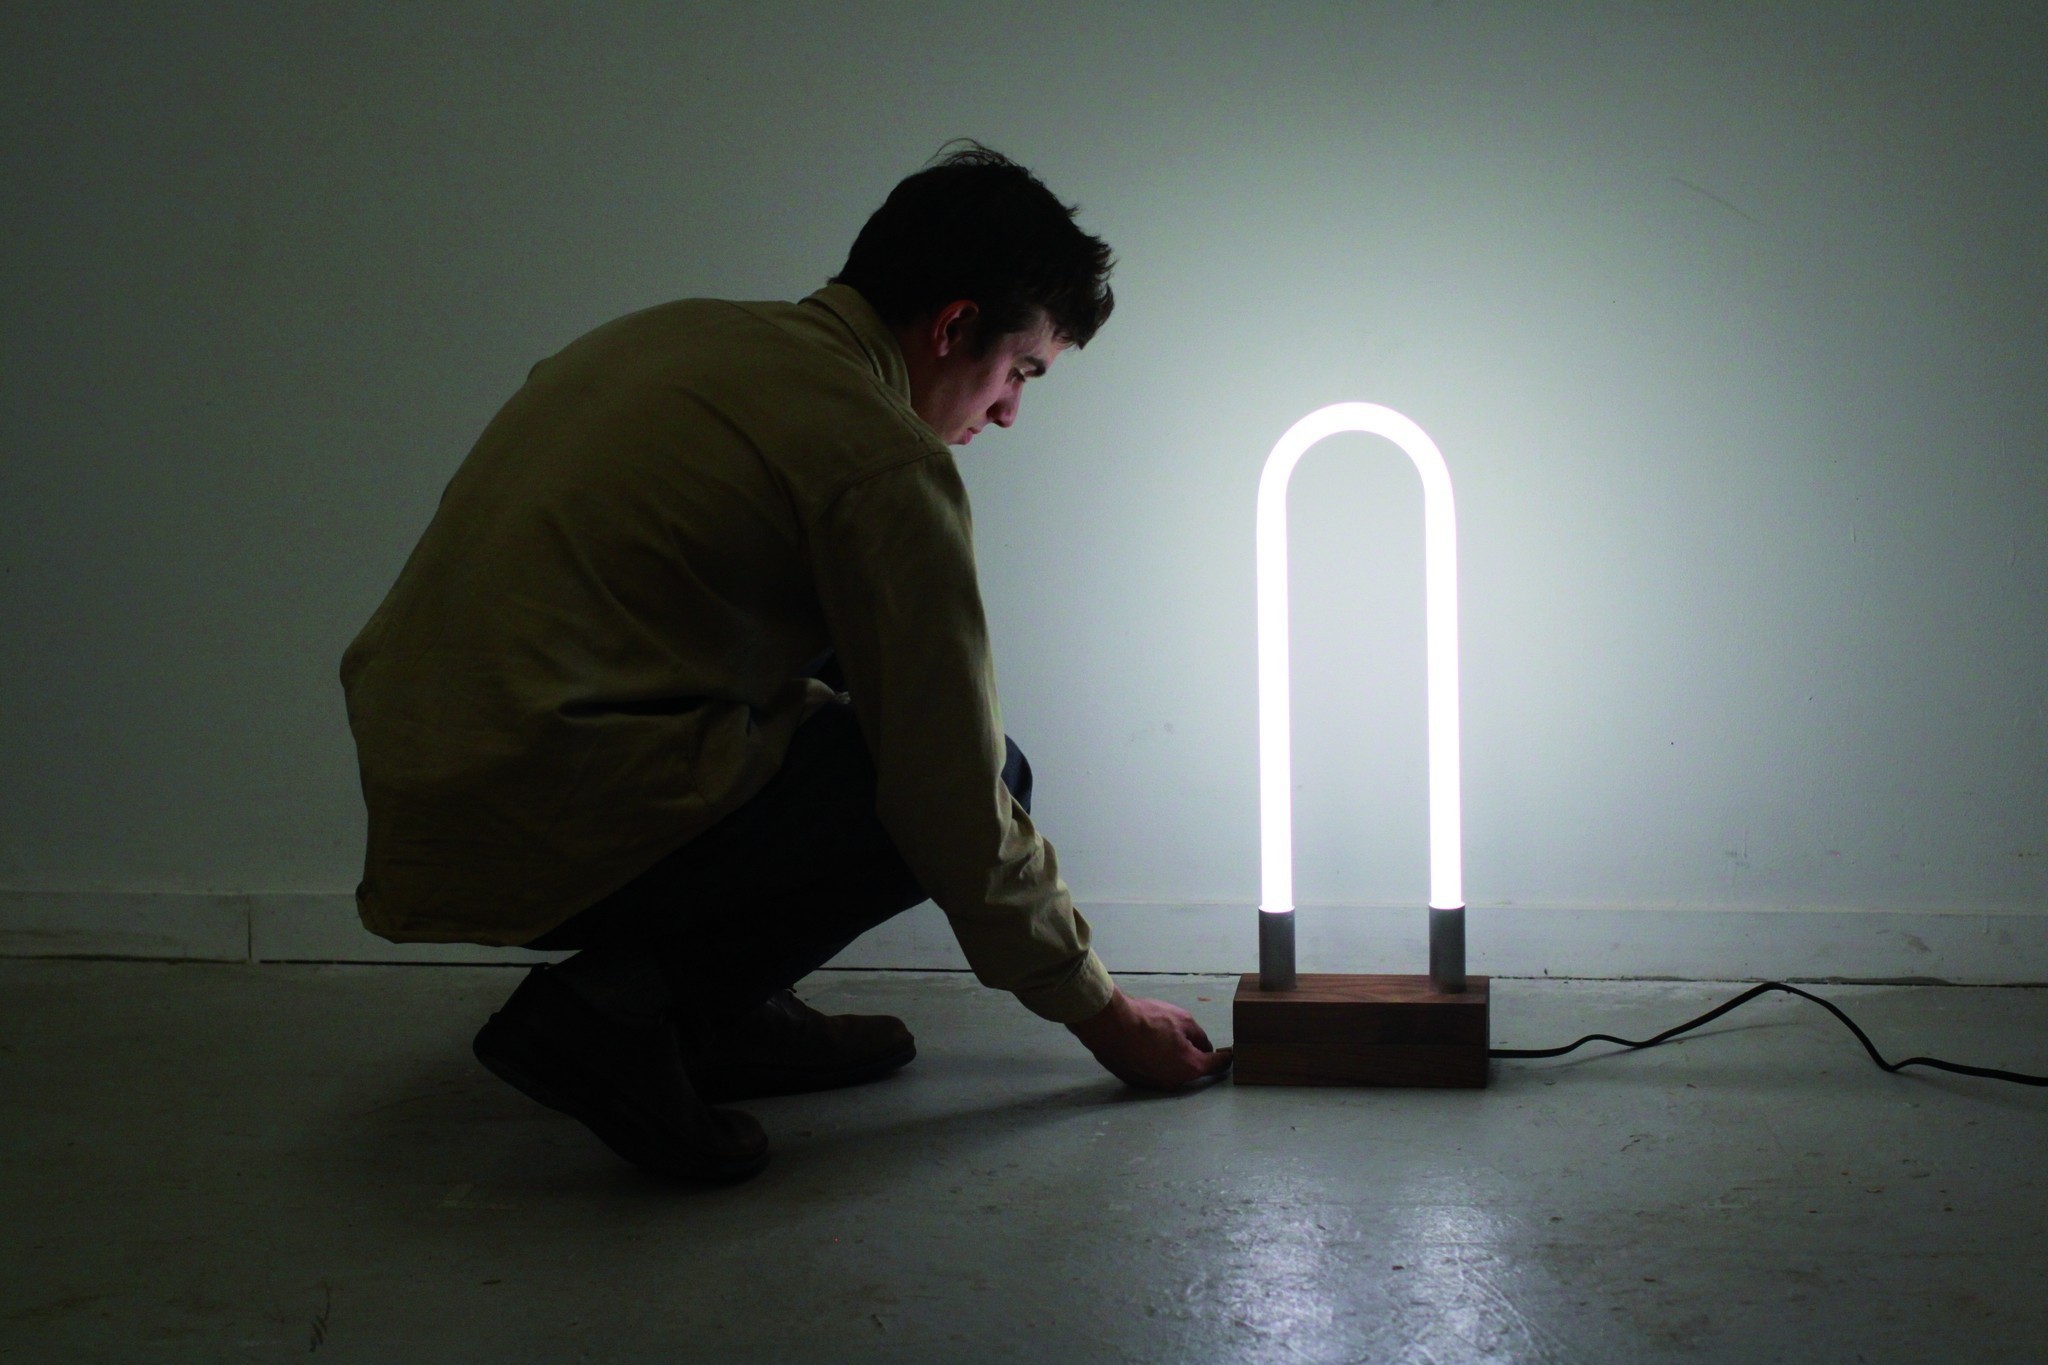
The T8, little brother of the T12, is an exploration in form and material. This light is designed from readily available, standard parts, combined with solid black walnut and a soft, fabric cord.
This project was an experiment using pre-made parts – most of which can be found in any hardware store. The entire piece is constructed with magnets and press-fit components, so is easily disassembled/reassembled. The base consists of two pieces of wood held together by magnets. These design features also allow for simple assembly and easy access for troubleshooting – perfect for an ambitious DIYer. The design itself is easily customizable, too; changes to the wood or metal finishing can produce an end result with its own unique aesthetic.
Once the T8 U-bulb is inserted into the base, the light comes
to life. Its overly luminous fluorescent light, set against the polished, elegant materials, creates new associations for an industrial product.
-
 Elin H. added T8 Light to Bigger projects
02 Apr 08:57
Elin H. added T8 Light to Bigger projects
02 Apr 08:57
-
Elin H. favorited T8 Light
02 Apr 08:56
-
 Lily O. favorited T8 Light
04 Mar 20:43
Lily O. favorited T8 Light
04 Mar 20:43
-
 Maggs added T8 Light to Household
08 Aug 21:25
Maggs added T8 Light to Household
08 Aug 21:25
-
 Heather S. added T8 Light to Celebrity Room
20 Feb 18:40
Heather S. added T8 Light to Celebrity Room
20 Feb 18:40
-
 Ginger Darkstar favorited T8 Light
13 Jan 19:06
Ginger Darkstar favorited T8 Light
13 Jan 19:06
-
 angela d. favorited T8 Light
09 Aug 21:50
angela d. favorited T8 Light
09 Aug 21:50
-
 Bencaz favorited T8 Light
21 Jul 19:19
Bencaz favorited T8 Light
21 Jul 19:19
-
Angel C. favorited T8 Light
06 May 19:23
-
 SugarNSpiceLily added T8 Light to house decoration
02 May 15:30
SugarNSpiceLily added T8 Light to house decoration
02 May 15:30
You Will Need
-
 Step 1
Cut the metal tubing into two lengths of 114mm.
Cut the wood into two pieces measuring 102 x 229 x 38mm.
-
 Step 2
In both pieces of wood, drill aligning shallow holes in all four corners of one of the wider faces. (These should be the depth of your magnets, so that when they are glued in they sit flush with the top of the wood.)
Use the router to cut out a pocket in the middle section. The resulting hole should be a rectangle that measures 25 x 216 x 30mm deep. This piece will be the bottom of the light (part A).
Drill a hole in the centre on both ends of the bottom piece. One hole should fit the toggle switch, and the other hole should fit the lamp cord.
Take the other piece of wood, which is the top (part B), and drill two larger holes with diameters that correspond to the metal tubing (32mm). The holes should be 152mm apart, centre to centre.
Cut two scrap pieces the width of the pocket (25mm) and 76mm long (part C).
-
 Step 3
Glue the magnets into the holes using epoxy so that the pieces of wood will snap together to make one larger piece, measuring 102 x 229 x 76mm. Make sure that the magnets are aligned with their counterparts, otherwise they will repel and the wood will not stick together.
-
 Step 4
Place the ballast inside the pocket of part A.
Place the two scrap pieces of wood (parts C) on top of the ballast, using epoxy to glue the wires down so that the copper contact will line up with each pin of the T8 bulb.
Snap the two pieces of wood together and insert the metal tubes into the two holes.
If there is a stretcher bar connecting the bottom of the U bulb, remove it.
-
 Step 5
Insert the light bulb into the metal tubes, turn on and enjoy!