About
A fun way to create a whole new look by using those negatives from die-cuts.
Next time you die-cut a shape from cardstock, don't throw away the negatives, keep them to create a whole new look with your stamps. Upcycle what would otherwise be trash into a clever stencil to give your stamps new life.
-
 Ink Stained Roni published her project Stamping In The Negative
24 Mar 09:00
Ink Stained Roni published her project Stamping In The Negative
24 Mar 09:00
-
 Step 1
Create a diecut negative simply by die cutting an image from a piece of cardstock or use an existing negative you have left over from another project.
-
 Step 2
Position the negative over a card panel where desired and tape into position with washi tape*
*Note - washi tape works great when working with stencils as it is easily removable from your project without damaging it.
Stamp desired image(s) using VersaFine Clair Ink filling up the negative window.
-
 Step 3
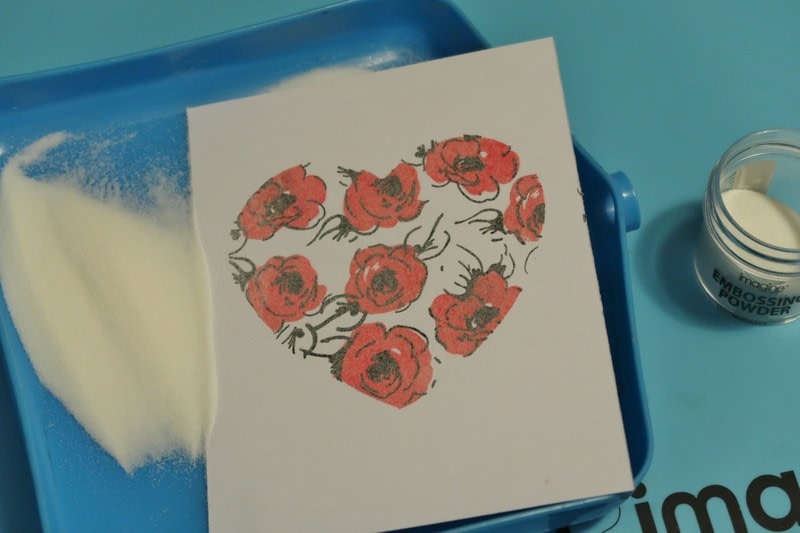
After you have finished stamping, carefully remove the die-cut negative panel, set aside for future use.
Sprinkle the stamped image(s) with clear embossing powder; shake off excess and return it to the jar.
-
 Step 4
Melt the embossing powder with a heat tool and let the melted powders cool completely.
-
 Step 5
Trim the embossed image and mat with red cardstock.
Finish off the card as desired.
-
 Step 6
Mount the red panel onto a black card base and enjoy!