About
This is made with straight line and straight stitch sewing. Nothing fancy, but a great result!
This is a tutorial explaining how to change a pair of skinny leg jeans into trumpet leg jeans, It can also be followed to make really wide flares, too.
After many years of wearing straight cut jeans, which made my legs look short and dumpy (they are, but everyone doesn’t need to know it!) at the turn of the millennium I discovered trumpet leg jeans, which made my legs look great. Unfortunately after a couple of years I could no longer buy them.
I recently found some panelled trumpet trousers online, but they were about £70! When I was given a pair of skinny leg jeans I decided to make my own.
I hope I have described the process thoroughly!
Apologies for the mini lectures at pretty much each point, I just wanted to explain why I did things in certain ways. You can always just read the bits in larger type! They’re the most important parts.
Before we begin.
All but the last 2 steps can be sewn using a wide stitch, it makes it easier to unpick if it messes up.
Although I haven’t said so here, please try on the trousers at any stage that you feel the need to check, to see how it hangs, etc, (be careful if it’s pinned at the time!) there is no point in making them if they’re not going to look right! (I tried on the first pair I made every few seams!)
I’ve called the fabric being used to make the flare the “panel” throughout, because I wasn’t sure what else to call it!
When I mention the “triangle” I mean the top, still sewn together part of the undone seam of the trousers, because it looks like a triangle.
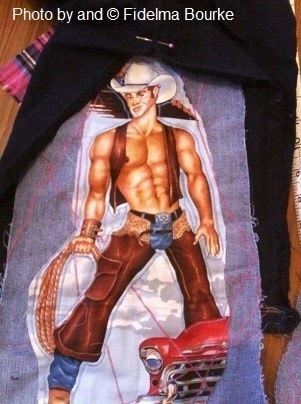
The fabric I’ve used is Wranglers, by Alexander Henry. It is available online, I bought mine as 2 fat quarters from fabric-yard.co.uk (I’m not paid for this, I just like to share info! )
I have won a couple of Cut Out And Keep competitions, so as a ThankYou I decided to give this tute away for free here, but it is also for sale as a downloadable pdf featuring more photos on my Craftsy and Etsy pages.
http://www.craftsy.com/pattern/sewing/clothing/skinny-jeans-to-trumpet-flares-tutorial-/196638
https://www.etsy.com/uk/shop/FidelmaBs?ref=hdr_shop_menu
-
 Alma added Skinny Jeans To Trumpet Flares Tutorial to Trousers to...
02 Jul 10:48
Alma added Skinny Jeans To Trumpet Flares Tutorial to Trousers to...
02 Jul 10:48
-
 Sarah Snowflake favorited Skinny Jeans To Trumpet Flares Tutorial
30 Nov 01:13
Sarah Snowflake favorited Skinny Jeans To Trumpet Flares Tutorial
30 Nov 01:13
-
 irma o. added Skinny Jeans To Trumpet Flares Tutorial to clothes
16 Aug 00:14
irma o. added Skinny Jeans To Trumpet Flares Tutorial to clothes
16 Aug 00:14
-
 Fidelma B. published her project Skinny Jeans To Trumpet Flares Tutorial
29 Apr 21:49
Fidelma B. published her project Skinny Jeans To Trumpet Flares Tutorial
29 Apr 21:49
-
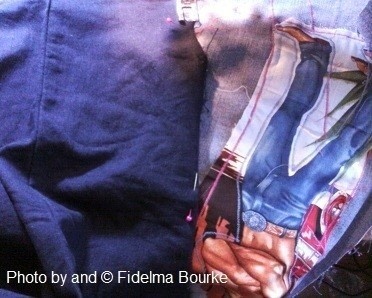
 Step 1
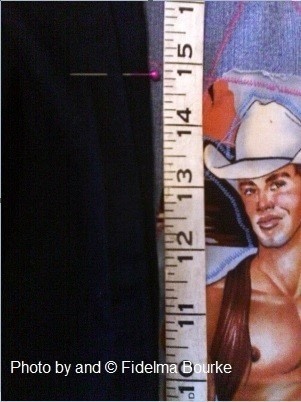
Measure the length of the gap you need to make.
The fabric I used during this tutorial has a pattern 14 or so inches long, so the gap had to be longer than that, so it was neither covered by the triangle at the top, nor dragging along the ground.
Place a pin at the point you’ll be ripping the seam to on the OUTSIDE seam of the trousers (It's easily done, AFTER I made this tutorial I made another pair, happily ripping up the inside leg, even though the pin was on the outside!!).
This is only to make it easier, so you don’t have to keep stopping and measuring, and you won’t undo further up than needed.Using a seam ripper, undo from the ankle up to the pin, and undo some of the stitches along the ankle cuff, 1cm to 1 inch on each end of the cuffs should be enough. Only rip the thread used to sew it together, do not cut off the seams.
Sometimes the outer seam has been sewn with an overlocker, sometimes it hasn’t, which means sometimes it takes a loooooong time to undo! (The pair I used for this tutorial was sewed using an overlocker. It took me 45 minutes to undo the seams!) -
 Step 2
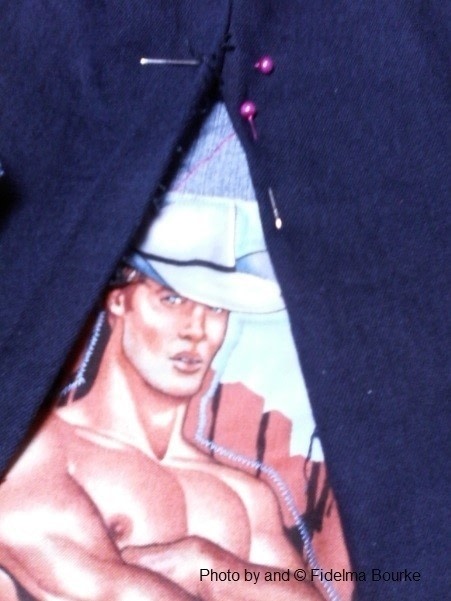
Perfect the hole.
You need to make sure it is long enough to comfortably fit the length or width of your pattern without having to manipulate away from a nice triangular shape. Tuck the fabric in the leg to get an idea of how it looks, where the pattern sits and how the leg fits around the panel, etc., remember to leave room at the bottom for the binding. -
 Step 3
If you have a pattern, like mine, where some is facing to the left and some to the right (it could be animals, cars, buildings, etc.), place the pattern facing frontwards!
It’s one of those artsy things, aesthetically you want the image moving in the same direction as you. The objects facing left should be put in the right leg, the objects facing right should be in the left leg. This should work for almost anything, unless it looks better facing backwards.
Pin them to the trouser leg and hold them up to check , before you begin just to make sure.Fold the bottom under so you can see the bottom of the trouser leg, and keep adjusting it until it sits and looks right in the trouser leg. This is probably the most tedious part, but it’s better to spend a lot of time on this now and have trousers you’ll love to wear, than rush through it and never wear them because you hate how they look.
-
 Step 4
Now that your panel looks right, you need to pin it in place.
Pin one edge only, if you pin both sides you’ll end up in an awkward prickly tube shaped muddle that your machine can’t handle… yet. It’s much easier to sew in 1 side if only to stop getting badly pricked by the pins.
-
 Step 5
Almost everything that is sewn has a seam which is “flat” and a seam which is “folded under”. The flat piece is what I’m calling the “inner” seam. When the item is laid flat the “outer” piece looks higher, or like it is on top of the other piece.
In the photo the “outer” piece is on the left, it will be more obvious when you have your trousers in front of you!
-
 Step 6
Start with pinning the “inner” layer of trouser leg to the panel, from the triangle, down towards the ankle, folding it under as you go, to make a neat hem (the holes left by the ripped out stitches make a good guide where to fold.)
Pin all down the panel leaving at least an inch at the ankle edge. -
 Step 7
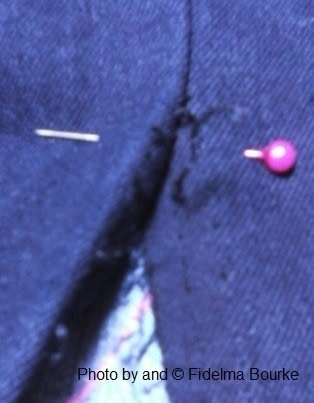
Sew in the panel, from the ankle end, leaving an at least 1 inch gap at the ankle end, smoothing out the parts to be sewn as you go. Getting as close as you can to the top of the triangle, you don’t have to sew all the way in, there’s a lot of extra material at the point end, and it may get sewn in and bulky.
Turn leg inside out and roughly cut off excess on the sewn seam (leave about 1 inch all the way around). Only the sewn seam, don’t cut too near the triangle top, you may cut more than expected.
-
 Step 8
Now pin the other side of the panel in place, and sew into the triangle end from the ankle. again leaving an inch or so unsewn at the ankle edge.
This is the trickiest part.
You will need to scrunch the trouser leg up around the machine, a bit like a cloth bowl!
Make sure you are only sewing together the panel and pinned fabric, it is SO EASY for another piece of the trousers to stray under the needle, and you end up sewing a lump of ankle to the knee or something! (if this does happen, just get after the stitches with the seam ripper). It’s better for you to stop every 2 stitches to pull stray trouser leg out of the way than sew the whole thing in one go only to have to un-pick stitches where a lump of thigh got caught up in it.
Once back out of the machine, roughly cut the excess from that side.
-
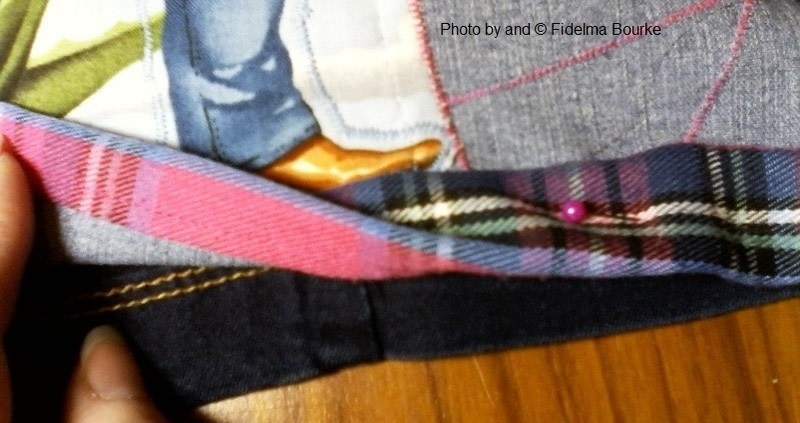
 Step 9
With the panel sewn in, you can now work on the ankle hem.
Tuck under the panel end a little bit higher than the trouser cuff hem (a couple of millimetres is fine. And pin in place the binding fabric.
The binding is there mostly for aesthetic reasons, it may reduce the chances of the panel fraying, I don’t really know. What I do know is my first trousers looked unfinished before I added a bit of ribbon on the bottom! The width, colour, pattern and even the fabric used is really down to you and how you want it to finish the panel, For this tutorial I used an off cut of a sort of woollen tartan skirt, another pair I used shiny ribbon, another I used an strip from a gingham shirt, it all depends how it goes with the panel! You do need enough to be able to sew on, fold down and under around to the back, and to reach side to side and beyond. How wide you want the cuff depends on you (or what you have available!)
-
 Step 10
It feels back to front, but you lay the binding right side on top of the panel (right sides together) with the edges together. Make sure some of the binding is hanging over each of the side edges. Pin in place, and sew about 1 cm or the sewing foot width in, something like that, but really it depends on the width of the binding (if it needs to be sewn further up the panel to best suit the design of the binding, please do that!) remove the pins as you sew, you don’t want them left in the cuff.
-
 Step 11
Now you need to pin the binding the right way out.
Use where it was sewn on to the panel as a handy folding point, fold over the binding and bring under to the back of the panel (you can fold over again at the back, or leave it unfolded, folding again at the back means more fiddling about), when you have a nice crisp fold, pin it in place along the length of the panel, but not the ends yet. (My binding in this tutorial came out about an inch wide) Cut off some of the overhanging binding at the edges, leaving over 1 cm each edge.
You can sew it in now or, if you’re feeling brave, wait until you’ve sorted the cuff hem seams.
-
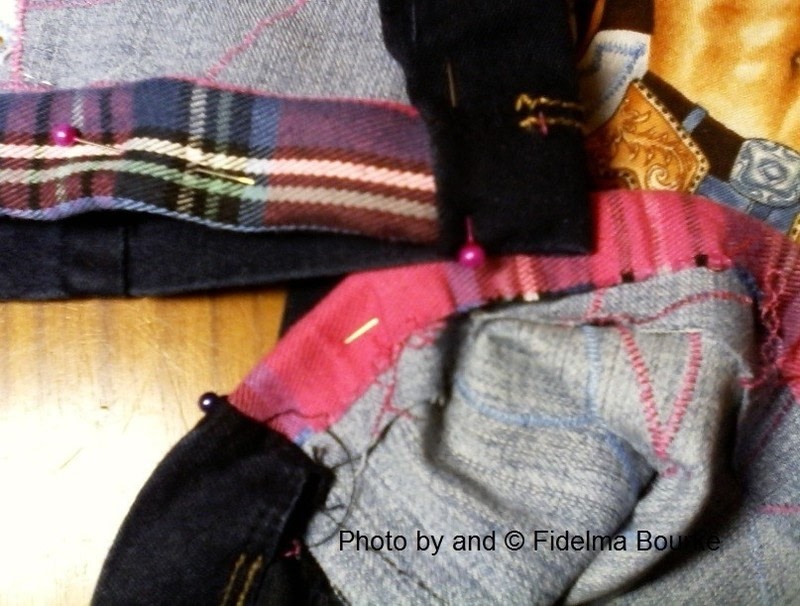
 Step 12
Neaten and sew the binding into the cuffs.
You need to be able to open flat the cuff seams, tuck the binding in it, and fold the cuffs back around the binding. You may need to use the seam ripper some more along the cuff seams, but you shouldn’t get carried away and undo the whole cuff!, undoing the seam by about an inch should give enough to work with.
Make sure the panel is going to get sewn in, too. And make sure it keeps the flow of the rest of the trouser leg.Once you have folded the cuff around the binding, pin it in place.
-
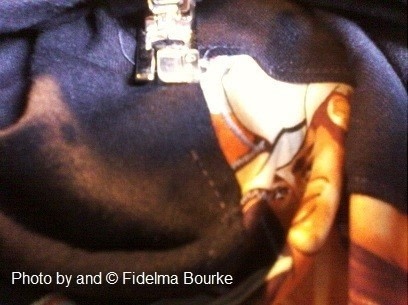
 Step 13
If you haven’t already, set machine to a narrower stitch.
The cuff/binding/ankle edge is sewn in a rectangle pattern in this order:
ALONG the bottom edge of the binding, leaving pins in place. UP the cuff, to the top edge of the binding (remove that pin). ALONG the top edge of binding (removing pins as you go) and DOWN the other cuff hem. It doesn’t matter if you start from the left or the right edge. -
 Step 14
THE FINAL SEAM!!!
From the ankle end, sew UP the OUTER seam, (see part 5) remembering to scrunch the leg up the machine! all the way up to the triangle, and to where the two trouser seams meet again, and DOWN the INNER seam (unscrunching as you go) . This secures any parts which didn’t get sewn already.
Trim any long threads, and Enjoy wearing your new trumpet leg trousers!