

About
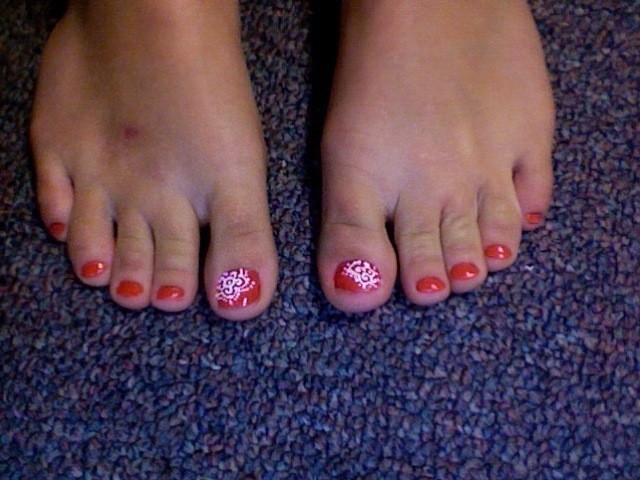
Simple and quick way to jazz up your toes!
I was looking up henna patterns because I love how Henna designs look. I decided to draw up a very simple 'Henna' flower and try it out on my toes!
Tags
Downloads
- Photo_529.jpg 107 KB [ Download ]
-
 Saba S. commented on Simple Henna Flower Toe Design
11 May 06:35
Saba S. commented on Simple Henna Flower Toe Design
11 May 06:35
-
 Step 1
OPTIONAL: You can sketch up this simple flower for practice of drawing it. It doesn't even look all that special when its on paper, but trust me, it looks awesome on your nail. :)
-
 Step 2
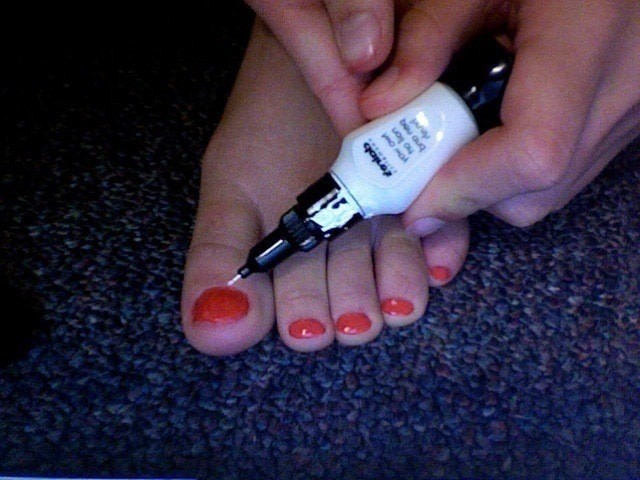
Step 1: Paint your toes with the desired color, and add 2-3 coats. I used a hot pink-ish, orange-ish color.
-
 Step 3
This is to show you the kind of Nail Art Polish Pen thingy that I used. Its from Claire's for a relatively cheap price (don't remember exactly how much though). It was easy with the very skinny squeeze-out nail polish bottle. The amount of nail polish that is squeezed out is the amount of a dot.
-
 Step 4
Step 2: Make a single dot where you desire the center of the flower to be. I made my in the corner, I wanted my flower to be incomplete with only two or three petals showing.
P.S. The other "dot" on top of the nail is the LIGHT REFLECTION, not the polish.
-
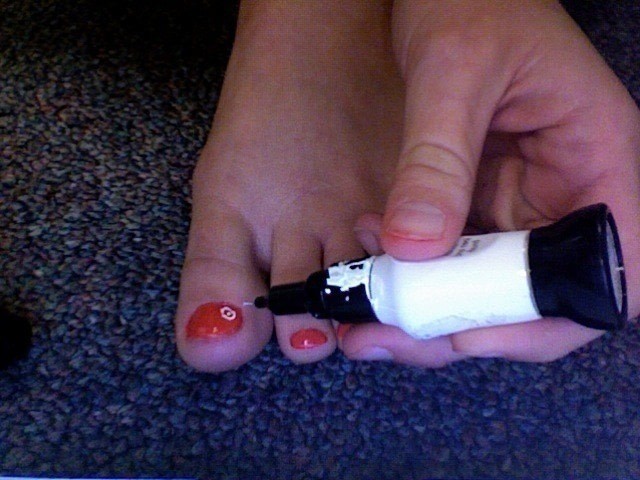
 Step 5
Step 3: Draw a circle around the dot. Obviously, this is difficult. Don't sweat it if your circle isn't perfect - it just adds to the appeal. :)
-
 Step 6
Step 4: Add swirls going out of the circle. Again, don't sweat it if they're not perfect. I personally did 5 swirls, but you can subtract or add as many swirls as you want. (The simpler it is, the easier)
-
 Step 7
Step 5: Draw an arch over a swirl (you decide if you want the arch to be curved or pointed) then connect the end with another arch going over the next swirl.
-
 Step 8
Step 6: Add dots along the lines of the arches. Ta-da! You are done!
Obviously, the henna flower isn't perfect. It was my first time trying to paint it.
-
 Step 9
The other toe ended up looking a lot better than the one I used for this How-To. I wish I took a step-by-step of THAT toe. Oh well! Enjoy painting your pretty Henna Flowers!


Comments


