About
Pouch for school supplies using WATG Etenia Bag Kit
-
 Victorian Dreamer favorited School Supplies Tote
31 Mar 02:07
Victorian Dreamer favorited School Supplies Tote
31 Mar 02:07
-
 noraknickers published their project School Supplies Tote
02 Dec 11:52
noraknickers published their project School Supplies Tote
02 Dec 11:52
-
 Step 1
3 strands held together
-
 Step 2
Cast on and knit 3 rows of basic stockinette, slipping first stitch of each row.
-
 Step 3
Row 4: slip 1, knit 2, *yarn over, knit 2 together (repeat 3x), knit to last 9 stitches *slip slip knit, yo (repeat 3x), knit 3
Row 5: s1, purl
Row 6: s1, k2, *yo, k2t (repeat 2), knit to last 7, *ssk, yo (repeat 2), knit 3
Row 7: s1, purl
Row 8: s1, k2, yo, k2t, knit to last 5, ssk, yo, knit 3 -
 Step 4
Decide how long you want your bag to be once folded over. Then comes a little math. Measure how long this pattern is, then subtract that from 1/2 the length of your bag. Continue in stockinette until it measures that much.
The next row will repeat row 8, and continue backwards so it's the mirror image of the first pattern.Knit next 6 rows in stockinette, then repeat rows 4-8. This will line up the two lace patterns. Then repeat the measuring and mirror image pattern so it lines up on the top of the bag also.
-
 Step 5
Next decide how long you want the closure flap to be. I decreased and repeated the first pattern at the same time. the bottom eyelets will be my buttonholes, too.
So, the last rows are: s1, ssk, *yo, k2t (repeat 3) knit to last 9 stitches, *ssk, yo (repeat 3) k2t, k1
next row: s1, purl
next row: s1, ssk, *yo, k2t (repeat 2), knit to last 7 stitches, *ssk, yo (repeat 2), k2t, k1
next row: s1 purl
next row: s1, ssk, yo, k2t, knit to last 5 stitches, ssk, yo, k2t, k1
last row: s1, purl
Bind off -
Step 6
Next step is to soak and block. This is important so we know how long & wide our fabric is and also to emphasize our lace stitching. Lace never looks quite right until it's blocked.
After it's dry, fold in half, lining up your lace patterns on the top and bottom, then measure. Double this length, plus a bit for seam allowance and maybe a bit extra on top if you want a little foldover on your lining is what we'll want for our lining. Weave in ends.
-
 Step 7
Measure twice, then cut your chosen fabric lining. Pin to your bag, making sure to twist your knit fabric edges out, as we'll use that for stitching up the sides of our bag.
-
 Step 8
Sew! Hand stitch or machine sew, whatever floats your boat, or you have the patience for. I used the color of the yarn so it would be invisible on the outside.
-
Step 9
Using 2 dpns, I did an applied i-cord for stitching up the sides. Whipstich would also work.
-
Step 10
Fold your closure flap over, decide where you want your buttons and sew them on.
-
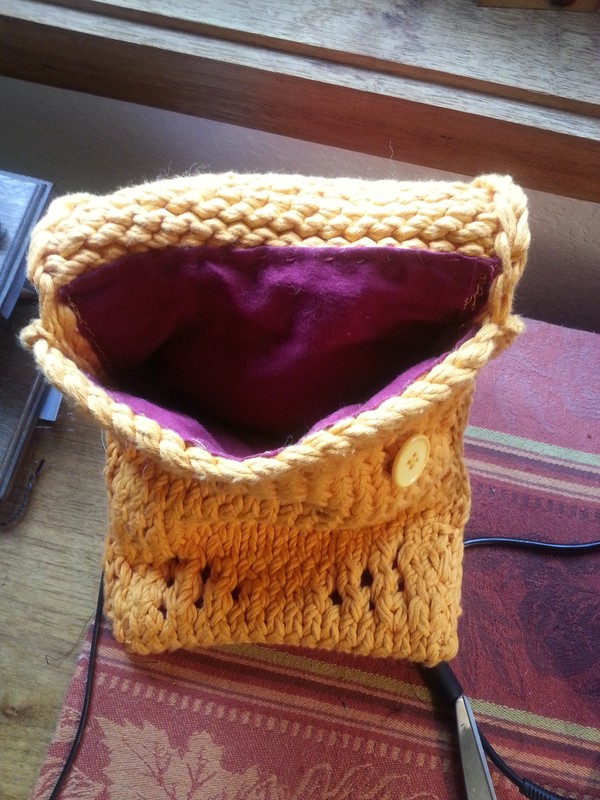
 Step 11
And you're done! Congratulations on your lovely new bag!