


About
Halogen Lamp made of galvanised wires and looking like funny robot
This was a nice project, I did not want to spend that amount of money for such lamp on the market (around 400€) so I tried to make it on my own. I think it costed me something like 70/80euros. I took about 90 pix of the whole projects. I used a third of the pictures in this tutorial. If anything is unclear, please let me know, I could update the steps and even add other pictures if required. Good luck. Enjoy the making.
Tags
-
 Alyssa D. favorited Robolamp
18 Jan 21:03
Alyssa D. favorited Robolamp
18 Jan 21:03
-
Mariah E. favorited Robolamp
14 Nov 22:39
-
Barn favorited Robolamp
06 Nov 21:31
-
Stacie R. added Robolamp to Gifts
07 Sep 07:20
-
 duncan.swart.9 favorited Robolamp
28 Jun 20:16
duncan.swart.9 favorited Robolamp
28 Jun 20:16
-
 harley r. favorited Robolamp
25 May 18:16
harley r. favorited Robolamp
25 May 18:16
-
 Craffy added Robolamp to Para hacer <3
06 Apr 18:09
Craffy added Robolamp to Para hacer <3
06 Apr 18:09
-
Craffy favorited Robolamp
06 Apr 18:09
-
 × Aurélie M. favorited Robolamp
30 Mar 09:48
× Aurélie M. favorited Robolamp
30 Mar 09:48
-
Kristen B. added Robolamp to Room Ideas
22 Mar 20:48
You Will Need
-
 Step 1
You will find bellow all the pieces I purchased from a german online shop meinhausshop.de.
I actually ordered the wires on visual and ended up ordering more pieces as actually strictly required. I did this on purpose in case something would have gone wrong. Let me provide you the full list:Tempergussfitting verzinkt Nr.241 Reduzierstück d = 2''x1/2''
2 8,66 EUR
Tempergussfitting verzinkt Nr.240 Reduziermuffe d = 2''x1/2''
2 11,08 EUR
Rohrdoppelnippel, verzinkt 1/2", 30 mm AG/AG WG801
10 3,59 EUR
Rohrdoppelnippel, verzinkt 1/2", 50 mm AG/AG WG801
4 2,31 EUR
Tempergussfitting verzinkt Nr.90 Winkel I/I 90° d = 1/2''
5 3,28 EUR
Tempergussfitting verzinkt Nr.180 Kreuzstück IG d = 1/2''
2 6,04 EUR
Tempergussfitting verzinkt Nr.120 Winkel I/I 45° d = 1/2''
1 2,10 EUR
Tempergussfitting verzinkt Nr.130 T-Stück d = 1/2''
2 1,70 EUR
Tempergussfitting verzinkt Nr.300 Kappe d = 1/2''
2 1,64 EUR
Tempergussfitting verzinkt Nr.240 Reduziermuffe d = 3/4''x1/2''
1 1,15 EUR
Tempergussfitting verzinkt Nr.90R Winkel red. I/I 90° 1 1/2'' x 3/4''
1 4,34 EUR
Tempergussfitting verzinkt Nr.241 Reduzierstück d = 1 1/2''x1 1/4''
1 1,65 EUR
Rohrdoppelnippel, verzinkt 3/4", 30 mm AG/AG WG801
1 0,47 EUR
Tempergussfitting verzinkt Nr.240 Reduziermuffe d = 1 1/2''x1/2''
1 4,02 EUR
Rohrdoppelnippel, verzinkt 1/2", 40 mm AG/AG WG801
4 2,15 EURIt costed me 60 euros with delivery (with extra pieces)
-
 Step 2
I first mounted all the pieces together to get an idea where I was going.
-
 Step 3
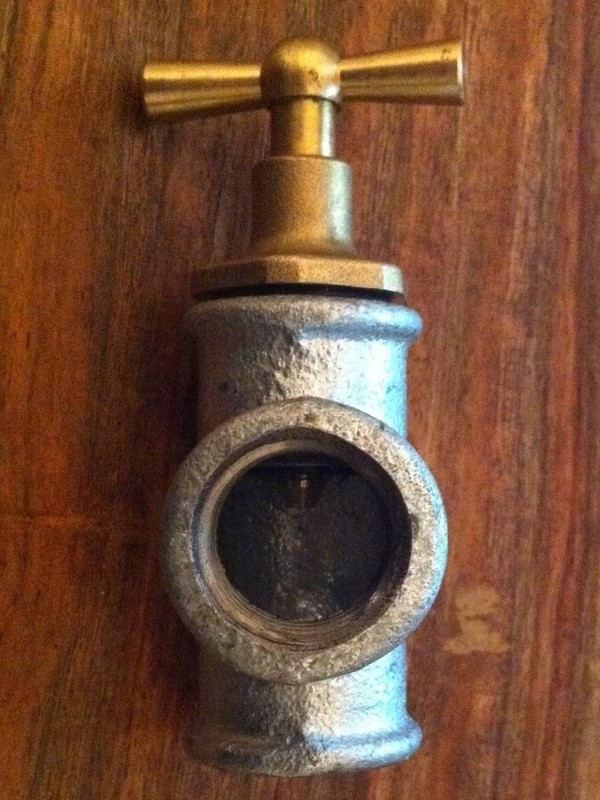
You need a faucet handle too. This the one I got from world-of-heating.de I ordered 4 of them for other projects.
Knebel-Oberteil 1/2" blank-sandgestrahlt (805001726)
Lieferzeit: ca. 3-4 Werktage
4 2,50 EUR 10,00 EUR+ 6 euros delivery.
-
 Step 4
This faucet will be used to turn the light on and off. It is the first tricky part of the project. As we will used 12v halogen light, we will use the robot body as the ground. So one cable goes from the 220v/12v current transformer until one pin of the halogen light through the pipes. One other cable from the current transformer until here on the pix, and will need to make contact with the tip of the faucet, the current will go through the robot's body and finally a little cable from the robot's body to the other pin of the halogen light. Check the photos related to step 6 & 7 to picture this better.
-
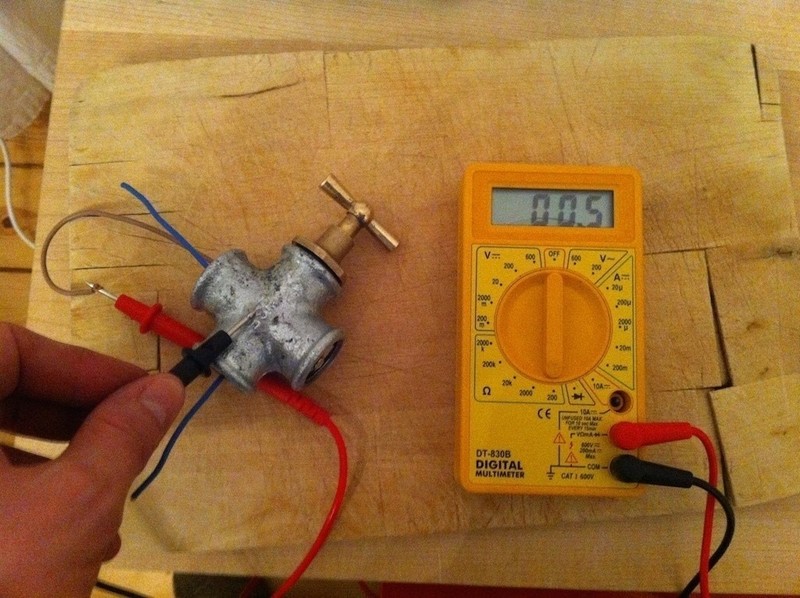
 Step 5
I used a threaded shaft, some bold/nuts and some rings. You probably need a set of them to be able to adapt. As you can see 2 rings are bigger. I choose a diameter big enough so that they make contact with the tip of the faucet at half way through the wire. To keep the threaded shaft in the middle of the pipes I used pieces of plastic cork from a bottle of wine. I cut the cork in 3 equal pieces. You can see the cork on the photo related to step 6.
-
 Step 6
The blue cable goes through whereas the brown cable does not. This is what I meant previously, we will use the robot's body to further conduct the current.
-
 Step 7
bit of testing...
-
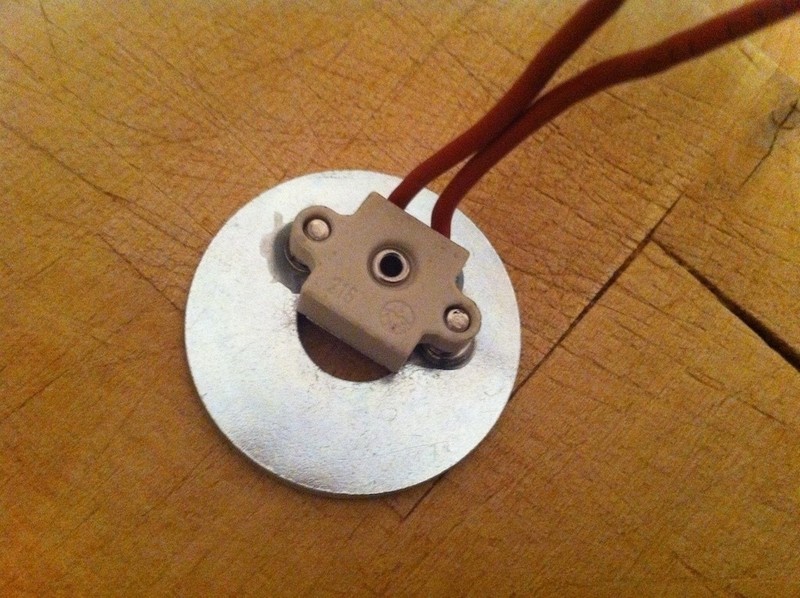
 Step 8
Let's take car of the 2nd tricky part, the head of the robolamp. The ring is 40mm diameter where the hole is something like 8/10mm. The light is a G4 12V halogen light. You need a wire connector socket for G4 too. It costed me 6euros in a local shop.
-
 Step 9
You might need to make the edge of this peace flat(er)...
-
 Step 10
... as we will stick the ring on it.
-
 Step 11
But first we need to fix the wire connector socket. It might not be the best way to do it but at the time I thought it could help to hold it together this way. So I glued 2 little screws to hold the position and in a second time I glued as well the connector...
-
 Step 12
...to end up like this.
-
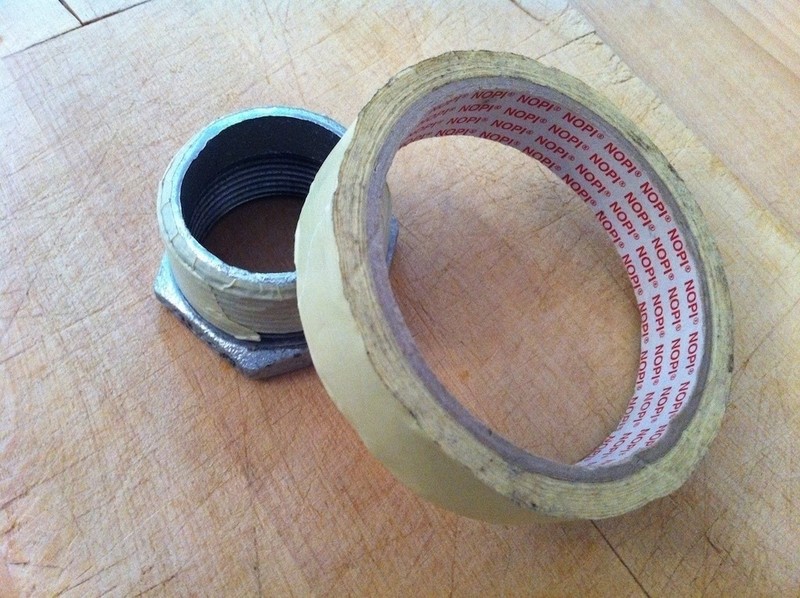
 Step 13
I taped the thread of this piece because I was afraid not being able to screw it if some glue stayed in the thread.
-
 Step 14
Then I glued that together.
-
 Step 15
Screw the whole with the curved galvanised wire end the head of robolamp is ready to welcome the halogen bubble light.
-
 Step 16
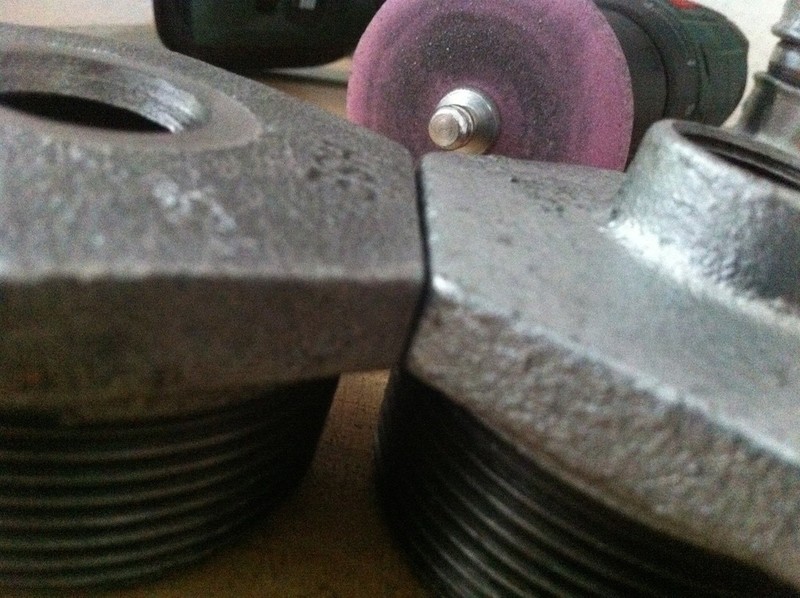
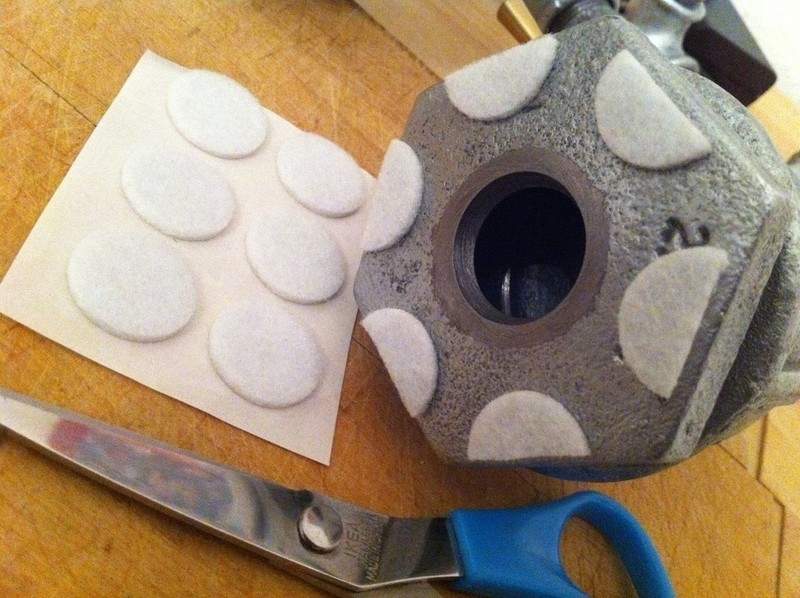
As I ordered the wrong parts for the foot, I had to saw the tits.
-
 Step 17
With the grindstone, I made them as flat as possible.
-
 Step 18
I made a hole in one foot and glued a ring for the electric power cable to go out.
-
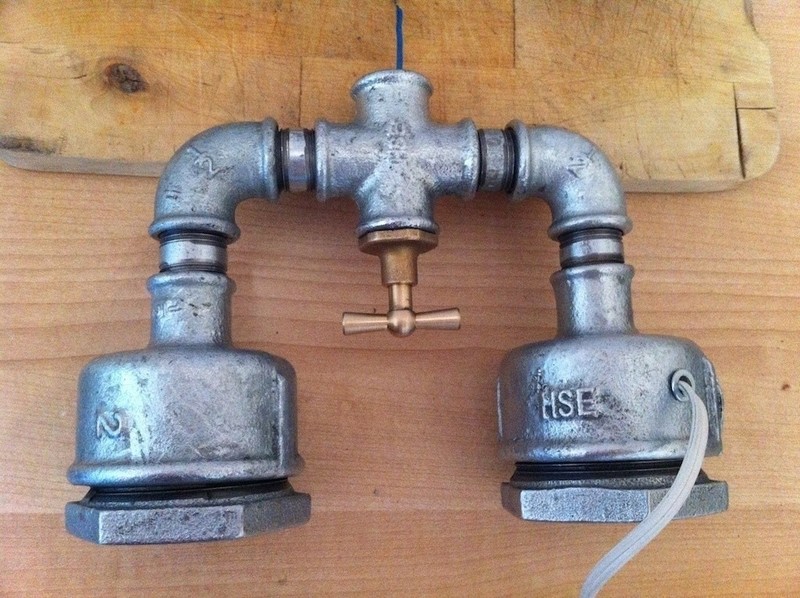
 Step 19
...and these are the foot finished.
-
 Step 20
Let's insert the cable and let's not forget the cable knot trick.
-
 Step 21
I thought first a white cable could be nice but I changed my mind because the current transformer box.
-
 Step 22
It is time to mount the blocks together.
-
 Step 23
Here the bottom part of the robolamp.
-
 Step 24
...and here the toppart of the robolamp. For the arms, I used some stripes of kitchen roll to keep a smooth movement of the arms.
-
 Step 25
I ordered few 20mm x 2mm super magnet. It costs like 1,5 euros per piece.
-
 Step 26
...and glue one magnet on each hands.
-
 Step 27
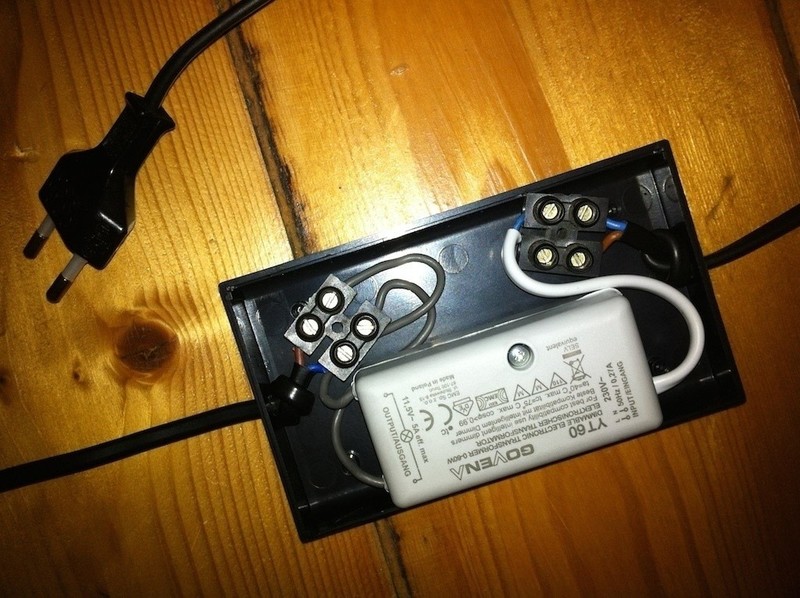
The current transformer I got was not so nice and the black plastic box I found was a bit to big too. But here is how it ends up with finally a black cable.
-
 Step 28
the last weldings...
-
 Step 29
I finalised the foot.
-
 Step 30
and that should be it :-)
-
 Step 31
Now let's clean the mess...


Comments


