


About
This ribbon organizer is made from a recycled tin can
-
 Rattiemama added Ribbon Organizer to Craft Supplies et al.
05 Oct 15:57
Rattiemama added Ribbon Organizer to Craft Supplies et al.
05 Oct 15:57
-
Rattiemama favorited Ribbon Organizer
05 Oct 15:56
-
 Krista E. favorited Ribbon Organizer
23 Feb 07:52
Krista E. favorited Ribbon Organizer
23 Feb 07:52
-
 meanebaby favorited Ribbon Organizer
10 Feb 00:49
meanebaby favorited Ribbon Organizer
10 Feb 00:49
-
 LEENA B. added Ribbon Organizer to organizer
28 Jan 19:48
LEENA B. added Ribbon Organizer to organizer
28 Jan 19:48
-
 Monica D. favorited Ribbon Organizer
14 Dec 03:40
Monica D. favorited Ribbon Organizer
14 Dec 03:40
-
 Jodie P. favorited Ribbon Organizer
21 Oct 19:22
Jodie P. favorited Ribbon Organizer
21 Oct 19:22
-
 arina m. favorited Ribbon Organizer
14 Jul 09:06
arina m. favorited Ribbon Organizer
14 Jul 09:06
-
 sbazany favorited Ribbon Organizer
30 May 19:39
sbazany favorited Ribbon Organizer
30 May 19:39
-
 leahsheila.tremayne favorited Ribbon Organizer
19 Apr 09:20
leahsheila.tremayne favorited Ribbon Organizer
19 Apr 09:20
You Will Need
-
 Step 1
All you need is a tin can with the label removed. Make sure you wash out your can and that there are no sharp edges.
-
 Step 2
I used a line that was already on my can as the mark for placing a straight line of holes using my Crop-A-Dile. If I chose to add more holes I could have used a nail to put another hole below the furthest point that my Crop-A-Dile would go.
-
 Step 3
So that the hole edges weren’t sharp I used my Crop-A-Dile to add eyelets to the holes. This also gives the can a more finished look.
-
 Step 4
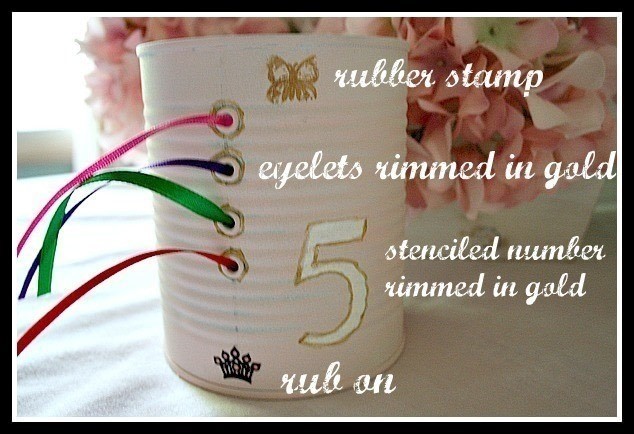
Next, I dry brushed my can with some pink craft paint {use any color you wish!}. I applied 3 coats.
When all was dry I used a rubber stamp and a gold paint pad to stamp on a butterfly. I had a little rub on crown left from the Dollar Store Princess frame I made last year and put that on my can as well as the number 5 {stenciled on in white} and then rimmed in gold paint. I also rimmed the eyelets with the gold craft paint.
-
 Step 5
Add your ribbon spools to the can one at a time feeding the ribbon ends through the eyelet hole.


 1
Watercolor Art »
Watercolor Paints Made From Make Up
1
Watercolor Art »
Watercolor Paints Made From Make Up
