


About
Recycled Denim Corset Tutorial
The methods and materials I have used for this corset are recommended only for costume use with light support on the body. If you want a traditional corset, or anything that is worn regularly or tightly laced then you will need to use much sturdier materials, like tightly woven coutil fabric and spiral or spring steel boning. If you just want to make something for show, read on!
All the quantity’s are approximate, as the exact amount you need will depend on the size and style of your corset pattern.
-
 SurberTatiana favorited Recycled Denim Corset
15 Sep 17:33
SurberTatiana favorited Recycled Denim Corset
15 Sep 17:33
-
 Key West Witch favorited Recycled Denim Corset
12 May 15:32
Key West Witch favorited Recycled Denim Corset
12 May 15:32
-
 joy.mardon.1 added Recycled Denim Corset to Sewing
28 Jan 12:37
joy.mardon.1 added Recycled Denim Corset to Sewing
28 Jan 12:37
-
joy.mardon.1 favorited Recycled Denim Corset
28 Jan 12:37
-
 Misty M. favorited Recycled Denim Corset
13 Sep 21:42
Misty M. favorited Recycled Denim Corset
13 Sep 21:42
-
 Jami M. added Recycled Denim Corset to CORSETS'
07 Jul 03:26
Jami M. added Recycled Denim Corset to CORSETS'
07 Jul 03:26
-
 Mz.Green Eyed Beauty favorited Recycled Denim Corset
13 Apr 10:57
Mz.Green Eyed Beauty favorited Recycled Denim Corset
13 Apr 10:57
-
 Gina g. added Recycled Denim Corset to Accessories- Sewing
29 Jan 09:37
Gina g. added Recycled Denim Corset to Accessories- Sewing
29 Jan 09:37
-
 Lesie W. added Recycled Denim Corset to interest
11 Jul 14:31
Lesie W. added Recycled Denim Corset to interest
11 Jul 14:31
-
Lesie W. favorited Recycled Denim Corset
11 Jul 14:31
You Will Need
-
Step 1
Pattern
Get yourself a good corset pattern. I traced mine off a late Victorian corset pattern when I was studying costume design. Lucky me, I know, but you can try the pattern companies, Simplicity has some historical costume patterns worth looking at, and if you want a serious corset try Laughing Moon or Corset Making Supplies.You can have a go at making one yourself with the old duct tape over a T-shirt method, but I found it time consuming and kind of messy. If you are a pattern maker like me you can also do it the hard way and draft one for yourself - also time consuming, or try How to create a corset pattern or the Custom corset pattern generator. (let me know how it works, I haven’t tried that one yet!)
-
 Step 2
Cutting
If you are using an old pair of jeans, cut them up the inner leg seam right up to the crotch, and lay them flat, right sides out. -
 Step 3
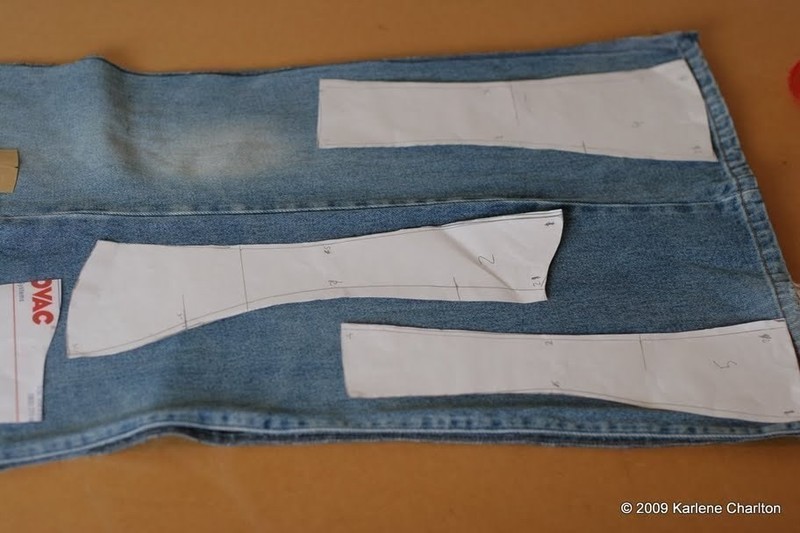
Place the pattern pieces on the jeans with the pieces all going in the same direction (check the grain line), avoiding any worn patches like the knees. It’s best to use jeans that are fairly uniform in colour so your corset doesn’t end up all patchy looking.
-
 Step 4
Make sure there is room for seam allowances if your pattern does not include them. Mine is a “block” pattern so I had to add 1.5cm seams to the side seams.
Cut out pattern, repeat for lining and inner layer. -
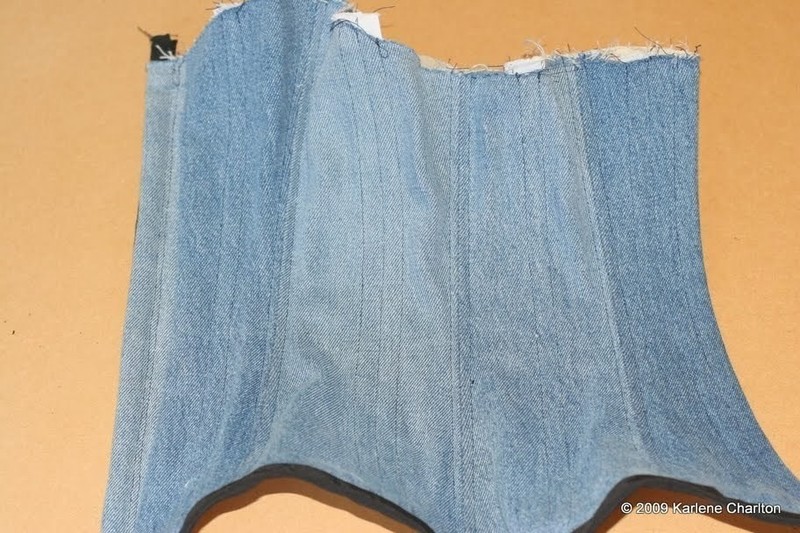
Step 5
Panel seams
Stitch the panels together, matching up the bits that are supposed to match. Use the seam guide on your machine or tape one on if you don’t have one, because the seams need to be all exactly the same width all the way down, top layer and bottom layer.
Stitch the inner layer with the lining as one piece to give the lining more stability. If you were using a lighter weight fabric on the top instead of denim, you could sew it the inner layer with that instead of the lining.
You should end up with a right half and a left half, in the denim and the lining/inner fabrics.
Press all the seams open flat.
My pattern has a rectangular piece at the centre front that gets folded in half, and is used to hold the busk stick. I have left this piece off to show how to put on the eyelet tape in the next step. -
 Step 6
Front closure
Traditionally corsets are fastened at the front with a busk stick closure. This is a pair of metal rods that get sewn into the front seams like boning, one side has loop hooks that stick out through the seam, and the other side has holes to sew buttons through. This holds everything in the right place at the front. They are also expensive and hard to find. I’m a big believer in using what you have on hand rather than spending money for something that is used for a costume, so I used some hook and eye tape I had in my stash with a pair of old knitting needles for stiffness (paint sticks are another idea).
You can buy hook and eye tape for a reasonable price at fabric stores, it looks a bit like the fastenings on a bra, but in a continuous line.
Line up the hook and eye tape with the front edges of the corset. I put the hooks on the left side and the loops or eyes on the right side (left and right of garment as worn on the body!) -
 Step 7
Try to get about a 1cm gap from the edges of corset to the first hooks and eyes for the binding, but no more than this. Leave a little bit at the top and bottom when you cut to allow for error.
There is a tube next to the hooks and eyes that can be used for the needles/sticks, you need to sew the tape on without making the tube too narrow.
There is a flap that comes underneath the hooks and eyes. I left this flat on the eye side, and stitched back the flap on the hook side as part of the tube.
Fold the panel in half and press. Line up the the tape again so the hooks or eyes are just poking out from the fold, then open the panel and pin in place. -
 Step 8
Baste the tape on the panel.
-
 Step 9
Stitch down as close to the hooks and eyes as you can. You may have to stop and start between the hooks and eyes.
Sew down the outer edge of the tape as close to the edge as you can.Make sure the needles\sticks fit inside, and repeat for other side.
-
 Step 10
Attach lining
First attach the rectangular lining panels to front closure. Fold and press as for the outer layer, then pin and stitch near the last seam you did on the top.
This is what it looks like underneath.Stitch the rest of the lining panels together, right sides facing, and stitch to centre front panel.
-
Step 11
Centre panel boning channels
I have used two methods of inserting boning. The first is the one sewn in the centre of each panel.
Cut a piece of cotton tape or binding the same length as the panel. Fold in half and stitch down one side to make a tube, or use a narrower twill tape and stitch two lengths together. The tube needs to be at least 1.5cm wide when finished.
Line up in the centre of panel and pin.
Sew carefully down one edge, just inside the stitching line where you make the tube.
Using the seam guide on your machine, stitch down the other side of tube exactly 1cm from the previous line. You should now have a boning channel 1cm wide. Try inserting some boning in to make sure it fits.
Repeat for other panels, except the back. This panel will have boning on the very edge, a 1cm gap for eyelets/grommets, and then another strip of boning running parallel to the edge.
You need to sew the channel edge closest to the back 3.5cm from the edge of cut fabric (1.5cm seam allowance, 1cm boning strip, 1cm eyelet gap), then sew the other side 1cm wide as the other channels.Whew, you deserve a break now - go have a cuppa!
-
 Step 12
Attach lining
With right sides together, sew up back seams.
Turn right side out, press seam edge flat. -
Step 13
Boning channels over seams
This is the second method for boning channels.
If your seams are all sewn nicely the same width, this part will be easy!
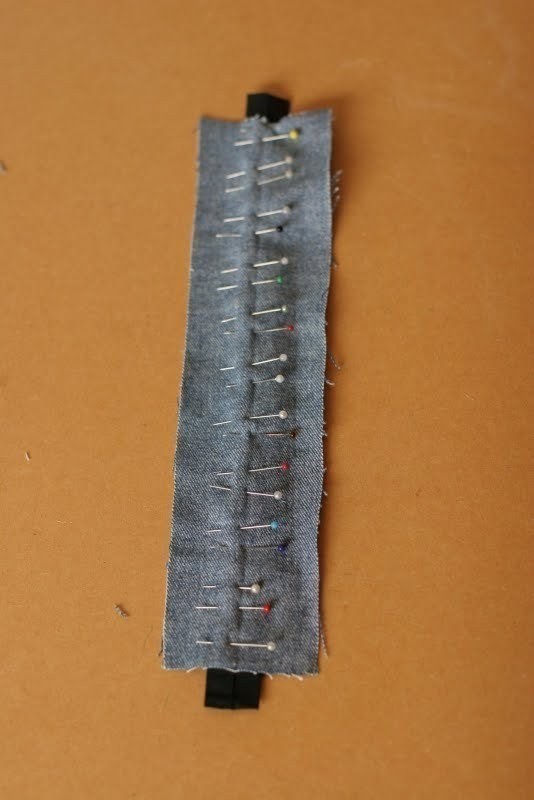
Line up the lining seams over the top layer with seams opened out flat, and pin. I use a pin going along the seam first to get it perfectly matched up, and then pin horizontally across the seam.
You will know if it is lined up correctly when you put the pin in the seam, as there will be less resistance than a pin going through fabric.
Make sure the seam allowances are nice and flat, as these are the bits making the boning channel.
Pin all the way down the seam, then baste.
Sew 5mm down each side of the seam line through all layers of fabric. You should end up with a tunnel 1cm wide between the seam allowances for the boning to go through.
Again, test the width with some boning to make sure it fits, then repeat for the other seams.
Sew a boning channel seam slightly wider than 1cm next to the finished back edge. -
 Step 14
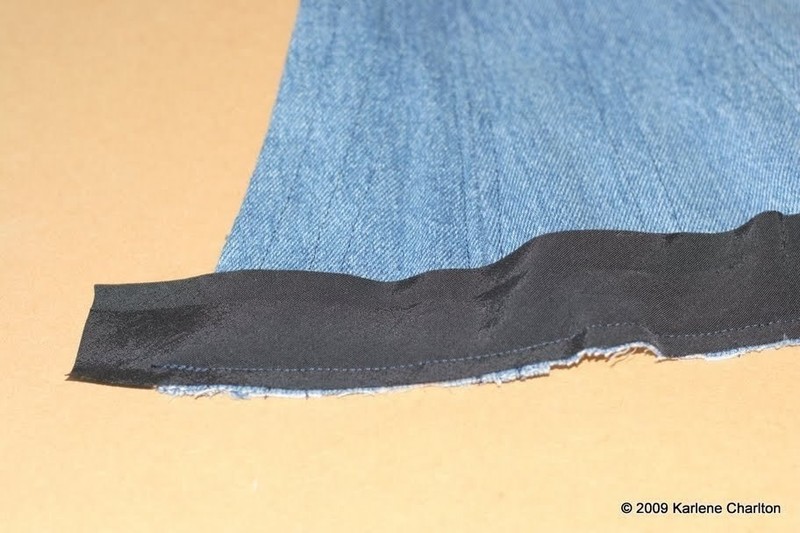
Binding lower edge
Lay the binding on the right side of the corset and pin, leaving 2-3 cm at the edges.
Stitch the binding on with a 7mm seam. -
 Step 15
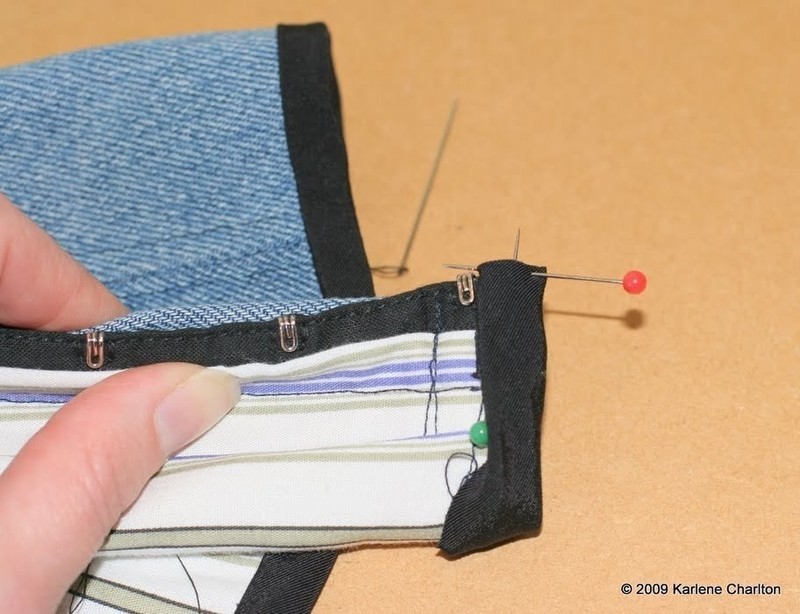
On the wrong side, pull the binding over, fold over the seam allowance (about 7mm) and tuck under, pin down ready for hand stitching.
-
 Step 16
This is how the ends are done,
-
 Step 17
tuck the leftover bit in then fold,
-
 Step 18
pin down and sew.
-
 Step 19
I found this lovely video clip showing how to get the corners neat, from Your Wardrobe Unlocked. This also explains things a little better than I have!
Repeat for other half of corset.
Go and have another cuppa. -
 Step 20
Your corset should now look something like this.
-
 Step 21
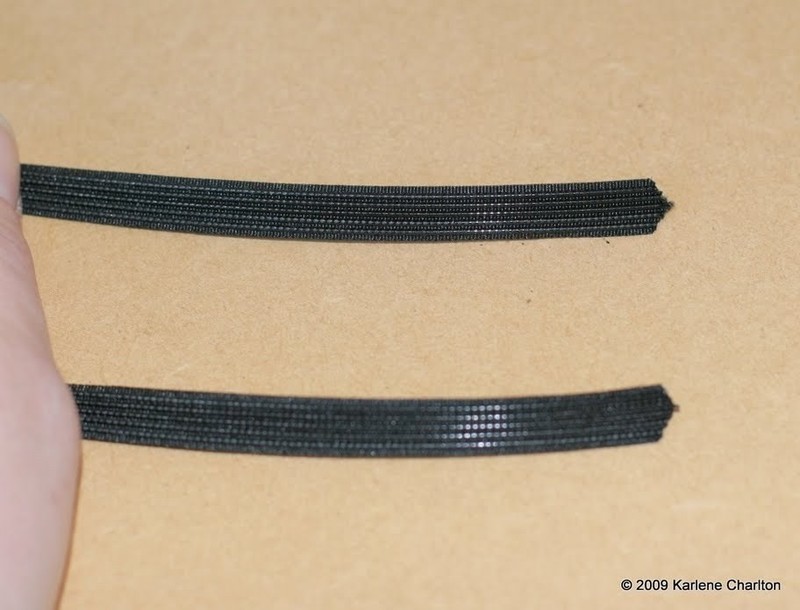
Prepare the boning
Cut your boning pieces 2cm shorter than the seam length.
Round the ends by cutting off the corners so they look like this. -
 Step 22
Now very carefully melt the ends by holding in a flame for a few seconds. I used a lighter for this, but on reflection, a candle would probably be safer.
This makes the rigilene boning less likely to come apart or poke through the fabric.Insert the boning into the channels. Put the knitting needles or paint sticks into the hook and eye tape channel. (Cut off any knobbly bits first and file down any sharp edges!)
-
Step 23
Top binding
Sew binding on the top edge the same way as the bottom. -
 Step 24
Eyelets/grommets
First mark the eyelet positions on one side with a chalk pencil, spaced evenly apart. My corset has 12 eyelets on each side, spaced an inch apart. (It was more convenient to be imperial than metric!)
Now make some holes.
This is not my favorite part. I always had trouble in the past with eyelets falling out and holes fraying. Apparently I was doing it wrong, instead of cutting a hole and breaking fibers, you need to make a hole by spreading the fabric apart.
Also I read that you need to use 2 piece grommets not eyelets. Can anyone please tell me what the difference is between a 2 piece eyelet (comes with a washer to put on the back) and a 2 piece grommet? They look just the same in the shop to me, but the ones labeled grommets were much bigger.
Back to business.
First you make a hole with an awl (separating those fibers not piercing them!) and then gradually make it big enough for the eyelet by working a pencil or paint stick through it.
I don’t have an awl so I used a fine knitting needle to make a hole followed by a fine tipped nail punch, and then a wide nail punch. I found the nail punch easier to get through than a pencil. -
 Step 25
Once your hole is big enough, quickly push in the eyelet before it closes again, and push down any bits caught on the back with the knitting needle before putting the washer on the back.
-
 Step 26
Then use the eyelet setting tool to hammer the back down. Lots of gentle tapping is better than a few big whacks.
-
 Step 27
Repeat for other holes.
-
 Step 28
To mark the holes on the other side of corset so they match up correctly, place the first half (that you just put eyelets in) on top of the second half, and put the chalk pencil through the eyelet holes.
-
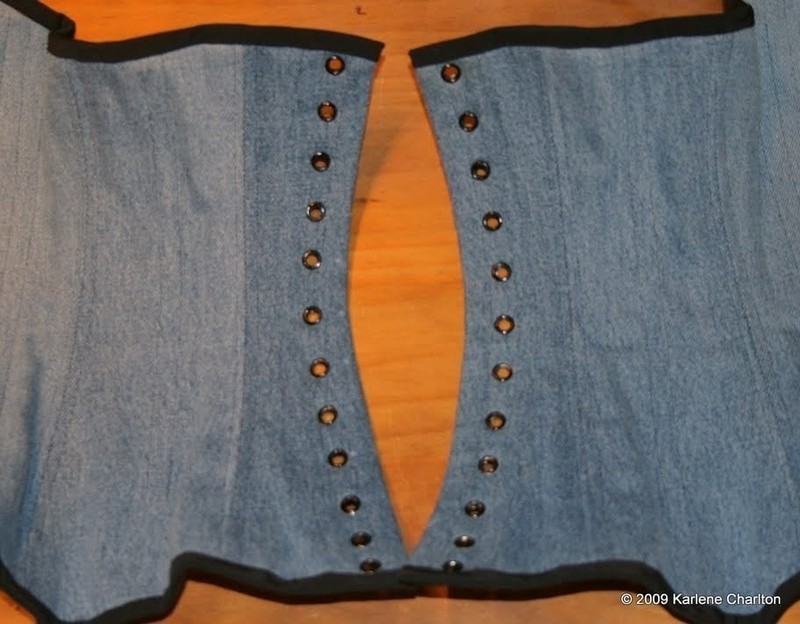
 Step 29
Make some more holes, put in some more eyelets.
Nearly done! -
 Step 30
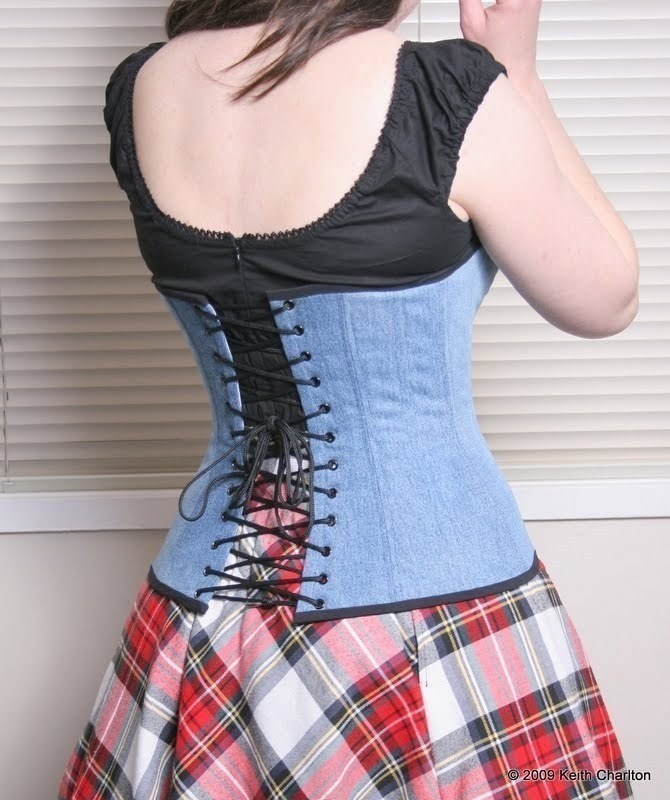
Lacing
Insert the lacing cord into the eyelets.
I have left a loop on each side at the waist, these are called bunny ears. These are the bits you pull to tighten the corset. -
 Step 31
Loosen the laces fully so the two halves of the corset are as far apart as they can go. This will help when doing up the front.
Put the corset on. -
 Step 32
Do up the front hooks. Pull out the bunny ears and hold them firmly.
Tighten up the laces starting at the top and then bottom, working to the waist - you might need an extra pair of hands for this. Not too tight though if you want this type of corset to last. And it’s important to be able to breathe!
Tie in a bow at the waist.


XXX♥XXX
Fléance