About
An easy & artistic way to express your love of Star Wars with string!
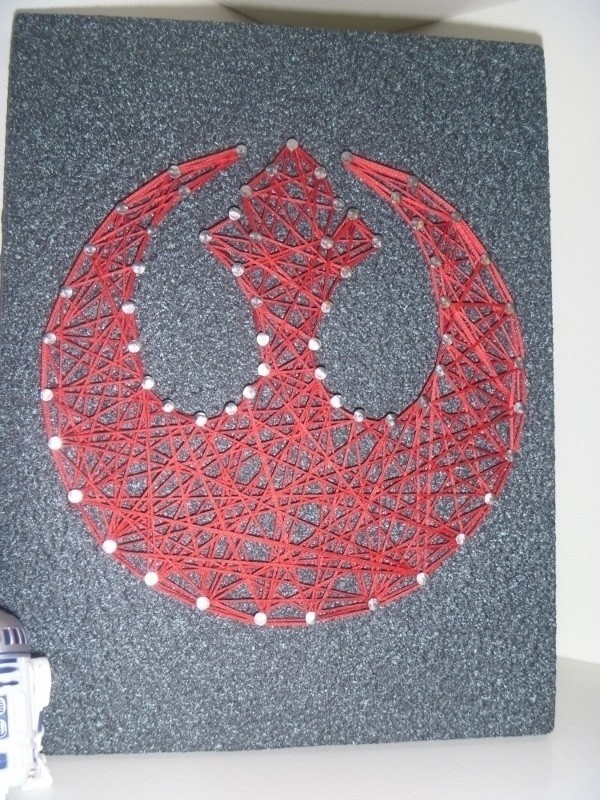
I am a huge Star Wars fan & I love the look of string art. I used a tutorial for typographic string art on ManMade.com for inspiration for this project. I used the author's process to create some string art of my own with the Star Wars Rebel Alliance symbol.
Tags
-
 Conner W. added Rebel Alliance String Art to wall ideas
11 Feb 23:23
Conner W. added Rebel Alliance String Art to wall ideas
11 Feb 23:23
-
 Chey s. favorited Rebel Alliance String Art
13 Jan 19:18
Chey s. favorited Rebel Alliance String Art
13 Jan 19:18
-
 Kit W. favorited Rebel Alliance String Art
29 Sep 05:00
Kit W. favorited Rebel Alliance String Art
29 Sep 05:00
-
 Michelle S. favorited Rebel Alliance String Art
14 Sep 14:24
Michelle S. favorited Rebel Alliance String Art
14 Sep 14:24
-
 Chudames favorited Rebel Alliance String Art
27 Jul 08:32
Chudames favorited Rebel Alliance String Art
27 Jul 08:32
-
 Allison B. added Rebel Alliance String Art to to make
06 Mar 18:07
Allison B. added Rebel Alliance String Art to to make
06 Mar 18:07
-
Allison B. favorited Rebel Alliance String Art
06 Mar 18:06
-
 Trixzie favorited Rebel Alliance String Art
25 Nov 03:22
Trixzie favorited Rebel Alliance String Art
25 Nov 03:22
-
Conner W. added Rebel Alliance String Art to craft ideas
09 Jul 01:31
-
Conner W. favorited Rebel Alliance String Art
09 Jul 01:30
-
 Step 1
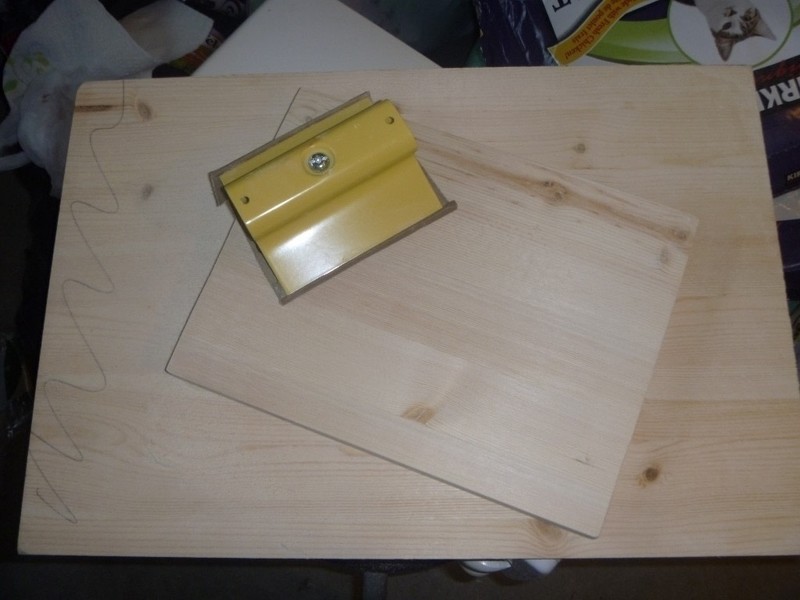
Cut your wood to size and sand it with fine sandpaper. You don't need to worry about the wood being perfectly smooth if you are using textured spray paint or textured paint.
-
 Step 2
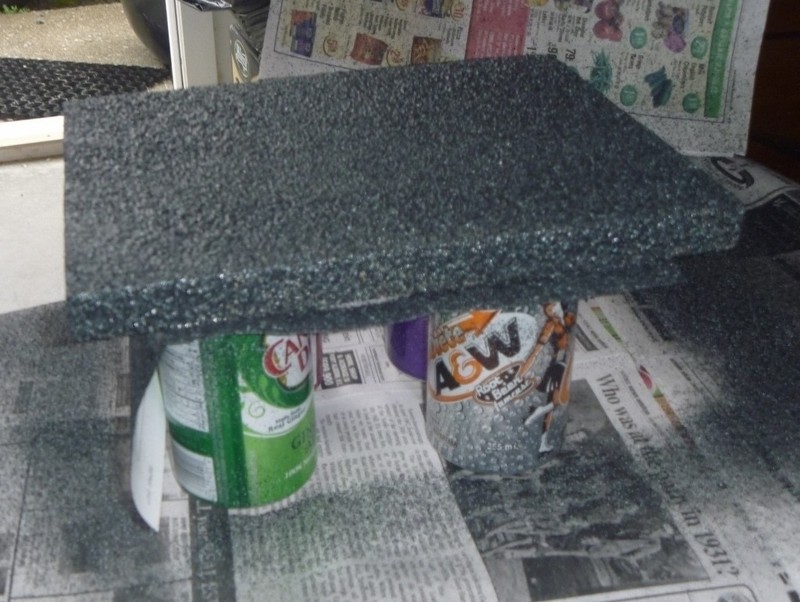
Put down some newspaper and begin spray painting your wood. I wanted to spray paint both sides of the wood, so I placed the wood on four old pop cans - that way I could get the sides too. Textured spray paint goes on best in several light coats - waiting for it to dry between coats is the hardest part of this project :P Once your first side is dry, flip it over and paint the other side.
-
 Step 3
Your wood will probably look something like this once dry.
Choose the side that looks the most even to work your design.
-
 Step 4
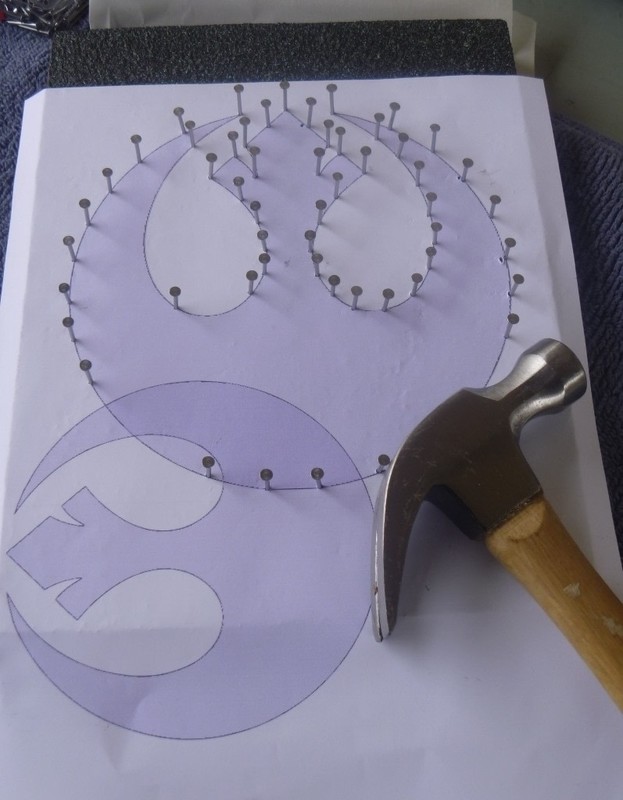
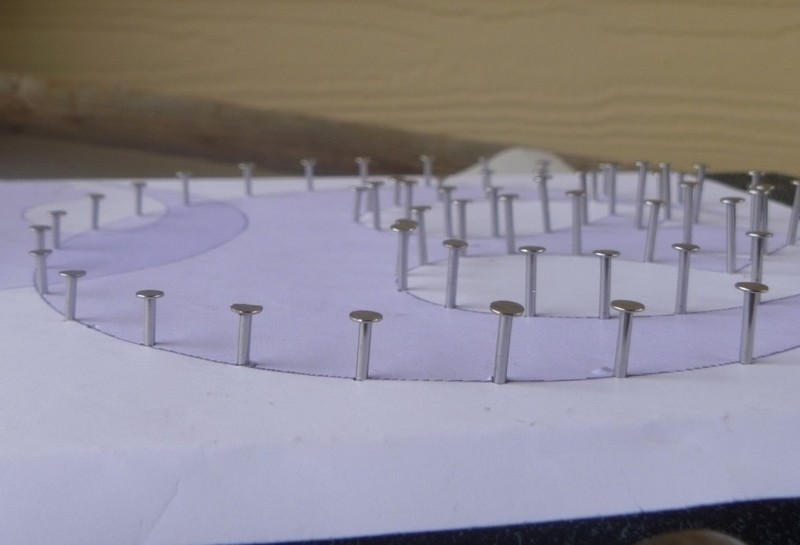
Print out or draw your pattern. I used the Star Wars Rebel Alliance symbol, but you could choose any simple shape - a heart, a circle, a triangle, or even a letter or word.
Center your pattern on the wood and begin placing your nails. You'll want to place the nails a somewhat equal distance apart - I just eyeballed it and didn't worry about measuring.
You'll want to hammer the nails in approximately half-way in, leaving enough room for the string, but not so far in that they pierce the back of your wood.
-
 Step 5
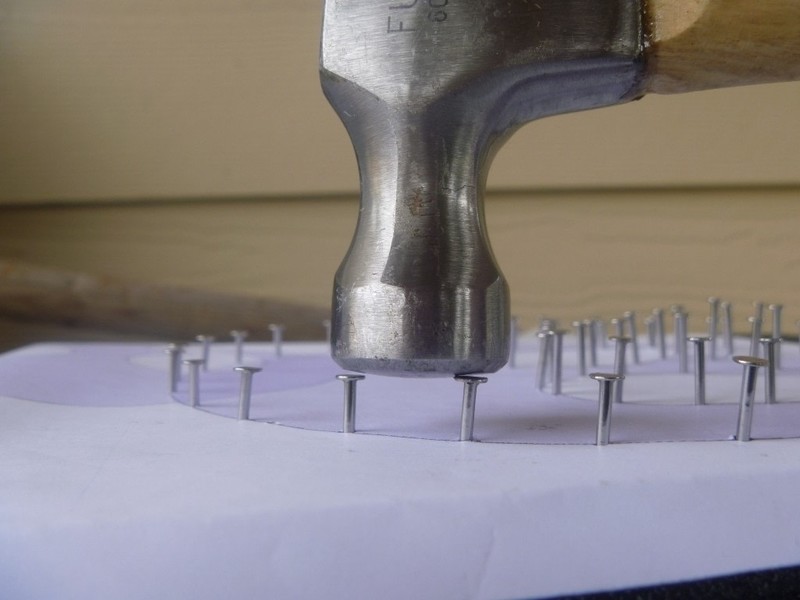
Once you are satisfied with the placement of your nails, you'll need to make sure they are mostly level. I used the head of the hammer to make sure one nail was the same level as the next (see photo) and repeated this all the way around the pattern. This is where the pliers come in handy - you can pull on nails that have gone in too far.
-
 Step 6
Use the pliers to make sure all the nails are *mostly* straight. Unless you're a pro with a hammer and nails, it won't look perfect. Try to make them look as straight as possible.
-
 Step 7
Rip the paper! You need to remove the pattern from around the nails. The main thing here is to rip around the nails and not rip the paper up or over the head of the nails, because you don't want the nails to move.
-
 Step 8
Continue to rip the paper
-
 Step 9
Admire your work so far :)
Use the pliers to make any straightening adjustments to the nails.
-
 Step 10
Tie your embroidery floss to a random nail. It is best to use a butcher's knot, however, if you are as useless with knots as I am, you can tie your best double knot and use the Q-Tip to dot some fabric glue on the knot to secure it.
Then go to town and string that baby up! I did the outline of the rebel alliance symbol first, then crisscrossed the floss from nail to nail.
Once satisfied with the stringing, I did the outline once more with a second skein of the floss in the same colour. When starting a new skein, I tied the new one to the tail of the previous one, making sure to dot my crummy knots with glue :P
-
 Step 11
Variations on this could be with multi-coloured string and completely different shapes. I can't wait to see your variations! Please post your pics!