About
Quilted Ball Ornament
It looks quilted, but this no-sew quilted ball ornament is great for the holidays or for a gift any time of year.
-
 Rae G. favorited Quilted Ball Ornament
25 Jan 13:58
Rae G. favorited Quilted Ball Ornament
25 Jan 13:58
-
 Delicate Stitches favorited Quilted Ball Ornament
19 Jan 10:57
Delicate Stitches favorited Quilted Ball Ornament
19 Jan 10:57
-
 Liz S. favorited Quilted Ball Ornament
16 Jan 15:27
Liz S. favorited Quilted Ball Ornament
16 Jan 15:27
-
 Crafterella featured Quilted Ball Ornament
15 Jan 23:00
Crafterella featured Quilted Ball Ornament
15 Jan 23:00
-
 Mister Domestic published their project Quilted Ball Ornament
11 Jan 09:00
Mister Domestic published their project Quilted Ball Ornament
11 Jan 09:00
-
 Step 1
For this design in the ornament, I used three different fabrics from Pat Bravo‘s Indie Folk Fabrics. If you are following this design, you’ll need two 2″ width of fabric strips for the fabric in the center & outside and one 2″ WOF strip for the other two. Press these strips in half with an iron and then slice those folded strips into 2″ sections. Save 10″ of the outside fabric without slicing it and put aside.
-
 Step 2
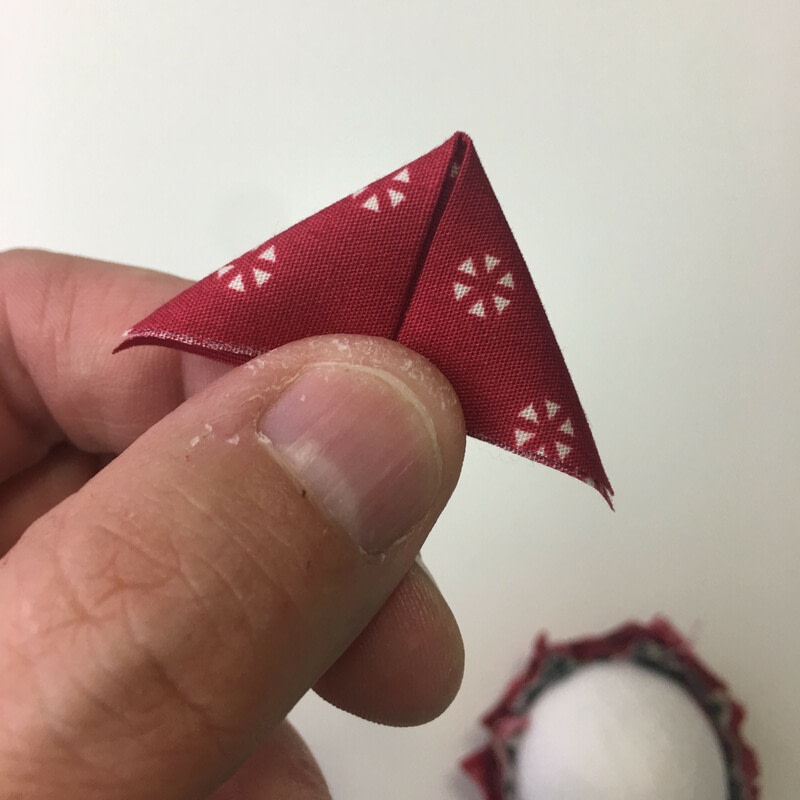
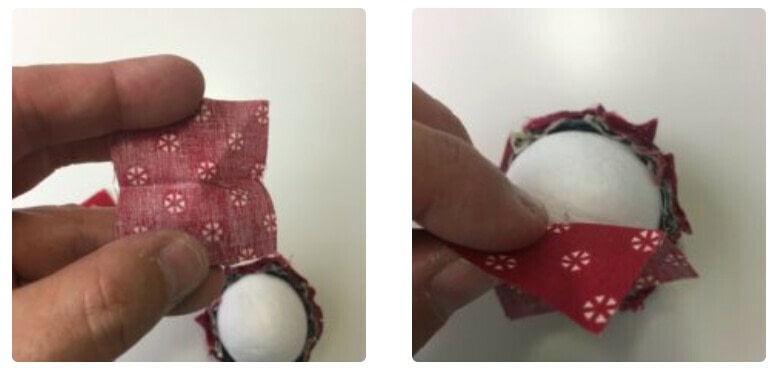
Each triangle will take three appliqué pins. The first goes into the center of the square with the point sticking out of the right side of the fabric. Stick that pin into the center of the ball. Next, fold the fabric over the pin and take one corner of the fold and bring it down to the center. Pin that in place. Do the same thing to the other corner to create a triangle.
-
 Step 3
Starting with the next triangle on the opposite side of the first, pin the next strip into the center and follow the same steps. Do this for the other two inside strips, making sure that the styrofoam isn’t exposed.
-
 Step 4
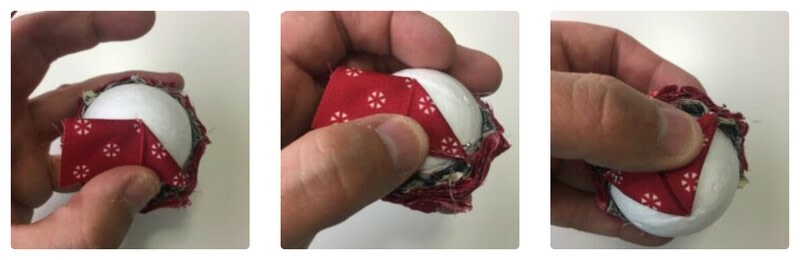
You’re basically going to follow the same steps for this ornament, working your way toward the midline of the sphere. For the second layer, you’ll first pin the new triangles onto the ornament in the space between the inner triangles.
Next, you’ll pin the triangles on the four remaining seams from the first layer.
With each set of four that you pin as you move down the ornament, they will all need to be pinned at about the same spot to create symmetry. Beyond that, where you pin it is totally in your hands and can create a lot of variety if you’re making a set of ornaments.
-
 Step 5
These next layers are exactly the same as the prior layer, where you’ll pin on the seam of the inner triangles first of the previous layer and then the outer ones. So instead of typing a bunch of words, I’ll share pictures for you to see.
-
 Step 6
Using scissors, trim off any excess fabric that extends beyond the midline.
With the 10″ strip of the outside fabric that you put aside, press it in half lengthwise one more time to create a double fold. Determine the top of the ornament and double pin one side of the double-folded strip to that spot. Use fabric glue along the center line and wrap the strip around the middle of the ornament. Once you get to the first double set of pins, mark the end, trim it and then double pin the end.
Let the glue dry and then use the long pin to secure the ribbon onto the top of the ornament. Creating a voluminous bow or adding some garnish will hide the pins on top. And ooh la la, you’ve got yourself a Quilted Ball Ornament that will leave all your friends gobsmacked.