About
Sew your own pleated tote bag
-
 RareJewel favorited Pleated Tote
02 Jun 08:30
RareJewel favorited Pleated Tote
02 Jun 08:30
-
 joan w. favorited Pleated Tote
02 Apr 08:05
joan w. favorited Pleated Tote
02 Apr 08:05
-
 lleeahs favorited Pleated Tote
21 Mar 00:49
lleeahs favorited Pleated Tote
21 Mar 00:49
-
 NoraBelle favorited Pleated Tote
20 Mar 20:28
NoraBelle favorited Pleated Tote
20 Mar 20:28
-
Liesl M. published her project Pleated Tote
17 Mar 09:00
You Will Need
-
 Step 1
Start by making the pattern pieces. Take your 14” x 18” piece of paper and fold in half. (It should be 14” x 9” when folded in half.)
-
 Step 2
Now we will make the dart markings and the curve of the bottom corners of the bag. Mark a 2 ½” square in the bottom right hand corner. Then along edge, mark 1” from corner point as seen.
-
 Step 3
From the top left corner of the square you drew, draw two lines down to where you marked those lines along the edge.
-
 Step 4
Now with your compass point in the upper left corner of the square, draw a quarter circle.
-
 Step 5
Now trim that curve. Then (this bit is optional but I like to do it so I can use the the pattern piece like a stencil at the dart) trim the triangular-ish shape of the dart.
-
 Step 6
Next up is the pleat/fold markings. You will have to mark all of these lines on the fabric in the next step, but it’s smart to mark them on the paper for when you make the bag again. *wink* With the pattern piece still folded, mark a line ½” from folded edge. Then mark three more lines at the top, all 1” apart. On the bottom, mark one line 1”. I also draw little arrows to remember which lines I am butting up against each other in the future.
-
 Step 7
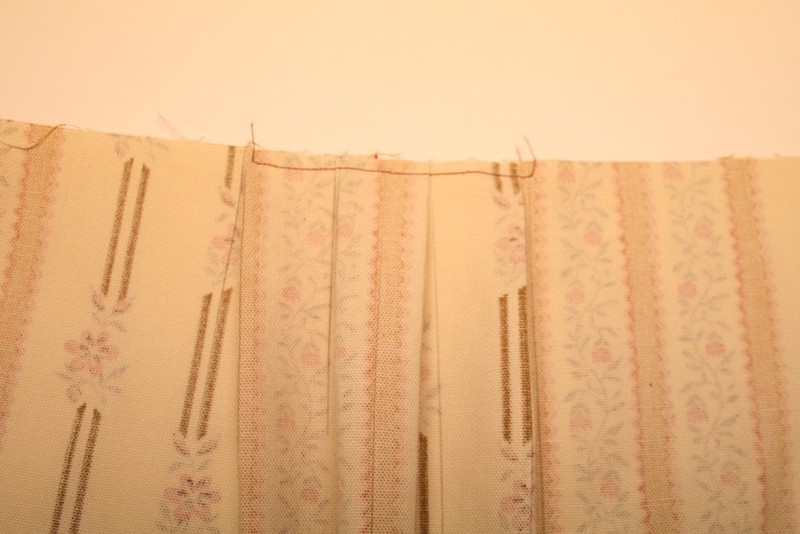
Now you have your bag pattern piece. (We’ll do the lining pattern later.) Cut two out from your fabric (and optional interfacing.) Do NOT cut out the darts from your fabric like you did with the paper. Simply use the paper as a stencil and draw the lines on the back of your fabric. Sorry the lines are so faint in the photo above.
-
 Step 8
Fold your dart so the lines match up and sew. Be sure to back stitch at the point to reinforce it.
-
 Step 9
Repeat for the other dart.
-
 Step 10
Now you want to pinch the first line you made ½” from the center.
-
 Step 11
Now pull that to the second line you made, which was 1” away and pin.
-
 Step 12
Here is an aerial view of sorts.
-
 Step 13
Repeat for the third line, pulling it over the fourth line. Repeat for the other side. You should have four folds/pleats like seen.
-
 Step 14
Here is a front view.
-
 Step 15
Baste the pleats in place about ⅛” from edge.
-
 Step 16
Do the same for the bottom folds. Baste. Repeat all these steps for the other side of the bag.
-
 Step 17
With right sides together, sew ¼” around the sides and bottom.
-
 Step 18
Turn right side out. Now you have the outer body of the bag done!
-
 Step 19
Now we can make the pattern piece for the lining. Take your 14” x 15 ¼” piece of paper and fold in half. (The 14” should be the height.) Repeat the steps you did for the darts earlier.
Up in the upper right hand corner of the paper, mark ¾” from the edge.
-
 Step 20
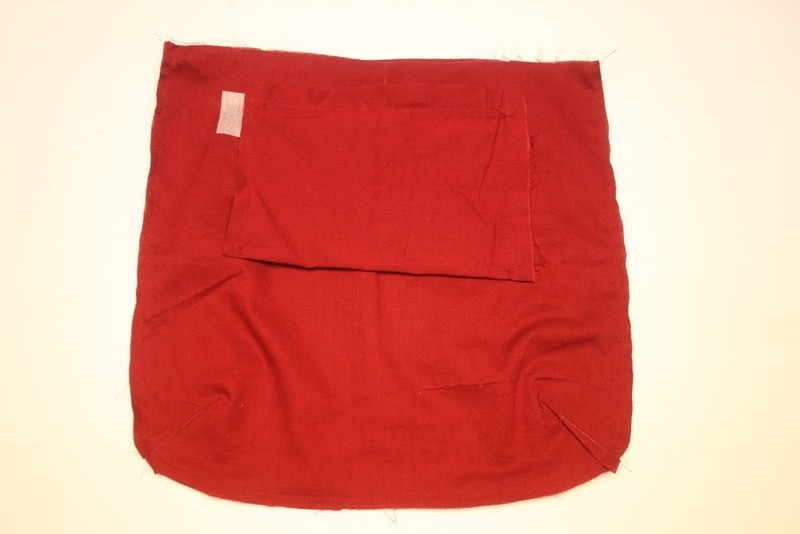
Using your ruler, line it up from the mark you just made to the top right corner of the square you drew to mark the dart earlier.
Trim the excess off. Now you have the lining pattern piece. Use it to cut out two lining pieces.
At this point you can add an optional zipper/other pocket. Make the darts like you did for the outer bag. There is no pleating in the lining. -
 Step 21
With right sides of lining pieces together, sew around sides and bottom. Unlike many other bags instructions, you do not need to leave a hole for turning.
-
 Step 22
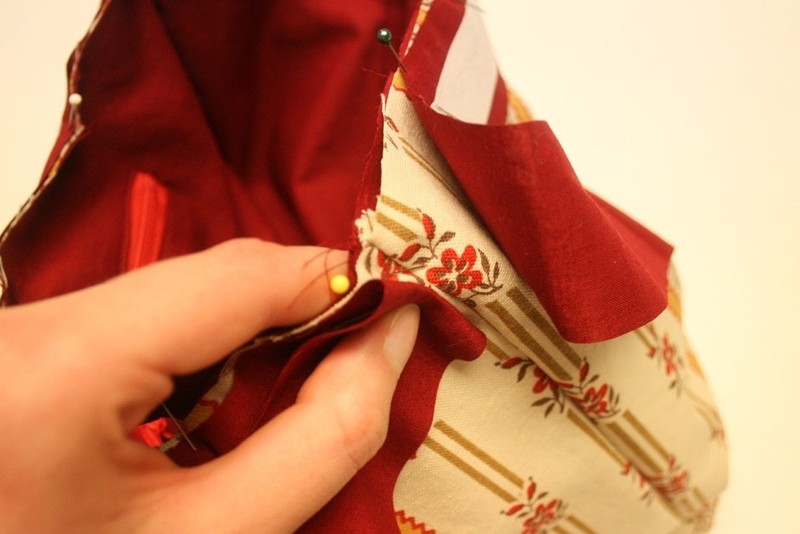
With wrong sides together, pin lining bag inside outer bag piece. Set that aside.
-
 Step 23
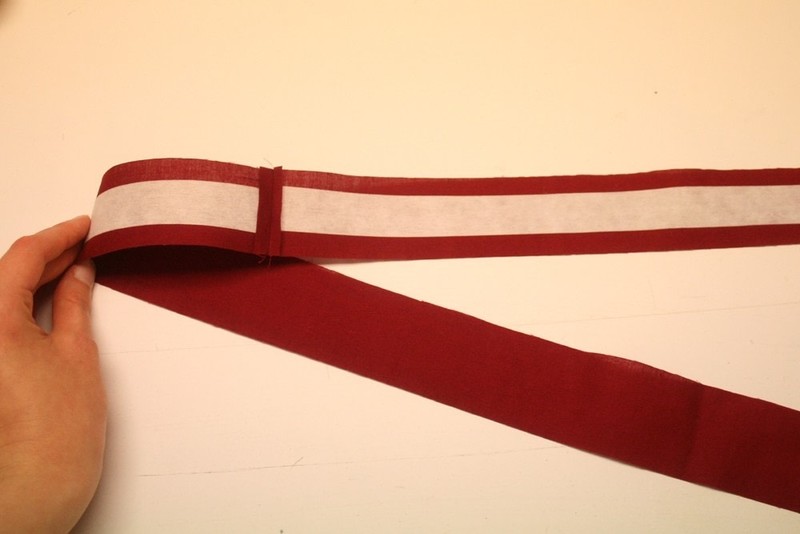
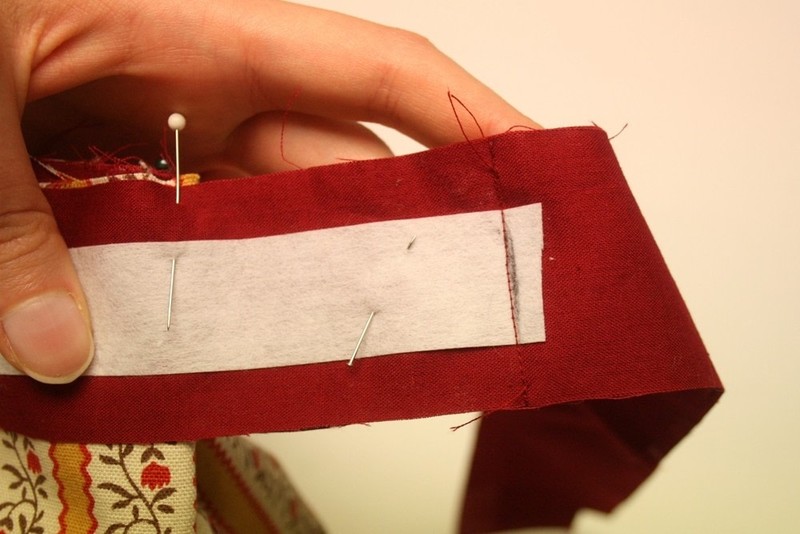
Iron your 1” wide iron-on interfacing to the back of the 2” wide fabric strips (the top contrast fabric), centering it ½” from top and ½” from bottom. As you can see in the photo, I used two 14 ½” pieces sewn together, but you can use a 29” piece if you’ve got it.
-
 Step 24
Either find the center of your 29” piece or line the center seam up with the seam of the outer bag and start pinning all around edge.
-
 Step 25
When you get to the other seam, stop pinning a couple inches from seam.
-
 Step 26
Fold the strip back, lined up with the bag's side seam.
-
 Step 27
Now I used a pen to mark on the inside (on the interfacing) where I folded. This is where you will stitch, so the strip fits nicely on the bag.
-
 Step 28
Repeat for the other side, then with the fabric right sides together, match those lines up. Pin pieces in place.
Sew along that line. Be sure to sew the whole width of the fabric strip, not just the interfacing.
-
 Step 29
Trim the seam allowance down. And then you can line the edges of the strip the bag/lining and pin in place. It should fit very nicely.
-
 Step 30
Sew ½” from edge, through the lining, bag outer and top contrast strip, all along the width of the bag.
-
 Step 31
Fold the strip up. The seam allowance should be pointing.
-
 Step 32
Next up is to measure 2 ½” from side seam and pin your handle/strap there. (Pardon my reflection.) Repeat for the other side.
-
 Step 33
You can baste/stitch (no more than a ¼” from edge) your handles in place, but I just leave the pins.
-
 Step 34
Iron the interfacing to the back of the other strip, just like you did the first one. And like you did before, start with lining the center or center seam up again the side seam of the bag and begin pinning in place.
-
 Step 35
You want to make sure that when you sew the handles are straight. I place two pins as seen to keep them perpendicular to the edge.
-
 Step 36
Continue pinning around bag and repeat the finishing steps you did for the other strip. Then sew ½” from edges. It’s smart to back stitch over the handles, to reinforce a stress area.
-
 Step 37
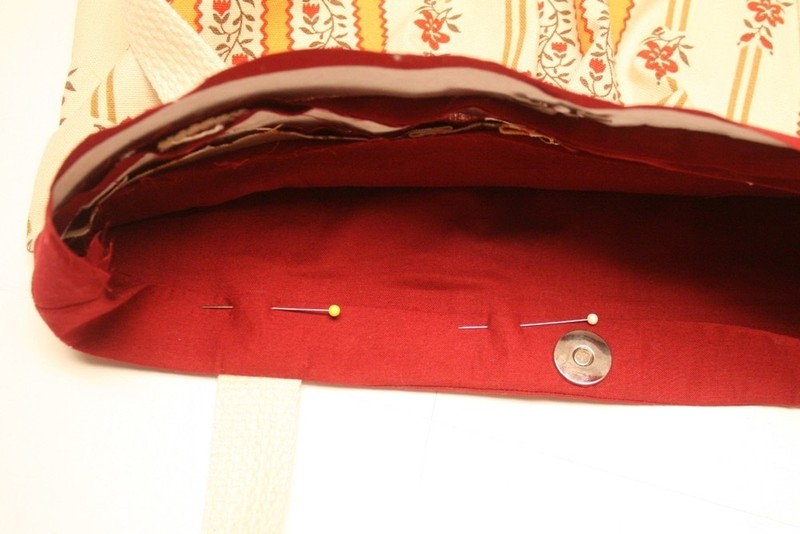
Fold second strip up. Now you can add optional magnetic snaps in the center, if you wish.
-
 Step 38
On the inside, fold the top edge back along the edge of the interfacing.
-
 Step 39
Then fold the whole top strip back and pin. All the seam allowances should be neatly hidden inside.
Now I hidden stitch the seam. However, you can top stitch if you’re in a hurry.